___________________________________________________________________________________________________
NEXO NX242 DIGITAL TDcontroller Service manual rev100606
P.
Mechanical issues
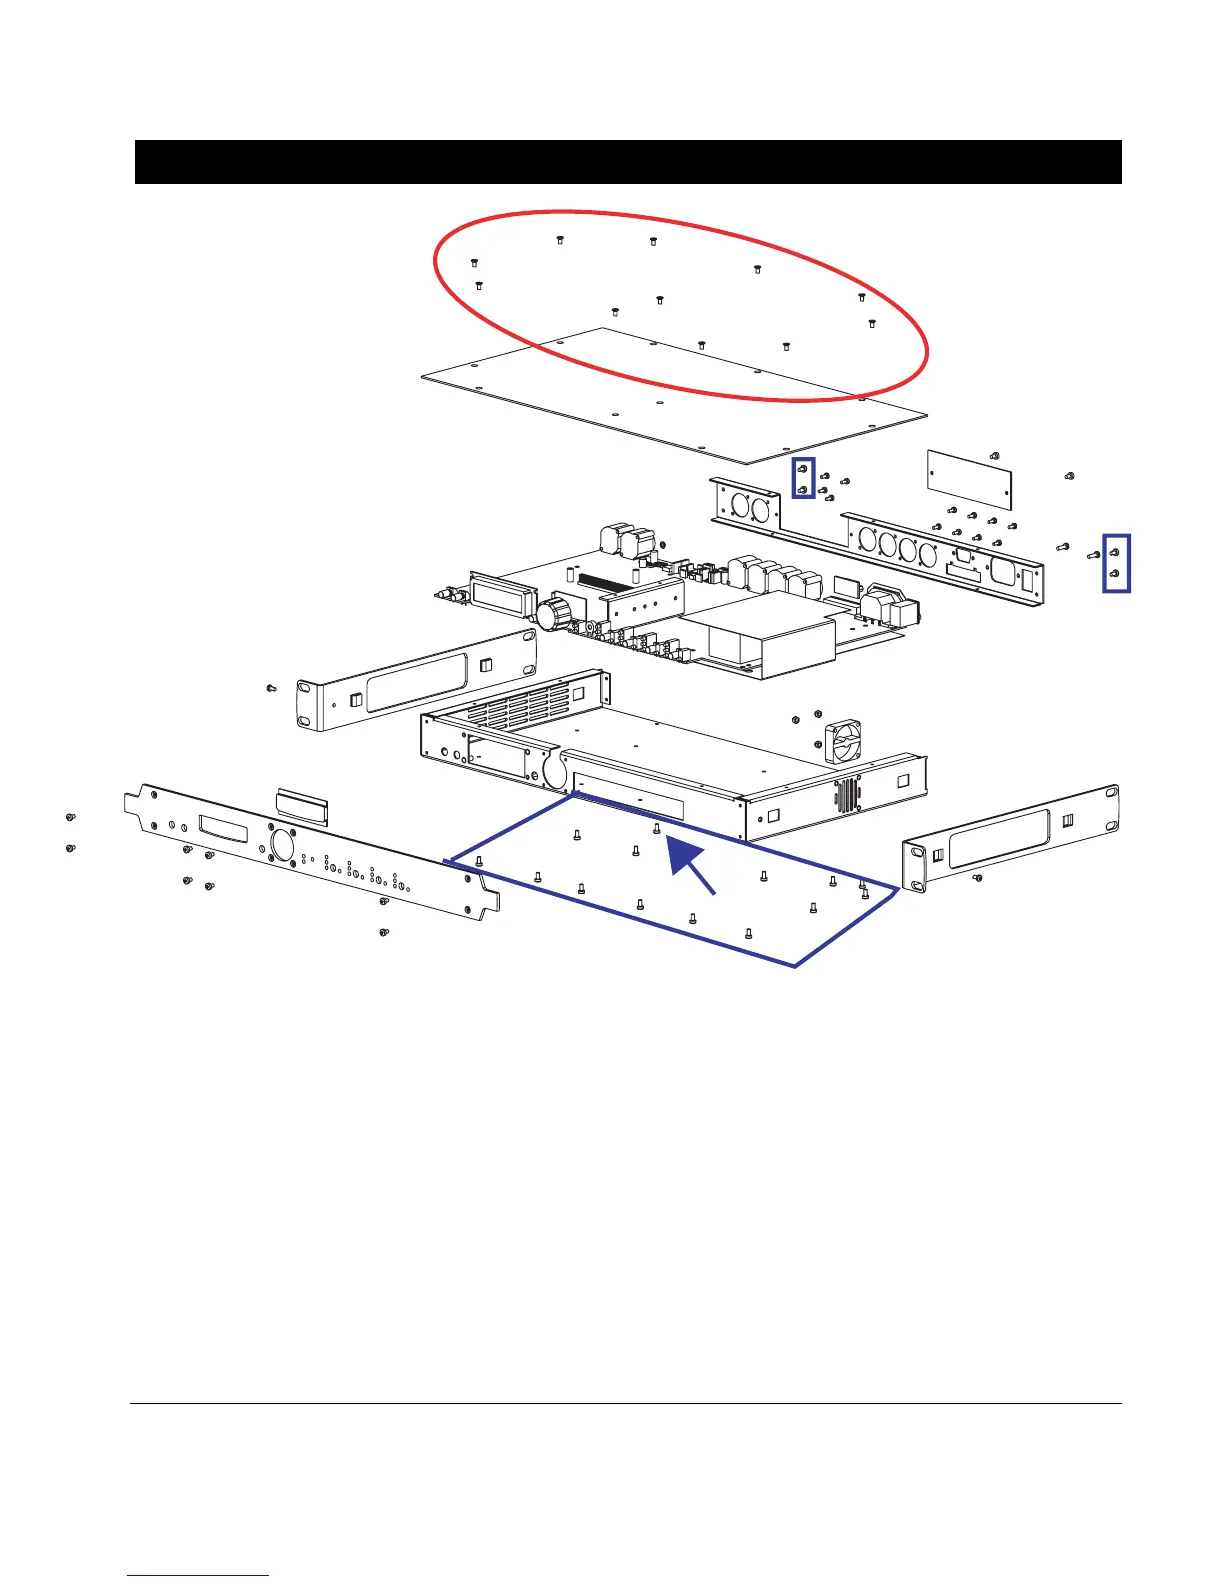
Removing the top panel
First be sure that the NX242 is disconnected from the mains. Wait 5 minutes to discharge the capacitors
To remove the top panel; unscrew the 11 screws circled in red in the above drawing (POZIDRIVE screwdriver).
When replacing the top panel pay attention to the 2 screws which are above the aluminum heatsink. They
should be screwed with a lesser torque than the other to avoid damaging the aluminum threading.
WARNIN G: Some of the NX components are sensitive to electrostatic discharges. Be sure to firmly hold the
chassis of the NX242 before touching any component inside. Always keep contact with the chassis to prevent
electrostatic discharge. If possible, use non-magnetic tools.
Removing the PCB
The remove the PCB; unscrew the 14 screws in blue square (POZIDRIVE screwdriver). Warning : the screw
pointed by the arrow is smaller than the other. It must be replace at the very same place to avoid so short circuit
problem (affecting slightly the overall dynamic range) on PCB v1.8

 Loading...