User Manual
Version 5.3
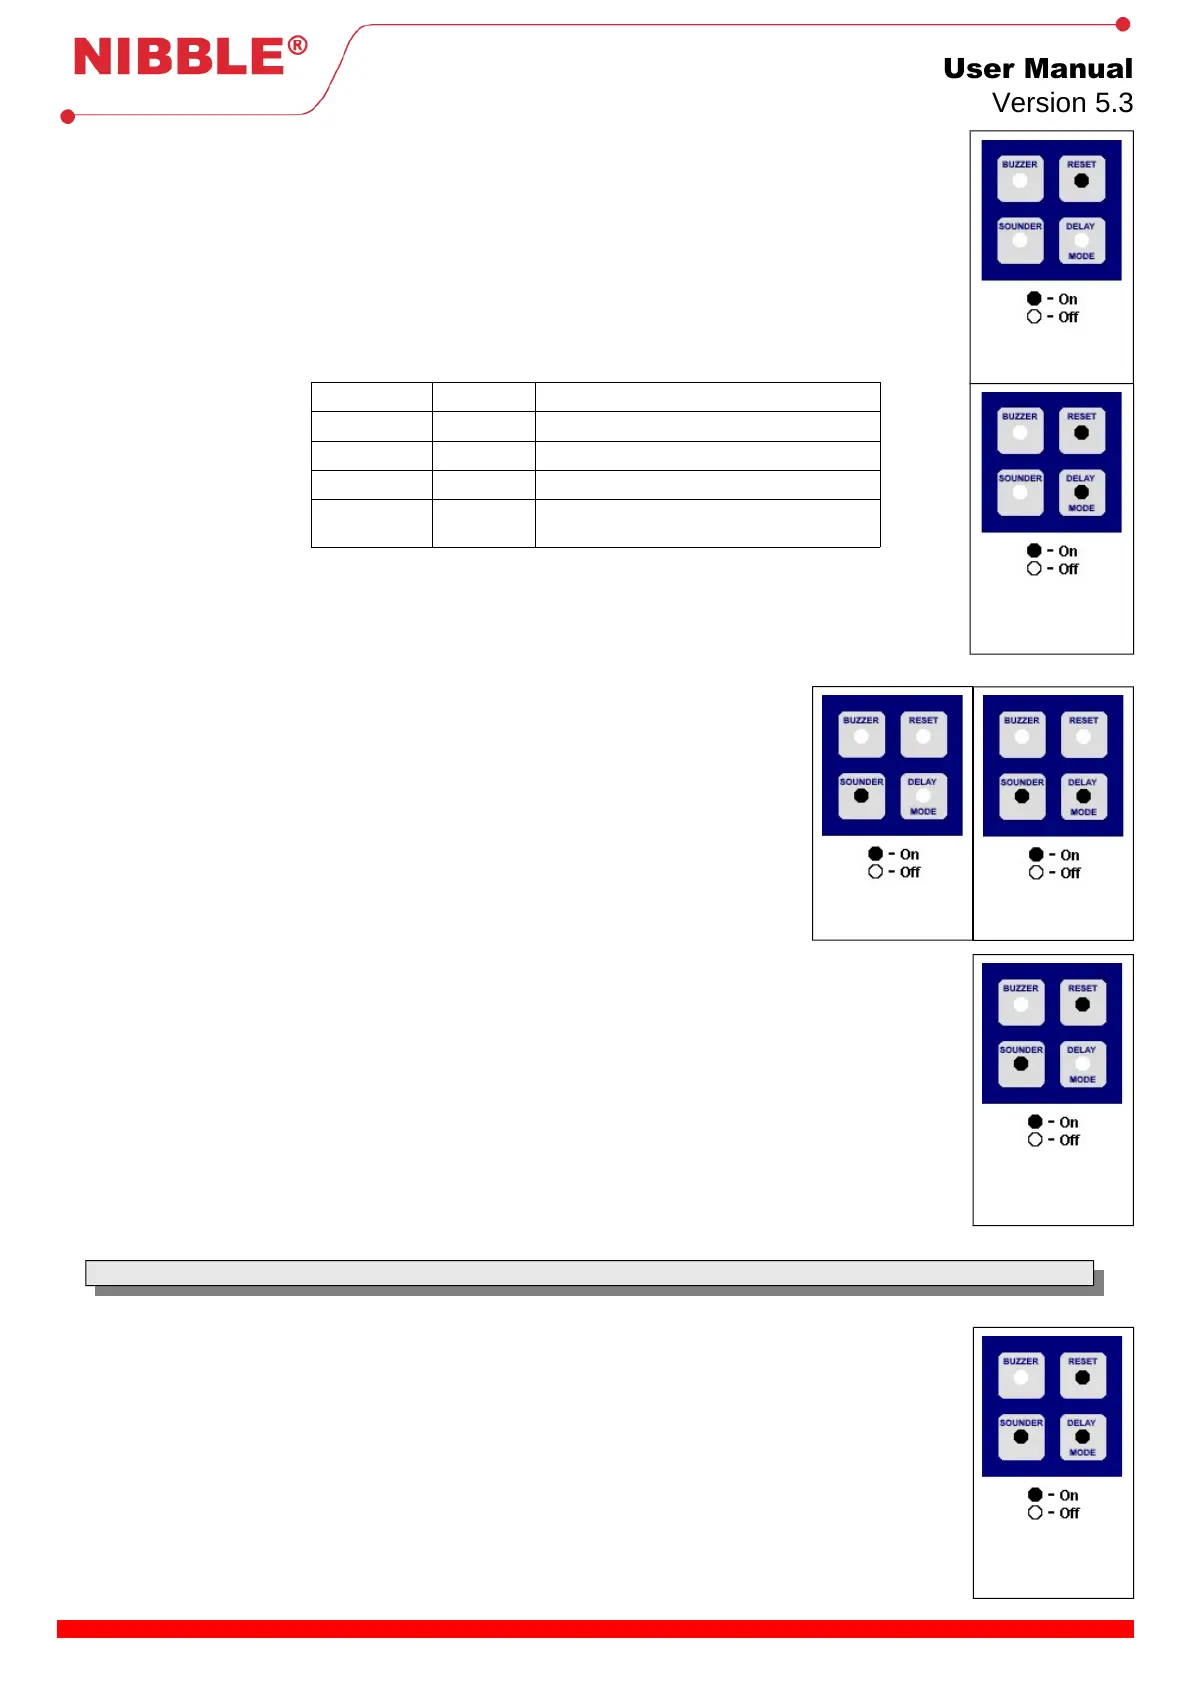
7.3 Intelligent and automatic zones:
1. The zone keys (Z1, Z2, ...) allow to change between modes (intelligent and automatic). When a zone is in intelligent
mode, the corresponding fail LED remains ON, when it is in automatic mode the alarm LED turns ON. When the
mode is changed, the corresponding LED blinks until user confirmation.
2. Press Delay Mode key to accept and Reset key to cancel.
3. A double beep will be emitted in case of a successful operation, and a single beep otherwise, backing to the
previous state.
7.4 Auxiliary outputs:
Auxiliary outputs can signal fails, alarms or both for corresponding zone. They can also be deactivated.
1. Zone keys (Z1, Z2, ...) allow to change between modes:
Alarm LED Fail LED Mode
Off Off Auxiliary output deactivated.
Off On Auxiliary output indicates failure at the zone.
On Off Auxiliary output indicates alarm at the zone.
On On
Auxiliary output indicates both failure and
alarm at the zone.
Table 3: Auxiliary outputs modes
2. Press Delay Mode key to accept and Reset key to cancel.
3. A double beep will be emitted in case of a successful operation, and a single beep otherwise, backing to the
previous state.
7.5 Relays:
The available relays can be configured to actuate under any combination of fails and/or alarms.
1. Press Buzzer and Sounder keys to select a failure or an alarm indicated in the front panel.
2. Press Z1 key to associate/disassociate the failure or alarm to relay. The failures and alarms
previously configured are indicated maintaining the corresponding LED ON. For the selected
failures and alarms but not yet confirmed, the LEDs that signal them blink slowly.
3. To configure the relay in sounder repetition mode (mutable), press the Buzzer or Sounder
key to navigate to the Sounder LED and press Z2 key. (NOTE: All the other failures and
alarms related to the relay must be removed for this mode to work properly, or else the relay
will be synchronized with those. By default, the General Alarm is selected and must be
removed).
4. Press Delay Mode key to accept or Reset key to cancel.
5. A double beep will be emitted in case of a successful operation, and a single beep otherwise,
backing to the previous state.
7.6 Test mode:
The FIREWALL has a test mode with the ability to reset after the occurrence of an alarm. To enter the test mode, follow
the next procedure:
1. Press the Buzzer and Siren keys to increase or decrease the alarm time, before perform the automatic reset. It can
be configured with the values of 1s, 5s, 10s, 15s, 30s and 1min.
2. The selected delay is represented by the LEDs Main power, 24VDC Fuse, Earth, Battery and Battery state. A
delay of 1s is represented by all LEDs off and the maximum delay by all LEDs on.
3. Use the Delay mode key to confirm and the Reset Key to cancel.
4. A double beep will be emitted in case of a successful operation, and a single beep otherwise, backing to the previous
state.
5. The FIREWALL will enter test mode and the General alarm LED will remain blinking. In this mode, it will work
normally but will reset in case of an alarm after the configured delay.
6. Press the Reset key to leave the test mode and return to the configuration menu.
Note: This feature is available since version FW 3.20.
7.7 Thresholds configuration:
Detection thresholds can be configured to work with termination resistors values between 1000Ω and 8000Ω. To
configure the thresholds follow this procedure:
1. Press the Zone keys (Z1, Z2, Z3, …) according to the zone you want to configure. It is possible to configure multiple
zones at the same time by pressing multiple keys.. The zone’s fault LED will turn on if the zone is selected;
2. Press the Delay Mode key to begin configuring the selected zones. The fault LED of each zone should be blinking;
3. The Battery Level LED will start blinking, indicating that the zone should be in rest mode (with the line termination
resistor and all fire detectors and manual callpoints inactive). If the value of a zone is not acceptable by the
FIREWALL, then the zone’s alarm LED will remain on until it reads a correct value;
4. Press the Delay Mode key to move to the next step. A double beep will sound in case of success, or an error beep in
case of failure returning to step 3;
5. The Battery LED will start blinking, indicating that the zone should be activated using a detector (if more than one
zone is being configured, then all of them should be activated before proceeding). If the value of a zone is not
acceptable by the FIREWALL, then the zone’s alarm LED will remain on until a correct value is read;
7 / 8
selected.
selected.
group selected.
group selected.
group selected.
selected.
 Loading...