AHEAD OF THE FLOW
®
www.nibco.com
NIBCO INC. WORLD HEADQUARTERS • 1516 MIDDLEBURY ST. • ELKHART, IN 46516-4740 • USA • PH: 1.800.234.0227
TECH SERVICES PH: 1.888.446.4226 • FAX: 1.888.234.0557 • INTERNATIONAL OFFICE PH: +1.574.295.3327 • FAX: +1.574.295.3455
www.nibco.com
1
®
INSTALLATION, OPERATION, and MAINTENANCE GUIDE
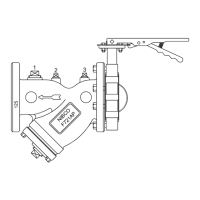
NIBCO Wall Mount Indicator Posts
Series NIP-2AW
• NIBCO Series NIP-2AW Wall Mount Indicator Posts are designed and manufactured to:
• Operate non-rising stem (NRS) post indicator valves (PIV) located through building walls
• Operate multi-turn post indicator valves (PIV) with an operating range from 10 to 50 turns
• Visually indicate if the valve is in the OPEN or SHUT position
• Provide a means to lock the valve into a desired position
(usually OPEN)
NIBCO Indicator Posts are listed by Underwriters
Laboratories Inc. (UL), Underwriters Laboratories Inc. for use
in Canada (C-UL), and approved by Factory Mutual Research
Corp. (FM).
It is important to follow the instructions below to assure
proper installation and safe trouble-free operation. Failure
to follow these instructions may result in reduced product
performance and may cause loss of manufacturer’s warranty.
1. Application
1.1 NIBCO Indicator Posts are primarily used with multi-turn non-rising stem (NRS) post indicator valves (PIV) controlling water
supplies to sprinkler, deluge, water spray, foam, and standpipe systems used in fire protection service.
1.2 NIBCO Indicator Posts are designed for outdoor service and are coated with electrostatically applied fusion bonded epoxy
resin to resist corrosion.
1.3 NIBCO Indicator Post view targets are adjustable to accommodate valves of various sizes.
1.4 NIBCO Indicator Posts are shipped for use with “left-hand” (counter-clockwise) opening valves.
1.5 NIBCO Indicator Posts are designed to allow the attachment of a Control Valve Supervisory Switch for electronic monitoring
of the OPEN valve position. Simply follow the instructions provided with the Supervisory Switch for proper installation and
operation.
1.6 NIBCO Wall Indicator Posts are designed to attach directly to the exterior of the building wall; four ¾” holes on a 10½”
diameter bolt circle.
1.7 Indicator Posts should be inspected on a regular basis.
WINDP-0617
© 2017, NIBCO INC.
PATENT #US 9,541,218