EN
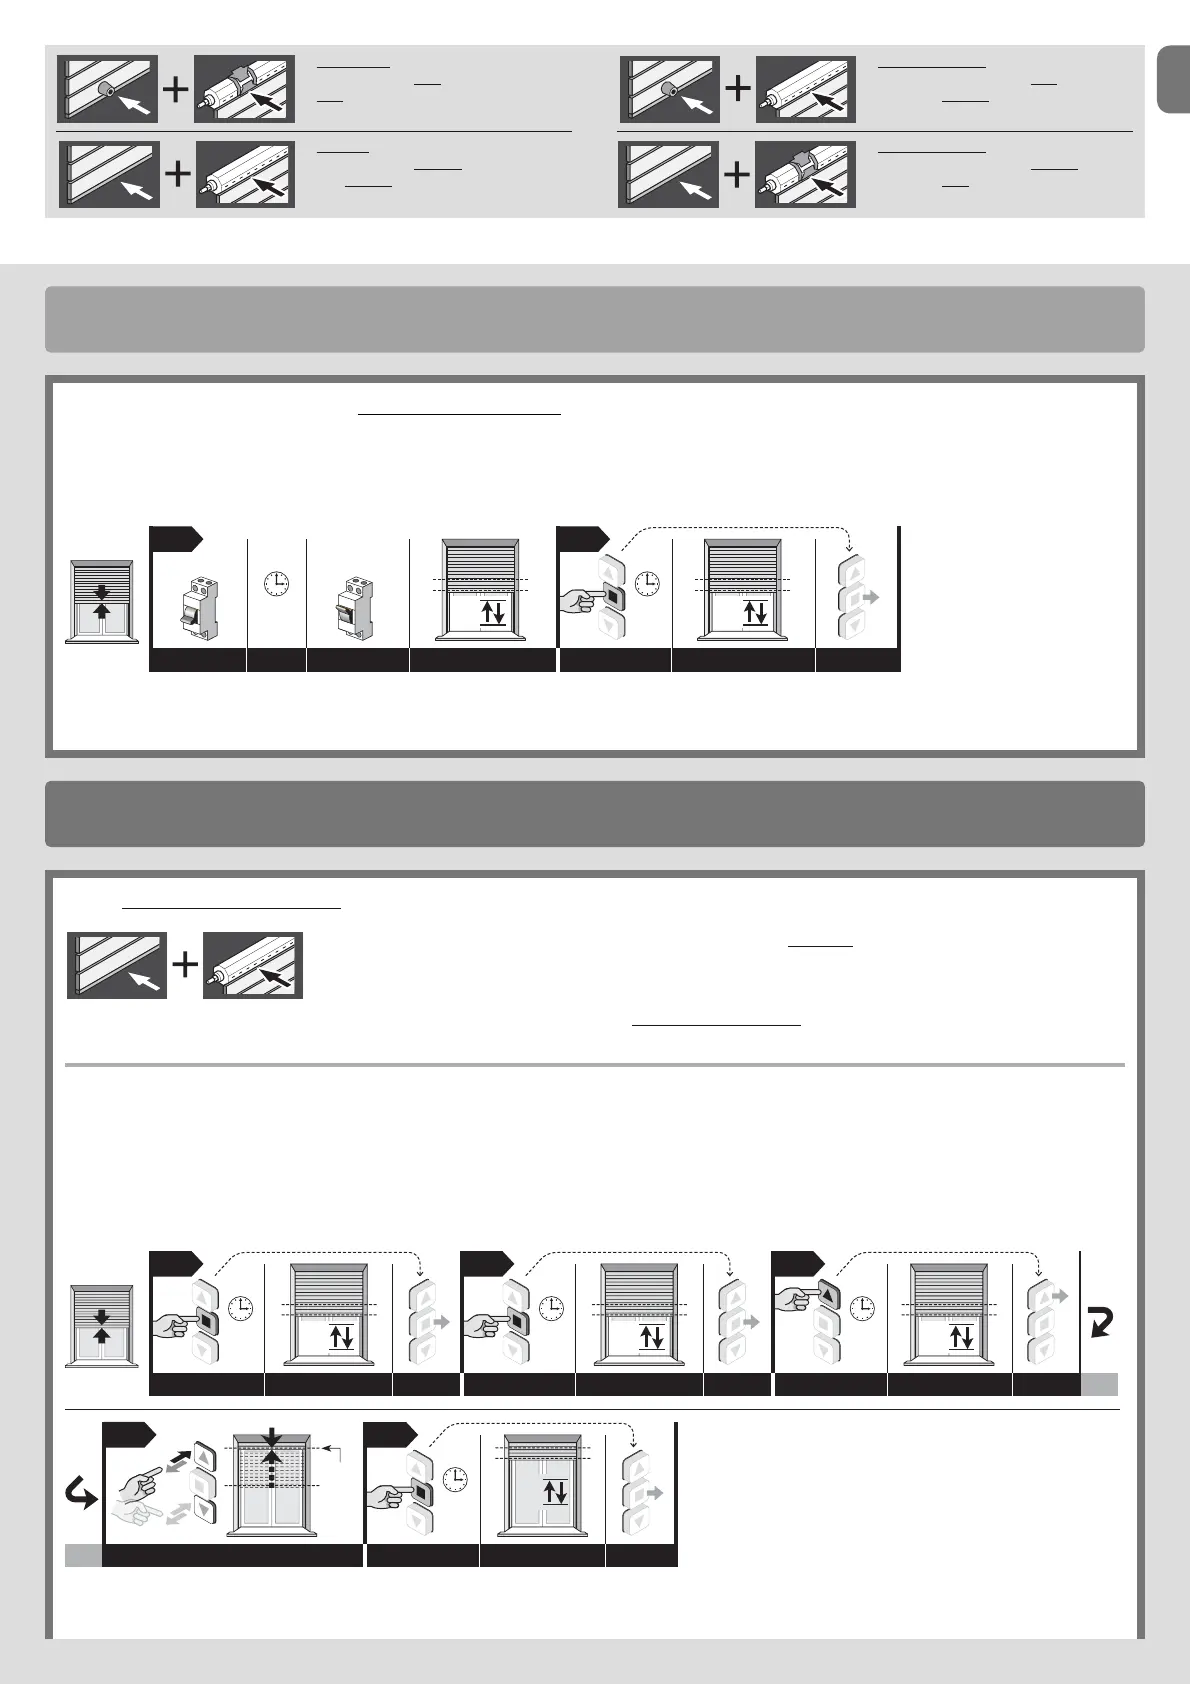
5.5 - Memorisation of the FIRST transmitter
Warning – Every time the motor is powered, 2 movements are performed if at least one transmitter and the limit switch heights are not in the memory.
Before starting the procedure, bring the rolling shutter to the midpoint of its stroke.
01. Disconnect power supply to the motor; wait two seconds and reconnect the power supply: the motor performs two movements.
02. Keep key n pressed and wait for the motor to perform three movements. Upon completion, release the key.
Note – After memorization, the raising and lowering direction of the rolling shutter is not yet associated with the s and t respective keys of the transmitter. This com-
bination will occur automatically when adjusting limit switches “0” e “1”; moreover, the rolling shutter will move in the “operator present” mode until the limit switches
are adjusted.
sec.
sec.
PROCEDURES
• Automatic (paragraph 5.7): ideal for
rolling shutters with
safety plugs and
with
rigid anti-intrusion springs.
• Manual (paragraph 5.6): ideal for
rolling shutters without
safety plugs
and without
rigid anti-intrusion springs.
• Semiautomatic (paragraph 5.8.1):
ideal for rolling shutters with
safety
plugs but without
rigid anti-intrusion
springs.
• Semiautomatic (paragraph 5.8.2):
ideal for rolling shutters without
safety
plugs but with
rigid anti-intrusion
springs
Adjustment of the limit switch heights and intermediate heights
5.6 - Manual adjustment of upper limit switch height (“0”) and lower height (“1”)
ATTENTION! - Adjustment of rolling shutters required without mechanical blocks for the limit
switch, but usable also for all other types of rolling shutters.
Warnings • This procedure overwrites previously adjusted heights with the new heights using this same procedure. • Every time the motor is powered, 2 movements
are performed if at least one transmitter and the limit switch heights are not in the memory.
5.6.1 - To adjust the UPPER limit switch (“0”)
Before starting the procedure, bring the rolling shutter to the midpoint of its stroke.
01. Keep the n key pressed and wait for the motor to perform 2 movements. Upon completion, release the key.
02. Keep the n key pressed again and wait for the motor to perform 4 movements. Upon completion, release the key.
03. Keep the s key pressed and wait for the motor to perform 2 movements. Upon completion, release the key.
04. Adjustment of height: Keep the s (or t) key pressed until the shutter reaches the desired “0” height. Note – to adjust the height with precision, press the s
and t several times consecutively (at each pulse theshutter moves a few millimeters.
05. Keep the n key pressed and wait for the motor to perform 3 movements. Upon completion, release the key.
Note – When performing the procedure, at any time you can cancel it by keeping the n and t keys pressed simultaneously for 4 seconds. Otherwise, do not press
any key and wait 60 seconds for the motor to perform 6 movements.
sec.
sec.
sec.
sec.
 Loading...