EasyManua.ls Logo

Nice Era Plus L

Default Icon
128 pages
To Next Page IconTo Next Page
Loading...
Era Plus
Tubular motor
E Plus M
E Plus L
EN - Instructions and warnings for installation and use
IT - Istruzioni ed avvertenze per l’installazione e l’uso
FR - Instructions et avertissements pour l’installation et l’utilisation
ES - Instrucciones y advertencias para la instalación y el uso
DE - Installierungs-und Gebrauchsanleitungen und Hinweise
PL - Instrukcje i ostrzeżenia do instalacji i użytkowania
NL - Aanwijzingen en aanbevelingen voor installatie en gebruik
Question and Answer IconNeed help?

Do you have a question about the Nice Era Plus L and is the answer not in the manual?

Nice Era Plus L Specifications

General IconGeneral
BrandNice
ModelEra Plus L
CategoryEngine
LanguageEnglish

Summary

Quick Start Guide

1 - Electrical Connections

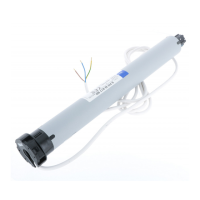
Basic electrical setup for the motor.

2 & 3 - Transmitter and Movement Pairing

Pairing the first transmitter and linking movements to keys.

4 - Programming Limit Switches

Setting the upper and lower operational limits.

1 Safety Warnings

1.1 Installation Warnings

Essential safety instructions for product installation.

3 Installation

3.1 Preliminary Checks

Pre-installation checks and usage restrictions.

5 Programming and Adjustments

5.1 Transmitter Usage

Using transmitters for programming and control.

5.2 Automatic Stop Positions

Setting upper and lower limits for automated movement.

5.3 Transmitter Overview & Warnings

Details on transmitters, programming, and general warnings.

5 Programming and Adjustments

5.5 Programming Two Limit Switches

Detailed steps for setting operational limit switches.

5.6 Changing One Limit Switch Level

Procedure to adjust a single pre-set limit switch.

5.7 Memorisation of the First Transmitter

Initial pairing procedure for the first remote transmitter.

5 Programming and Adjustments

5.8 Allocating UPDOWN Strokes to Transmitter Keys

Assigning specific movement commands to transmitter buttons.

5.9 Memorising Additional Transmitters

5.9.1 Memorising Second Transmitter (Mode I)

Procedure for adding a second transmitter using Mode I.

5.9.2 Memorising Second Transmitter (Mode II)

Procedure for adding a second transmitter using Mode II.

5.10 Total or Partial Memory Deletion

5.10.1 Deleting Memory (Mode I)

Procedure for deleting transmitter memories using Mode I.

5.10.2 Deleting Memory (Unmemorised)

Procedure for deleting memories with unmemorised transmitters.

5.11 Locking and Unlocking Memory

5.12 Memorisation of Climate Sensor (Radio)

5.13 Allocating Command to a Key

5.14 Programming Rain Movement

5.15 Resistive Sensitive Edge Connection

5.16 Adjustment of Sun Climate Sensor

5.17 Adjustment of Wind Climate Sensor

6 Optional Accessories

6.1 Wall-mounted Control Pushbutton Strip

Installation and connection details for pushbutton accessories.

6.2 Climate Sensors (Wind, Sun, Rain)

Overview of climate sensors and their definitions.

6 Optional Accessories

6.2.2 Memorisation of Climate Sensor (Radio)

Procedure for storing a radio-connected climate sensor.

6.2.3 Motor Behaviour in Weather Conditions

How the motor reacts to sun, rain, and wind conditions.

5.17 Adjustment of Wind Climate Sensor

7 Warnings About Using the Automated Device

7.1 Maximum Continuous Work Cycle

Information on the motor's operational limits and thermal protection.

7.2 Emergency Manual Manoeuvre

Procedure for manual operation during power outages or emergencies.

7 Warnings About Using the Automated Device

7.3 Troubleshooting Guide

Common issues and solutions for motor operation problems.

Technical Specifications

CE Declaration of Conformity

6.2.4 Programming Rain Movement

6.3 Photocell Couple

6.4 Resistive Sensitive Edge

Disposal of the Product

Related product manuals