English – 9
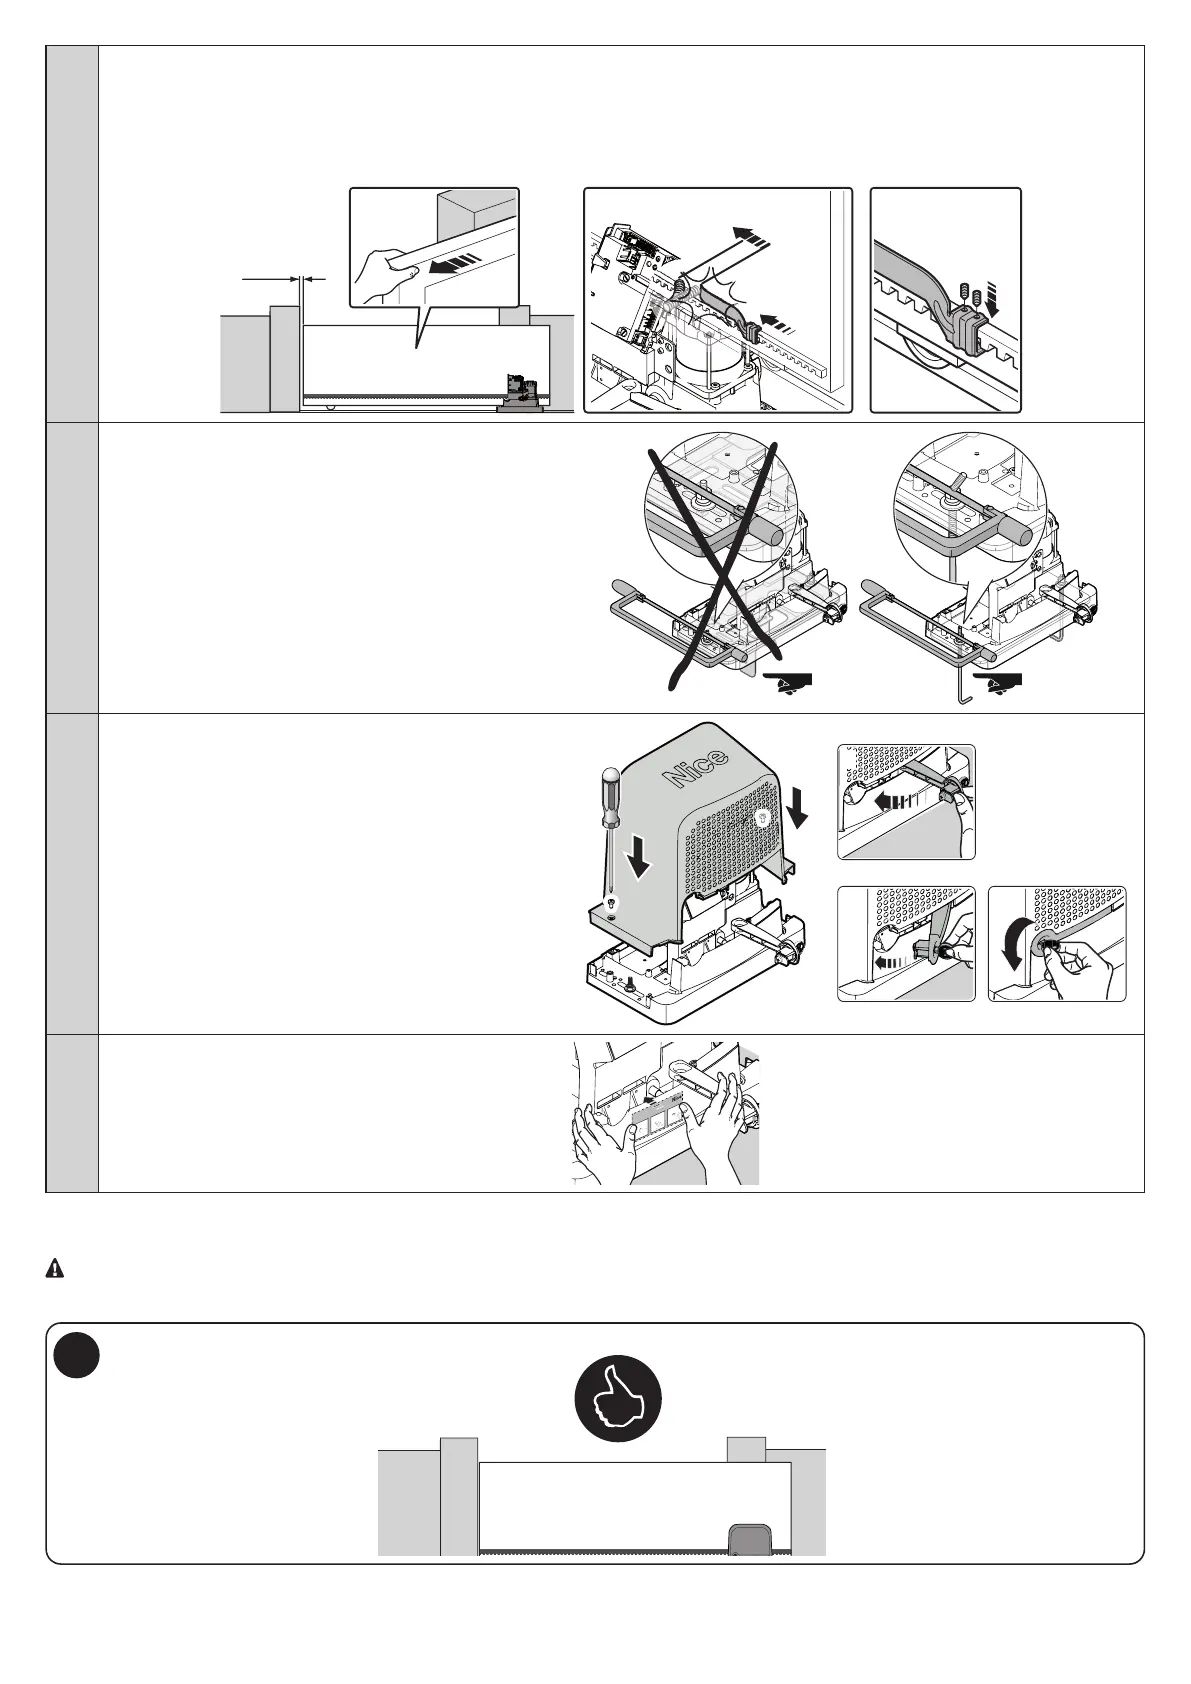
CLOSE:
a - Slide the gate closed by hand, stopping it 2/3 cm before the mechanical stop
b - Slide the limit switch bracket along the rack in the close direction until the limit switch trips (you will hear it click)
c - After you hear the ‘click’, move the bracket further forwards by 2 cm (minimum)
d - Secure the bracket to the rack with the provided grub screws
2-3 cm
+2 cm
click!
09. If threaded anchors are used, once the motor has
been fastened with the nut, check that the casing
does not come into contact with the protruding part
of the threading. If it does, eliminate the excess
threading
10. a - Insert the casing and fasten it with the two screws (1)
b - Lock the gearmotor (2÷4)
4
3
2
11. Apply the adhesive label with the unlocking instructions
P
er
Sblocc
a
r
e -
Pou
r
d
ébrayer -
T
o
u
n
bloc
k
U
m
zu
en
tr
iege
ln - Par
a
desbloquear
Odb
lo
kowani
e - O
m
t
e d
ebl
o
kke
ren
-
От
п
ереть
2
3
1
To install the devices provided in the system, refer to the respective instruction manuals..
IMPORTANT! – The gearmotor is set up (at the factory) for installation on the right (g. 5); if it must be installed on the left,
proceed as shown in g. 6 (a - b).
5