4 – English
3
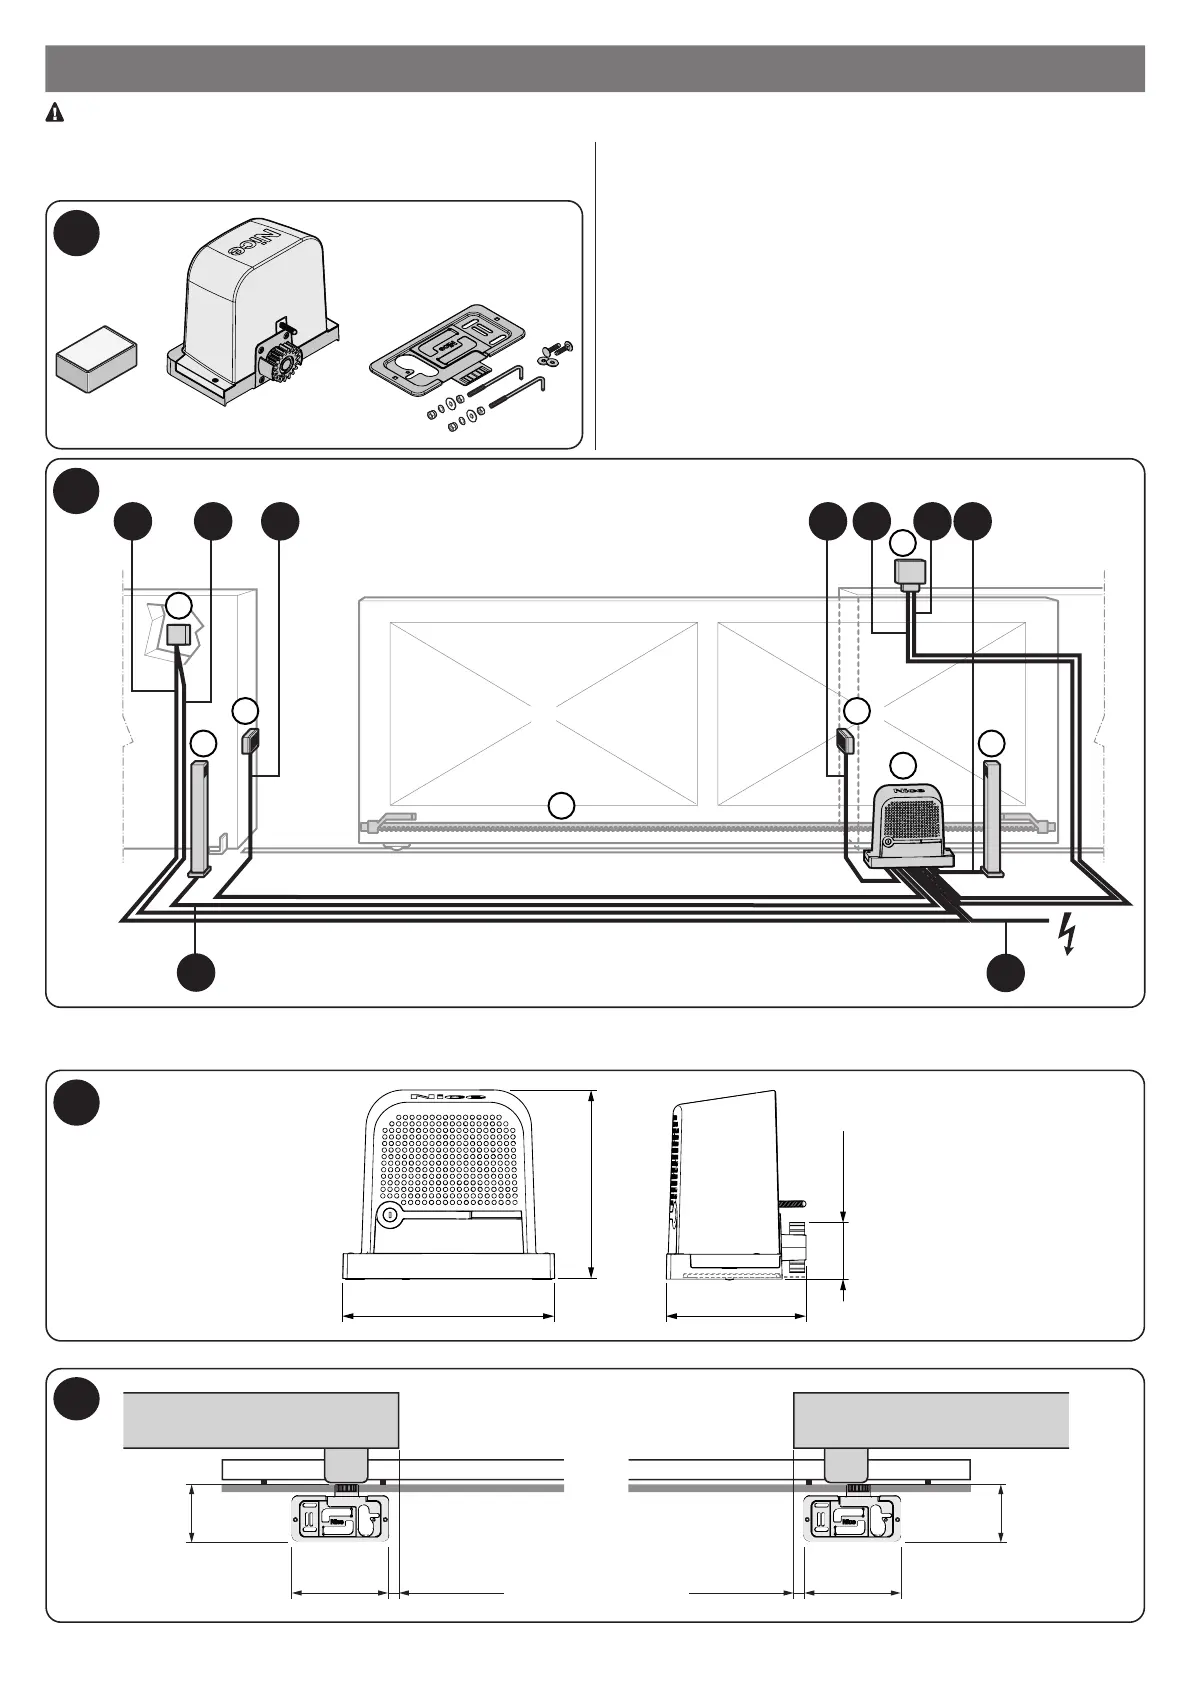
INSTALLATION
Important! Before installing the product, refer to chapters 2 and 13 (technical specications).
Fig. 1 shows the contents of the package: check that everything is
present and correct.
Fig. 2 shows the location of the components of a typical installation
using Nice accessories:
a - ROBO gearmotor
b - photocells
c - posts for photocells
d - Key switch / digital keypad
e - asher
f - rack
For the type of electrical cables (🅐 ÷ 🅕) refer to Table 3 under para-
graph “4.1 - Types of electrical cables”.
1
2
Before installing the system, check the gearmotor’s clearance (g. 3) and installation dimensions (g. 4):
3
340 mm
303 mm
85 mm
220 mm
4
330 mm 330 mm
192 mm 192 mm
0 ÷ 50 mm 0 ÷ 50 mm