ASSEMBLY INSTRUCTIONS
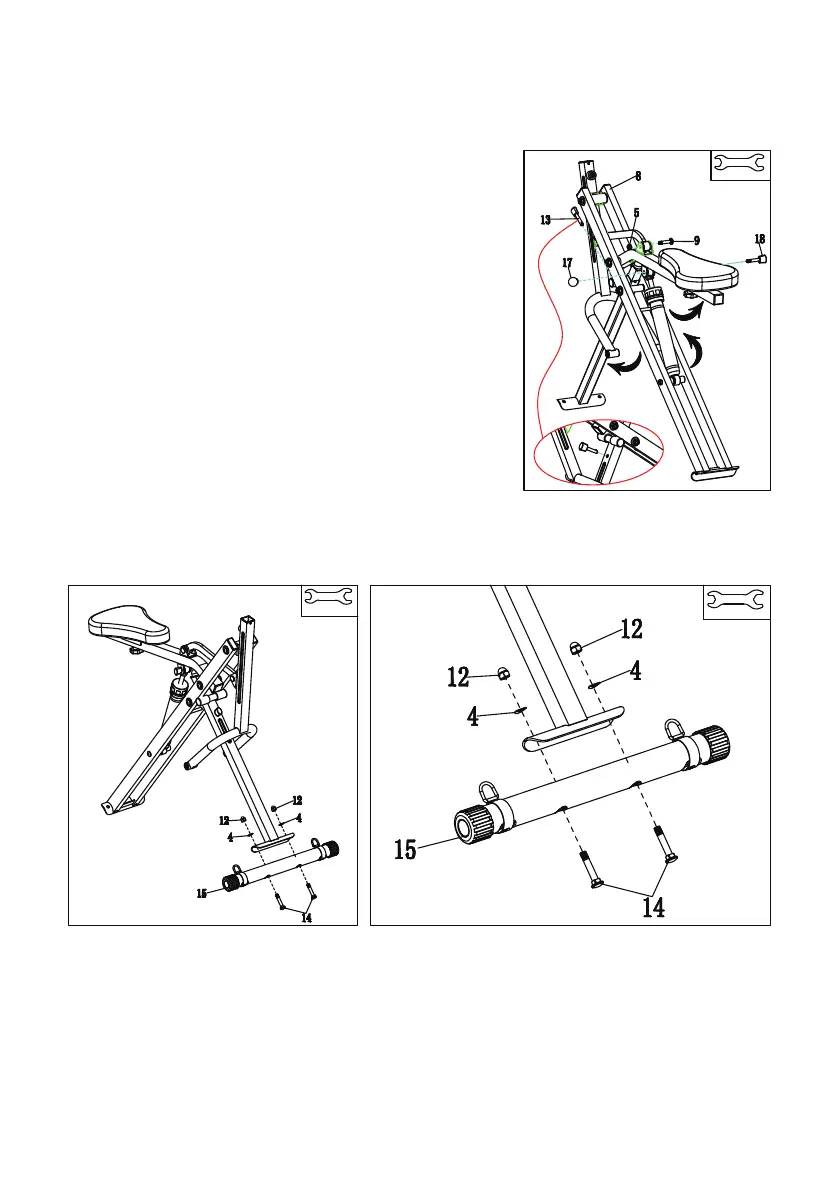
First, pull out the Plug (NO.13) fixed on the Main Frame(NO. 8), then
open the Main Frame(NO. 8) as shown in the figure, and insert the
Plug (NO.13) to fix it. Take out the Screw (NO.9) and Nut (NO.5) from
the toolkit, insert the Screw (NO.9) into the main frame hole as shown
in the figure, lock the Nut (NO.5), and then use the Open-end Wrench
(B) to tighten it. Then install the hydraulic cylinder, lift the hydraulic
cylinder to the position as shown in the figure, and fix it with Pin Ball
(NO.17) & Pin (NO.18).
STEP 1
Take out the Screws (NO.14)*2, Nuts (NO.12)*2, Washers (NO.4)*2 from the toolkit. Install the Front Stabilizer
(NO.15) as shown in figure below, and fix it with Open-end Wrench (B).
STEP 2
B
B
B
5