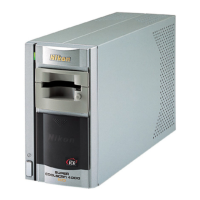
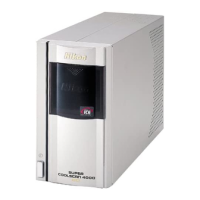
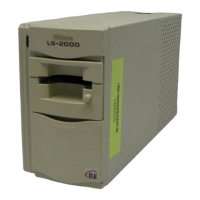
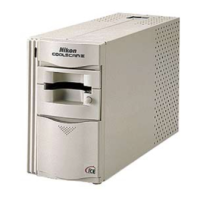
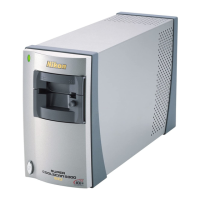
쐃 SUPER COOLSCAN 9000 ED fi lm scanner
쐇 Power cable
쐋 I EEE 1394 (Firewire) cable
쐏 FH-835S 35-mm strip -fi lm holder
쐄 Masking sheets (×2)
쐂 FH-835M 35-mm slide-mount holder
쐆 FH-869S medium-format strip fi lm holder
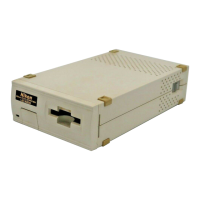
쐊 I EEE 1394 (Firewire) interface board
쐎 CD-ROM
• Nikon Scan CD (Yellow)
• Nikon Scan Reference Manual / Easy Scan-
ning Guide CD
• Nikon View CD (Yellow)
• Nikon View Reference Manual CD
쐅 Warranty
쐈 User’s Manual
쐉 Quick Start Guide (this guide)
Nikon Film Scanner
Remove the scanner from the box and confi rm that you have all the items listed
below.
Nikon Film Scanner
En
Fr
Es
User's Manual
Manuel de I'utilisateur
Manual del Usuario
En
Quick Start Guide
Quick Start Guide
If you need help:
Visit http://www.nikontechusa.com/ or call 1-800-NikonUX
(for users in the U.S.A.)
Vist
http://www.europe-nikon.com/support
(f
or users in Europe)
Visit
http://www.nikon-asia.com/
(for users in Asia, Oceania, the Middle East, and Africa)
If the computer is not already equipped with an IEEE 1394 (Firewire) interface, install
the supplied IEEE 1394 interface board. Before Nikon Scan can be installed, users of
Windows 98 SE will need to update the IEEE 1394 drive rs, inst all the interface board,
and then install the IEEE 1394 interface drivers. For more information, see “Installing
the IEEE 1394 (Firewire) Interface Board” on page 64 of the User‘s Manual.
Note
Power switch
Status LED
Eject button
Holder slot
AC connec tor
IEEE 1394 (Firewire)
connector
Preparation
Windows
Quick Start Guide
Before connecting the scanner, install Nikon Scan as described below.
Supported operating systems
Windows • Windows XP Home Edition/Professional
• Windows 2000 Professional
• Windows Millennium Edition (Me)
• Windows 98 Second Edition (SE)
Macintosh • Mac OS X (version 10.1.5 or later)
• Mac OS 9 (version 9.1 or later)
Other system requirements are detailed on page 10 (Win-
dows), 15 (Macintosh) of the User’s Manual.
Continued
above at
right
a
Tur n the c o mpute r on and wait for Windows to start up. Do not connect the
scanner.
Windows XP Home Edition / Windows XP Professional / Windows 2000
Professional
When installing or uninstalling Nikon Scan, log in as the “Computer
administrator” (Windows XP Home Edition/Windows XP Professional)
or “Administrator” (Windows 2000 Professional).
Important
Earlier Versions of Nikon Scan
Before installing Nikon Scan 4, uninstall any earlier versions of Nikon
Scan. See “Uninstalling Nikon Scan” on pages 70–72 of the User’s
Manual.
Important
c
The “Welcome” dialog will be displayed. Click
the “Software” tab and click Install.
d
The opening dialog of the Nikon Scan installer
will be displayed. Click Next.
e
After reading the license agreement, click Yes to
accept the agreement and proceed with installa-
tion.
f
The default install location for Nikon Scan (c:
\Program Files\Nikon\Nkscan4) is displayed un-
der “Destination location.” To choose a differ-
ent location, click Browse… and navigate to the
desired folder. Click Next to begin installation.
The dialog shown at right will be displayed.
Click Yes to create the destination folder for
Nikon Scan.
b
Insert the Nikon Scan CD in the CD-ROM drive.
After a brief pause, a language selection dialog
will be displayed. Select a language and click
Next.
g
When prompted to select the scanner drivers,
confi rm that LS-4000/8000/9000 is selected and
click Next.
Windows 2000 Professional
The dialog shown at right will be displayed;
click Yes (if the dialog is displayed twice,
click Yes each time).
Note
Associating Image Enhancement Extensions with Nikon Scan
If Nikon Capture or other Nikon software is
already installed on the computer, a dialog
will be displayed requesting permission to
associate image enhancement settings fi le
extensions with Nikon Scan. Click Yes.
Note
Continued
above at
right
j
Click Windows.
k
A list of color-space profi les will be displayed.
Select sRGB (recommended) and click OK. For
more information on color-space profi les, see
page 88 of the Nikon Scan Reference Manual
(on CD).
l
Click Finish to exit the Nikon Scan installer.
m
Click Ye s to restart the computer.
i
The opening dialog of the color space selection
wizard will be displayed. Click Use Wizard.
Macintosh
a
Tur n on the compu t er an d wait for it to start up. Do not connect the scan-
ner.
b
Insert the Nikon Scan 4 CD in the CD-ROM drive. Double- click the Welcome
icon (
) in the root directory of the Nikon Scan 4 CD.
d
The “Welcome” dialog will be displayed. Click
the “Software” tab and click Easy Install.
c
A language selection dialog will be displayed.
Select a language and click Next.
Mac OS X
Clicking Install displays the “Authenticate”
dialog shown at right. Enter the administra -
tor name and password and click OK.
Note
Windows 98 SE
If the computer displays a message stating that an IEEE 1394 update
is required, click OK to continue with installation. Once installation is
complete and the computer has restarted, update the IEEE 1394 driv-
ers as described on page 65 of the User’s Manual.
Important
Mac OS X
Administrator privileges are required to install or uninstall Nikon
Scan.
Important
Mac OS 9
CarbonLib 1.6 or later is required to install
Nikon Scan 4. If the installer detects an earlier
version, a message will be displayed. Click In-
stall to upgrade to a new version of CarbonLib. Be sure to restart the
computer before continuing the installation.
Important
Continued
above at
right
k
Click Quit to exit the installer.
g
The opening dialog of the color space selection
wizard will be displayed. Click Use Wizard.
h
Click Macintosh.
i
A list of color-space profi les will be displayed.
Select Apple RGB (recommended) and click OK.
For more information on color-space profi les,
see page 90 of the Nikon Scan Reference Manual
(on CD).
e
After reading the license agreement, click Ac-
cept to accept the agreement and view the Re-
adMe fi le. Take a few moments to read this fi le,
which may contain important information that
could not be included in the product manuals.
Click Continue… to proceed to the next step.
l
Click Restart to restart the computer.
Parts of the Scanner
j
Click Ye s to add Nikon Scan 4 to the Dock (Mac
OS X) or create an alias of Nikon Scan 4 on the
desktop (Mac OS 9).
Mac OS X Mac OS 9
h
Click Yes to create a shortcut to Nikon Scan on
the desktop.
f
Click Install to begin installation.
Nikon Scan 4 will be installed to the folder shown
under “Install Location.” In Mac OS X, Nikon
Scan 4 is installed to the “Applications : Nikon
Software” folder on the start-up disk. The
default install location for Mac OS 9 is the “Ap-
plications (Mac OS 9) : Nikon Software” folder on
the OS 9 start-up disk.
Warranty
If Multiple Copies of Photoshop Are Installed (Mac OS 9 Only)
If a copy of the Nikon Scan plug-in is installed
in the plug-ins folders for supported versions
of Adobe Photoshop, Photoshop can be used
to acquire images directly from the scanner. If
more than one copy of Photoshop is installed
on the computer, a list of plug-ins folders will be displayed. Select
the plug- ins folders for the copies of Photoshop that will be used to
acquire images and click Continue to copy the Nikon Scan plug-in to
the selected folders.
Note
쐃
쐇
쐋
쐏쐄쐂
쐆쐊쐎
쐅쐈쐉
Nikon Scan Reference Manual /
Easy Scanning Guide CD
This CD contains the Nikon Scan Reference Manual, which provides complete infor-
mation on Nikon Scan, and the Easy Scanning Guide, an animated guide introduc-
ing such basic scanning tasks as setting image size and resolution.
Windows
†
Macintosh
Easy
Scanning
Guide
*
Nikon Scan
Reference
Manual
* Icons may differ.
† Extensions may not be displayed in some
environments.
• Viewing the Nikon Scan Reference Manual
Double-click the manual.pdf icon on the reference manual CD. Adobe Acrobat
Reader will start and a language selection screen will be displayed; click the ap-
propriate link to view the manual in the desired language. Note that Adobe Ac-
robat Reader 4 or later is required to view the Reference Manual; Windows users
can install Acrobat Reader 5 from the “Acrobat Reader” folder on the reference
manual CD.
• Viewing the Easy Scanning Guide
Double -click the easy_guide.exe icon (Windows) , easy_guide_OSX icon (Mac OS X),
or easy_guide_OS9 icon (Mac OS 9). The Macromedia Flash Player will start and a
language selection screen will be displayed; click the appropriate link to view the
guide in the desired language. The Easy Scanning Guide can also be copied to the
computer hard disk for ease of reference. Copy the “easy_guide_main” folder
and easy_guide.exe (Windows), easy_guide_OSX (Mac OS X), or easy_guide_OS9
(Mac OS 9) to the desktop
*
.
* Users of Mac OS X should ensure that the start-up disk is named using only
letters and numbers (the default name for the start- up drive is “Macintosh
HD”). The guide may not start if the volume name contains punctuation or
other non-alphanumeric characters.
Quick Start Guide
If you need help:
Visit http://www.nikontechusa.com/ or call 1-800-NikonUX
(for users in the U.S.A.)
Vist
http://www.europe-nikon.com/support
(f
or users in Europe and Africa)
Visit
http://www.nikon-asia.com/
(for users in Asia, Oceania and the Middle East)
Visit these sites to keep up-to - date with the latest product information, tips, an-
swers to frequently-asked questions (FAQs), and general advice on digital imaging
and photography.
C
D
-
R
O
M
C
D
-
R
O
M
C
D
-
R
O
M
C
D
-
R
O
M
C
D
-
R
O
M
C
D
-
R
O
M
C
D
-
R
O
M
C
D
-
R
O
M
C
D
-
R
O
M
C
D
-
R
O
M
C
D
-
R
O
M
C
D
-
R
O
M
C
D
-
R
O
M
C
D
-
R
O
M
C
D
-
R
O
M
C
D
-
R
O
M
C
D
-
R
O
M
C
D
-
R
O
M
C
D
-
R
O
M
C
D
-
R
O
M
See Other Side
Step
1
Check the package contents
Step
2
Install Nikon Scan