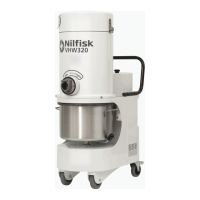
VHW320 - VHW321 - VHW420 - VHW421 - VHW440
09/2014
13
C393
GB
Main lter disassembly and replacement
WARNING!
When the vacuum cleaner is used to vacuum
hazardous substances, the lters become
contaminated, therefore:
■ Work with care and avoid spilling the vacuumed
dust and/or material;
■ place the disassembled and/or replaced lter in a
sealed plastic bag;
■ close the bag hermetically;
■ dispose of the lter in accordance with the laws in
force.
WARNING!
Filter replacement is a serious matter. The lter must
be replaced with one of identical characteristics,
ltering surface and category.
Otherwise the vacuum cleaner will not operate
correctly.
WARNING!
Take care not to raise dust when this operation is
carried out. Wear a P3 mask and other protective
clothing plus protective gloves (DPI) suited to the
hazardous nature of the dust collected, refer to the
laws in force.
Main cartridge lter replacement, models
with PullClean
Figure 16
1. Vacuum hose
2. Release levers
3. Cap
4. Filter holder
5. Seal
6. Cartridge lters
Before proceeding with these operations, turn off the vacuum
cleaner and remove the plug from the power socket.
■ Remove the vacuum hose (1).
■ Use one of the levers (2) to remove the cover (3).
■ Remove the lter holder (4).
■ Disassemble the lters (6) from the holder by turning
them counter-clockwise.
■ Assemble the new lters (6) by turning them clockwise
and check the gasket (5) is not torn or broken, otherwise
replace it.
■ Install the cover and the main lter holder in the reverse
order of removal.
■ Dispose of the old lters according to the laws in force.
[ NOTE ]
The cartridges must be fully tightened by hand; check that
cartridge gasket is tightened against the upper support. In
any case, do not apply a tightening torque higher than 12
Nm.
If necessary contact the manufacturer’s Service Center.
Cartridge replacement (InniClean Models)
Figure 17
1. Connector
2. Vacuum hose
3. Blower hose
4. Blower hose
5. Release levers
6. InniClean unit
7. Cartridge lters
WARNING!
Reassemble with care to avoid trapping your hands
between the InniClean unit and the container. Use
gloves that provide protection against mechanical
risks (EN 388) with a level of protection CAT. II.
Before proceeding with these operations, turn off the vacuum
cleaner and remove the plug from the power socket.
■ Disassemble the connector (1).
■ Remove the vacuum hose (2).
■ Remove the blower hose (3).
■ Use one of the levers (4) to disassemble the InniClean
unit (5) together with the lter protections.
■ Disassemble the old lters (6) from the protections by
turning them counter-clockwise.
■ Assemble the old lters (6) on the protections by turning
them clockwise.
■ Install the InniClean unit in the container by performing
the procedure in the reverse order.
■ Dispose of the old lters according to the laws in force.
[ NOTE ]
The cartridges must be fully tightened by hand; check that
cartridge gasket is tightened against the upper support. In
any case, do not apply a tightening torque higher than 12
Nm.