C393
14
09/2014
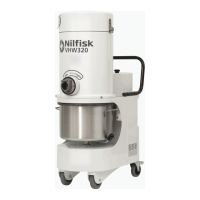
VHW320 - VHW321 - VHW420 - VHW421 - VHW440
GB
Upstream absolute lter replacement
WARNING!
Take care not to raise dust when this operation is
carried out. Wear a P3 mask and other protective
clothing plus protective gloves (DPI) suited to the
hazardous nature of the dust collected, refer to the
laws in force.
WARNING!
Do not use the absolute lter again after having
removed it from the vacuum cleaner.
Figure 18
1. Knob
2. Arm
3. Knob
4. Container
5. Absolute lter
6. Ring for bag
7. Bag for lter
WARNING!
Reassemble with care to avoid trapping your hands
between the vacuum unit and the container. Use
gloves that provide protection against mechanical
risks (EN 388) with a level of protection CAT. II.
Before proceeding with these operations, turn the vacuum
cleaner off and disconnect the plug from the power socket.
■ Loosen the knob (1) and turn the arm (2) counter-
clockwise to remove the container (4) from the machine
and lock it by tightening the knob (1).
■ Loosen the knob (3) to release the absolute lter (5).
■ Let the absolute lter drop on the bottom of the bag (7).
■ Close the bag with the relevant clamps and cut.
■ Insert the new absolute lter (5) inside the new bag (7)
with the ange looking upwards.
■ Fasten the new bag (7) to the container (4) with the new
ring for bag (6).
■ Remove the old ring for bag (6) with the bag (7) from the
container (4) and move it to the lter ange.
■ Overturn the absolute lter (5) inside the bag (7) in order
to move to the bottom part of the bag the end part of the
old bag and the corresponding rubber ring.
■ Lift the absolute lter (5) from the bottom of the bag and
place it inside the container (4) then slightly tighten the
knob (3) so that the absolute lter (5) is supported.
■ Roll up the bag (7) in order to remove the air inside;
it must be as at as possible under the absolute lter
ange (5).
■ Fasten the absolute lter (5) by tightening the knob (3).
■ Loosen the knob (1), turn the arm (2) clockwise in order
to insert the container (4) in the machine, then lock the
arm (2) with the knob (1).
Downstream absolute lter replacement
WARNING!
Take care not to raise dust when this operation is
carried out. Wear a P3 mask and other protective
clothing plus protective gloves (DPI) suited to the
hazardous nature of the dust collected, refer to the
laws in force.
WARNING!
Do not use the absolute lter again after having
removed it from the vacuum cleaner.
Figure 19
1. Knob
2. Container
3. Absolute lter
WARNING!
Reassemble with care to avoid trapping your hands
between the vacuum unit and the container. Use
gloves that provide protection against mechanical
risks (EN 388) with a level of protection CAT. II.
Before proceeding with these operations, turn the vacuum
cleaner off and disconnect the plug from the power socket.
■ Unscrew the knob (1), and remove the cover (2).
■ Remove the absolute lter (3) and place it in a plastic
bag, close the bag hermetically and dispose of the lter
in accordance to the laws in force.
■ Insert a new absolute lter (3) with the same ltering
characteristics as the removed one.
■ Reinstall the cover (2) by fastening it with the knob (1).
Motor cooling fan inspection and cleaning
Periodically clean the motor cooling fan to prevent the motor
from overheating, especially if the device is used in a dusty
place.
Tightness inspection
Figure 20
Hoses check
Make sure that connecting hoses are in a good condition and
correctly xed.
If the hoses are damaged, broken or badly connected to the
unions, they must be replaced.
When sticky materials are treated, check for possible clogging
along the hose, in the inlet and on the bafe plate inside the
ltering chamber.
Scrape the inlet (1) from the outside and remove the
deposited waste as indicated in the gure.