GBA Service Manual
Page 12
2. Push the screen protector from the inside of the front case to eject it. Apply pressure
simultaneously on the four corners of the protector, or until one of the corners of the screen
protector get up and it is possible to hold and pull the protector until it is completely
removed.
3. Remove any old adhesive from the front case.
4. Reset the front screen trim. Gently press all the way around so they don't occur fold or
wrinkle problems.
Note: Prevent foreign materials from sticking to the trim before installation.
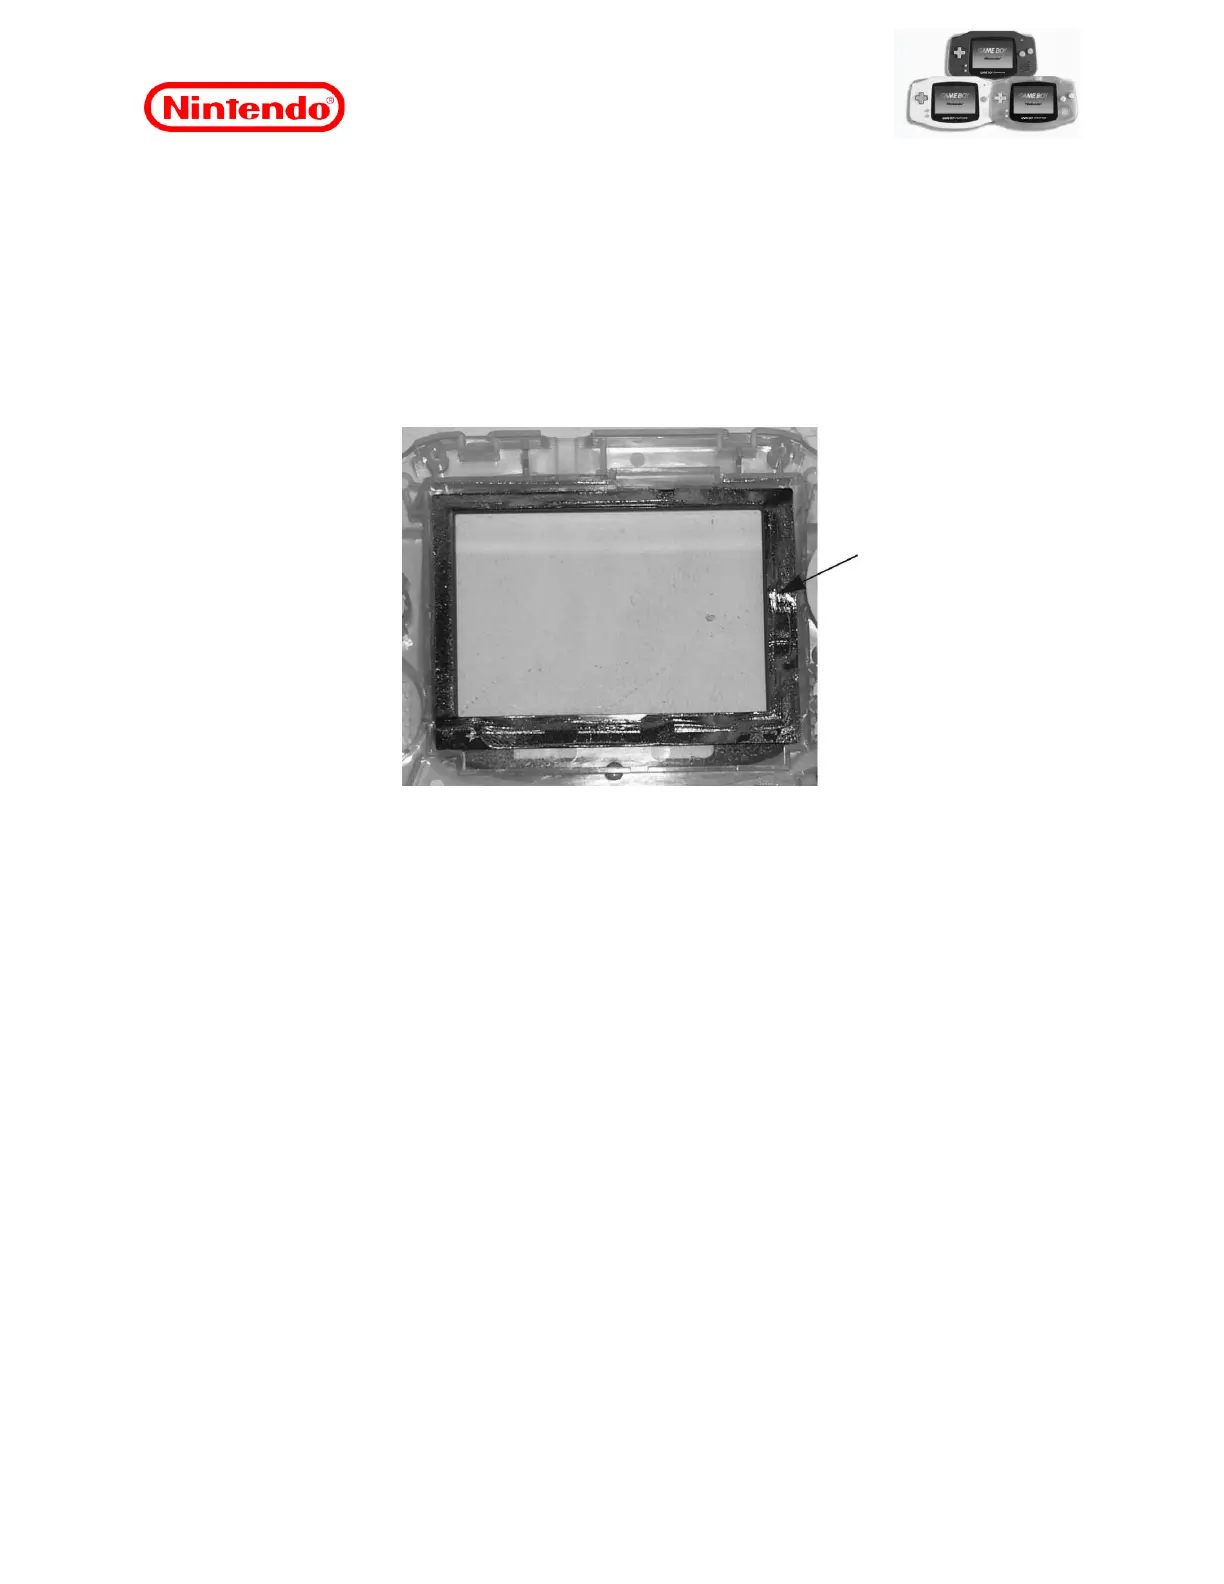
Figure 9
5.0 Use the lower right corner, seen from the rear as a reference, (see reference point in
section “5.3 Mounting the Front Panel” on page 6) when installing the LCD so that it is
correctly assembled.
Caution: The bottom frame on the LCD unit's installation frame is lower than the other three
sides. Be careful to prevent incorrect installation. The LCD can slide up the frame bottom. In
addition, the select / start buttons may be stuck in the unit's installation frame LCD. That is
why it is recommended to install the select / start buttons after the LCD and the backing
foam have been installed.
6. Carefully install LCD foam support, so that it is perfectly aligned with the LCD.
Note: When installing the LCD foam holder, completely cover the exposed glass part the
LCD.
 Loading...