GBA Service Manual
Page 11
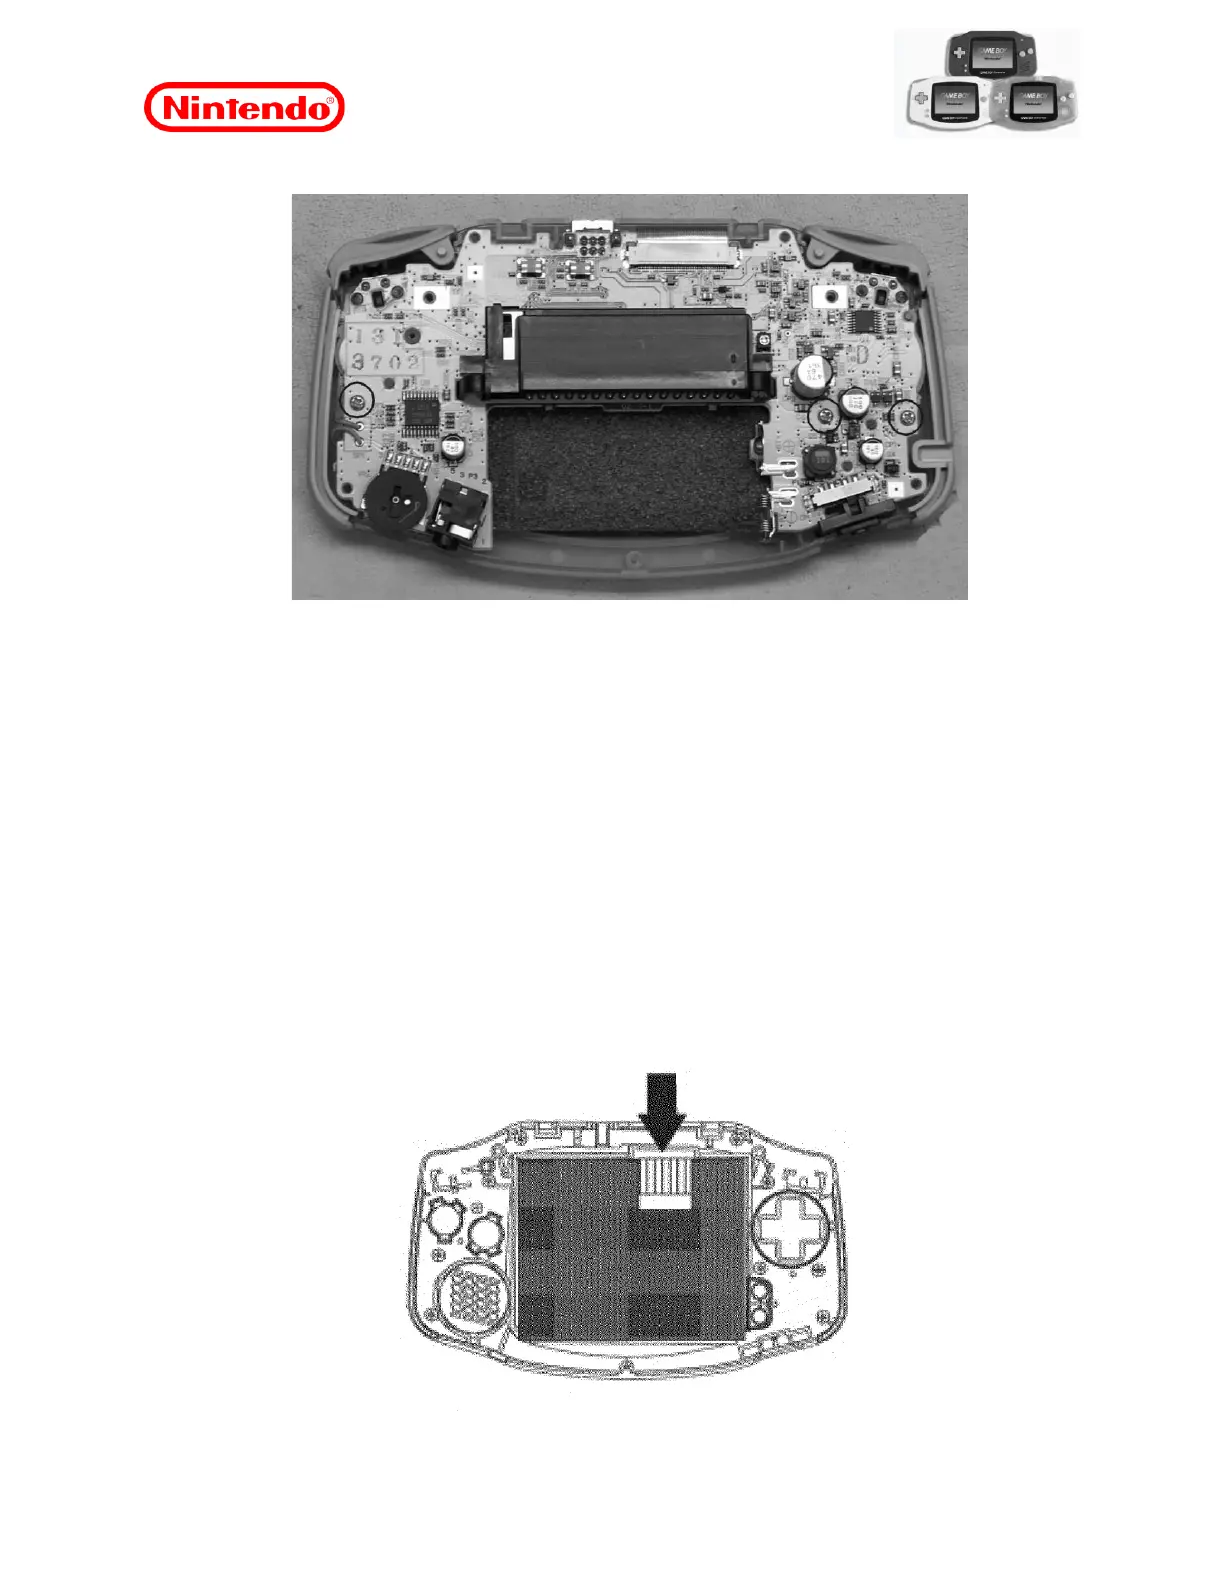
6. Remove the three Phillips screws that secure the PCI.
Figure 7
7. Lift and remove the PCI.
Note: If the rear case needs to be replaced, remember to keep the metal shield and install it
in the new rear case.
7.3 Replacing the LCD
To perform the replacement of the LCD, the procedure “7.2 Disassembling the Unit” must be
performed previously.
Note: When the LCD is replaced, the flicker adjustment must be performed as described in
the section
"8.3 Flicker Adjustment".
1. Gently insert a flat screwdriver or other flat-tipped tool between the trim of the front screen
and the opening of the LCD unit in the area under the flat cable, and then pry gently use the
key to separate the LCD from the front case.
Figure 8
 Loading...