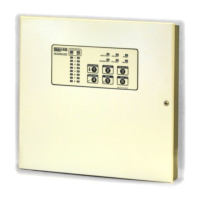
Noby-448 Installation & Programming Instructions (Rev.5) Page 2 of 12
GETTING STARTED
We strongly recommend that the Noby-448 is first powered up with all 4K7 End Of Line resistors fitted at the panel
as supplied by the factory. In this way you can gain confidence that the panel is operating correctly before
introducing detector and sounder circuits.
Power-Up With Battery
• Connect two 12v SLA batteries in series (+’ve to –‘ve) to form a 24 volt battery stack, using the
battery jumper link supplied.
• Connect the black battery lead to the battery stack –‘ve terminal.
• Connect the red battery lead to the battery stack +’ve terminal. It is normal to see a small spark.
• The Common Fault LED will be continuously lit together with flashing PSU and CPU fault LEDs.
These faults are also accompanied by an audible fault tone signified by 4 rapid pips every 4 seconds.
• Press [3][6][3][6] [1][4][5] to silence and perform a System Reset – observe 3 second LED test.
• The panel should then settle to quiescent state with all LEDs off.
• Connect the mains power supply to the fused screw terminal block
• The panel should now be in a standby state with only the green Power LED continuosly lit.
Power-Up With Mains
• Connect the mains power supply to the fused screw terminal block.
The green Power LED will be continuously lit.
The Common Fault LED will be continuously lit together with flashing PSU and CPU fault LEDs.
These faults are also accompanied by an audible fault tone signified by 4 rapid pips every 4 seconds.
• Connect two 12v SLA batteries in series (+’ve to –‘ve) to form a 24 volt battery stack, using the
battery jumper link supplied.
• Connect the black battery lead to the battery stack –‘ve terminal.
• Connect the red battery lead to the battery stack +’ve terminal. It is normal to see a small spark.
• Press [3][6][3][6] [1][4][5] to silence and perform a System Reset – observe 3 second LED test.
• The panel should now be in a standby state with only the green Power LED continuosly lit.
Notes
1. The panel will persist in reporting a PSU fault after a System Reset if the battery is either not present or the
battery fuse F7 has blown.
2. Whilst there is a measure of protection against accidental reverse connection of the battery, such action will
blow fuse F7 and may cause permanent damage to the panel.
Installing the Noby-448XT 4-Zone Extender Card (Optional)
• Disconnect the mains & battery power supplies prior to fitting the Noby-448XT.
IMPORTANT: Failure to heed this warning may damage the circuitry.
• Install the Noby-448XT into the cabinet using the 3 mounting pillars supplied.
• Connect the Noby-448XT to the Noby-448 Main PCB using the 10-way ribbon cable.
• All zone and sounder circuits must be terminated with a 4K7 EOL resistor (supplied).
• Restore the mains and battery power supplies to the panel.
• FINALLY . . . you must configure the panel software to recognise the Noby-448XT:
o Key [6][2][5][3] [3][5] to enter programming mode.
o Key [1] to Toggle the option - the yellow zone fault LED’s display the active zones.
o Key [4] to Accept and update the configuration option to E2PROM memory.
o Key [5] to Quit and revert back to normal standby mode without updating the E2PROM.
 Loading...