Do you have a question about the NOCO Genius G3500UK and is the answer not in the manual?
Prior to use, read and understand product safety information to avoid electrical shock, explosion, or fire.
Access comprehensive support at no.co/support or contact NOCO for personalized assistance via no.co/connect.
Find NOCO's phone number, email, and mailing address for customer inquiries and support.
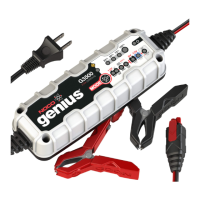
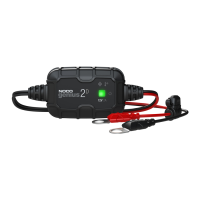
Learn about the advanced technology of the G3500, designed for various 12V lead-acid and lithium-ion batteries up to 120Ah.
Before charging, consult your battery's manual for specific precautions and to determine its voltage and chemistry.
Mount the charger using #6 self-drill screws, minding obstructions and noting the DC cable length is approximately 75 inches.
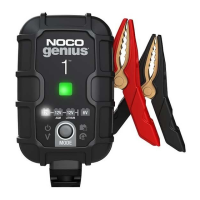
The G3500 features eight charging modes, some requiring a three-second press-and-hold to activate advanced functions.
This mode is for 6-volt lead-acid batteries only. Consult battery manufacturer before use.
Use this mode with care for 12V lithium-ion batteries. Consult manufacturer, especially regarding Battery Management Systems (BMS).
Advanced mode for repairing sulfated or damaged batteries; may take up to four hours and requires careful usage.
Caution: For 12V lead-acid only. High voltage may cause water loss in wet batteries or affect electronics. Disconnect battery first.
Connect DC cables first, identify terminal polarity (+/-), and avoid connecting to fuel lines or thin metal parts.
Verify battery, connections, and AC power. Select mode, observe LEDs, and confirm charging has started for maintenance.
Learn what the 25%, 50%, 75%, and 100% Charge LEDs indicate about the battery's state of charge.
The Maintenance Green LED indicates the battery is topped off and can be left connected indefinitely without overcharging.
Error conditions are indicated by the Error LED and Standby LED flashing back and forth, with flash counts denoting the issue.
Interpret error codes like single flash (won't hold charge) or solid red error LED (reverse polarity) for quick solutions.
Details on Memory, Interactive, Recovery, Safe, Fast, Compensation, Rugged, Compact, Start-Stop, and Firewall features.
Explore advanced features such as Optimization, Maintenance Plus, Energy Save, Load Tracking, Diagnostics, CANBUS, and Thermal Monitor.
Steps 1 & 2 involve checking the battery's initial condition, voltage, state-of-charge, and health.
Step 3 initiates the Recovery desulfation process for deeply discharged or sulfated batteries using pulsing current.
Step 4 begins the charging process with a gentle, soft charge.
Step 5 initiates Bulk charging, returning 80% of the battery's capacity.
Step 6 brings charge to 90% with small currents to limit gassing and prolong battery life.
Step 7 finalizes charging to maximum capacity, optimizing specific gravity for performance.
Step 8 continuously monitors the battery, restarting charging if voltage drops, to keep it at full charge safely.
Charging time depends on battery size (Ah) and depth of discharge (DOD), with estimates provided for reference.
Specifies input voltage (110-120 VAC) and working voltage range (85-130 VAC) with 50-60Hz frequency.
Details the charger's efficiency (85% Approx.) and maximum power consumption (60W Max).
Covers charging currents (3.5A, 0.9A) and low-voltage detection thresholds (2V for 12V and 6V).
Lists supported battery types (6V & 12V) and chemistries (Wet, Gel, MF, CA, EFB, AGM & LIB) up to 120Ah.
| Brand | NOCO Genius |
|---|---|
| Model | G3500UK |
| Category | Battery Charger |
| Language | English |