Do you have a question about the Noctua NH-D9L and is the answer not in the manual?
Guide to removing the mainboard from the case for backplate installation.
Positioning the backplate on the mainboard and aligning cut-outs.
Securing mounting bars using plastic spacers and thumb screws.
Choosing alignment for desired final cooler orientation.
Cleaning CPU and applying a small drop of thermal paste.
Attaching the heatsink to mounting bars and tightening screws.
Connecting the fan to the mainboard CPU fan header.
Optional connection of L.N.A. for reduced noise, with temperature caution.
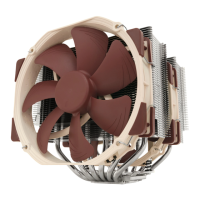
Installing a second fan for improved cooling performance.
Details on 6-year warranty, RMA service, and support contact.
Screwing bolts into the LGA2011 socket frame for mounting bars.
Placing mounting bars onto bolts and tightening with thumb screws.
Selecting alignment for desired final cooler orientation.
Cleaning CPU and applying a small drop of thermal paste.
Attaching the heatsink to mounting bars and tightening screws.
Connecting the fan to the mainboard CPU fan header.
Optional connection of L.N.A. for reduced noise, with temperature caution.
Installing a second fan for improved cooling performance.
Details on 6-year warranty, RMA service, and support contact.
Removing the existing retention module for cooler installation.
Attaching mounting bars to the mainboard using screws and spacers.
Choosing alignment for desired final cooler orientation.
Cleaning CPU and applying a small drop of thermal paste.
Attaching the heatsink to mounting bars and tightening screws.
Connecting the fan to the mainboard CPU fan header.
Optional connection of L.N.A. for reduced noise, with temperature caution.
Installing a second fan for improved cooling performance.
Details on 6-year warranty, RMA service, and support contact.
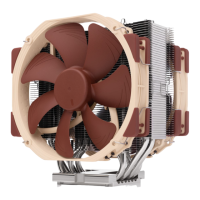
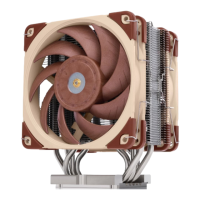
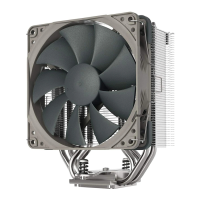
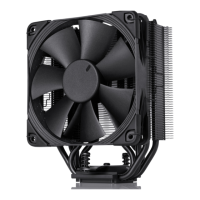
| Type | Cooler |
|---|---|
| Airflow | 78.9 m³/h |
| Fan diameter | 92 mm |
| Suitable location | Processor |
| Rotational speed (max) | 2000 RPM |
| Rotational speed (min) | 400 RPM |
| Noise level (low speed) | 16.3 dB |
| Noise level (high speed) | 22.8 dB |
| Compatible processor series | - |
| Supported processor sockets | Socket AM2, Socket AM2+, Socket AM3, Socket AM3+, Socket FM1, Socket FM2 |
| Mean time between failures (MTBF) | 150000 h |
| Material | Aluminium, Copper |
| Product color | Metallic |
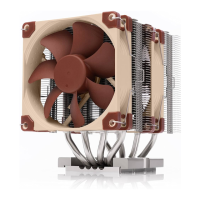
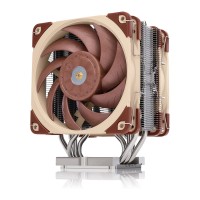
| Number of fans | 1 fan(s) |
| Voltage | 12 V |
| Power supply | 1.2 W |
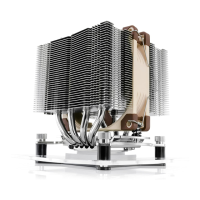
| Heatsink dimensions (W x D x H) | 95 x 95 x 110 mm |
| Harmonized System (HS) code | 84733080 |
| Width | 95 mm |
|---|---|
| Height | 110 mm |
| Weight | 531 g |
| Fan weight | 103 g |
| Fan thickness | 25 mm |
| Heatsink weight | 428 g |
| Fan dimensions (W x D x H) | 92 x 92 x 25 mm |