Do you have a question about the Noctua NH-U12S SE-AM4 and is the answer not in the manual?
Ensure correct orientation of NM-AMB6 (inward curve) and NM-AMB7 (outward curve) mounting bars.
Gently tighten screws until they stop, avoiding excessive force (max. 0.6 Nm).
Choose NM-AMB6 or NM-AMB7 bars based on desired cooler orientation.
Install NM-APS4 spacers and fix mounting bars with four long screws to the stock backplate.
Clean CPU residue. Apply a small drop (4-5mm) of NT-H1 thermal compound to the heatspreader center.
Applying excessive thermal paste reduces heat conductivity and cooling performance.
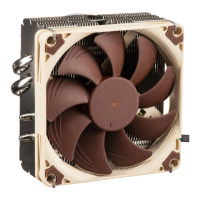
Remove the fan and protection cover from the heatsink bottom before installation.
Place heatsink onto CPU and screw it to the mounting bar threads.
Use supplied steel clips to reattach the fan to the heatsink.
Connect the fan to the mainboard's CPU fan header, option to use L.N.A.
Use extra clips and thick pads for second fan; use y-cable for speed control.
Use self-adhesive strips for non-Noctua fans to prevent vibrations.
Remove fan to reduce weight (below 700g) for safety during transport.
Offers a 6-year warranty and direct RMA service for reliability.
Contact support@noctua.at for problems or visit www.noctua.at/faqs.
| Type | Cooler |
|---|---|
| Airflow | 93.4 m³/h |
| Fan diameter | - mm |
| Suitable location | Processor |
| Maximum air pressure | 2.61 mmH2O |
| Airflow with LNA (max) | 74.3 m³/h |
| Rotational speed (max) | 1500 RPM |
| Rotational speed (min) | 300 RPM |
| Noise level (high speed) | 22.4 dB |
| Noise level with LNA (max) | 18.6 dB |
| Compatible processor series | - |
| Supported processor sockets | Socket AM4 |
| Rotational speed with LNA (max) | 1200 RPM |
| Mean time between failures (MTBF) | 150000 h |
| Pulse-width modulation (PWM) support | Yes |
| Material | Aluminium, Copper, Nickel |
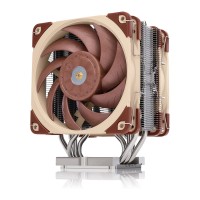
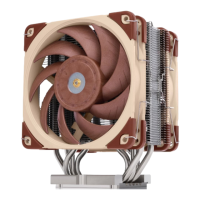
| Product color | Beige, Brown, Stainless steel |
| Voltage | 12 V |
| Power supply | 0.6 W |
| Harmonized System (HS) code | 84733080 |
| Depth | 71 mm |
|---|---|
| Width | 125 mm |
| Height | 158 mm |
| Weight | 755 g |
| Fan dimensions (W x D x H) | 120 x 25 x 120 mm |