Do you have a question about the Noctua NH-U14S DX-4677 and is the answer not in the manual?
Turn the heatsink upside down and carefully place it onto the heatpipe tips to secure it without bending fins.
Carefully remove the plastic protection cover from the heatsink base, being cautious not to damage the pre-applied thermal compound.
Reattach the fans using supplied clips and connect them to the motherboard's CPU fan headers.
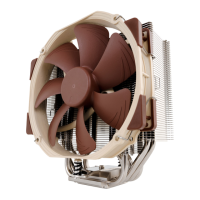
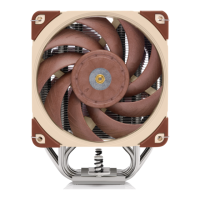
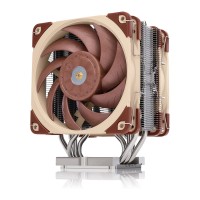
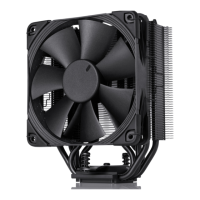
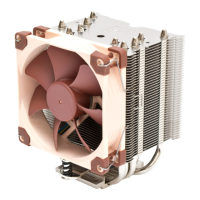
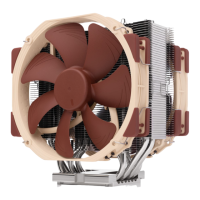
The Noctua NH-U14S DX-4677 is a high-performance quiet cooling solution specifically designed for Intel Xeon processors, aimed at enthusiasts and professionals seeking superior thermal management for their systems. This cooler is part of Noctua's DX line, known for its robust design and exceptional cooling capabilities. The installation process is guided by a comprehensive manual, ensuring a smooth setup for users.
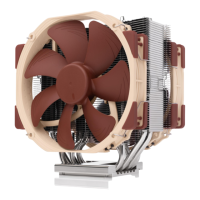
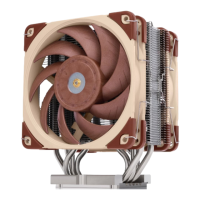
The primary function of the NH-U14S DX-4677 is to efficiently dissipate heat generated by Intel Xeon processors, thereby maintaining optimal operating temperatures and preventing thermal throttling. This is crucial for systems running demanding applications, servers, or workstations where sustained high performance is essential. The cooler achieves this through a combination of a large heatsink and two high-performance fans, working in conjunction to maximize heat transfer and airflow. The design is optimized to provide quiet operation, making it suitable for environments where noise levels are a concern. The cooler is designed to integrate with the Intel LGA4677 socket, requiring a specific plastic CPU carrier frame for proper installation. This carrier frame, which comes with boxed retail CPUs or can be purchased separately for tray-type CPUs, is vital for securely mounting the processor and heatsink assembly to the motherboard. The manual emphasizes the importance of using the correct carrier frame type (E1A, E1B, or E1C) corresponding to the specific CPU, ensuring a precise and secure fit.
The NH-U14S DX-4677 is designed for straightforward installation, guided by the SecuFirm2™ mounting system. The process begins with removing the fans from the heatsink using the supplied fan clips, which simplifies the subsequent steps of attaching the heatsink to the CPU. The manual directs users to follow Intel's official installation guidelines for attaching the CPU carrier frame to the heatsink, inserting the CPU into the carrier frame, and then installing the entire CPU/heatsink assembly into the socket. This ensures adherence to manufacturer-recommended procedures for handling sensitive components. A key step highlighted is turning the heatsink upside down when attaching the CPU carrier frame, allowing the base to face upwards. This position facilitates careful placement onto the heatpipes and secure handling to prevent tilting or bending of the fins.
Before installation, users are advised to remove the plastic protection cover from the heatsink's base, taking care not to damage the pre-applied thermal compound layer. This pre-applied compound simplifies the initial setup, eliminating the need for users to apply their own thermal paste for the first time. However, for subsequent installations or if the heatsink has been used before, the manual instructs users to apply a thin layer of thermal compound to the CPU themselves. This ensures optimal thermal conductivity between the CPU and the heatsink. The final step involves reattaching the fans to the heatsink using the provided fan clips and connecting them to the motherboard's CPU fan headers. This completes the physical installation, preparing the system for operation.
The manual also provides crucial pre-installation checks to ensure compatibility and prevent potential issues. Users are urged to consult Noctua's compatibility center on their website (ncc.noctua.at) to verify full compatibility with their motherboard. Additionally, it's important to ensure that the PC case offers sufficient clearance for the cooler and that there are no compatibility issues with other components, such as tall RAM modules. Users should also double-check that the heatsink and fan clips do not make contact with the VGA card, other PCIe cards, motherboard heatsinks, or any other components. These precautions are vital to avoid damage and ensure proper functionality.
Maintaining the NH-U14S DX-4677 involves several considerations to ensure its long-term performance and reliability. For users who are not installing the heatsink for the first time, or if the pre-applied thermal compound is no longer fresh, it is necessary to apply a new layer of thermal compound to the CPU. The manual specifically advises cleaning off any residual traces of previous thermal paste or thermal pads from both the CPU and the heatsink before applying new compound. This ensures a clean surface for optimal thermal transfer and prevents degradation of cooling performance over time.
When it comes to transporting a system with the NH-U14S DX-4677 installed, the manual strongly recommends removing the cooler for safety reasons. This is because it's impossible to reliably calculate or control the forces that act upon a system during transport (e.g., in shipping), and excessive stress could lead to damage. Noctua explicitly states that it cannot be held responsible for any damage arising from excessive stress during transport if the heatsink remains installed. This recommendation underscores the importance of preventive measures to protect both the cooler and other system components.
For removing the heatsink from the socket and the CPU from the heatsink, users are directed to follow the official Intel guidelines. This ensures that the disassembly process is performed correctly, minimizing the risk of damage to the CPU, socket, or heatsink.
Noctua stands behind the quality of its products, offering a warranty period of 6 years and direct, fast, and straightforward RMA service. This commitment to customer support ensures that users can rely on assistance if they encounter any problems with their NH-U14S DX-4677. Users are encouraged to consult the FAQ section on Noctua's website (www.noctua.at/faqs) for common issues and solutions, and to contact the support team at support@noctua.at for any difficulties. This comprehensive support system aims to provide the highest possible level of reliability and convenience for users throughout the product's lifespan.
| Type | Air cooler |
|---|---|
| Airflow | 140.2 m³/h |
| Bearing type | Self-Stabilising Oil-pressure Bearing (SSO) |
| Fan diameter | 140 mm |
| Suitable location | Processor |
| Rotational speed (max) | 1599 RPM |
| Noise level (high speed) | 24.6 dB |
| Compatible processor series | Intel Xeon W |
| Supported processor sockets | LGA 4677 (Socket E) |
| Fan 2 rotational speed (max) | 1500 RPM |
| Fan 2 rotational speed (min) | 300 RPM |
| Fan connector | 4-pin |
| Product color | Brown, Light brown, Silver |
| Number of fans | 2 fan(s) |
| Radiator material | Aluminum |
| Base plate material | Copper |
| Number of heat pipes | 6 |
| Fan voltage | 12 V |
| Fan power consumption | 1.56 W |
| Depth | 111 mm |
|---|---|
| Weight | 1136 g |
| Radiator depth | 52 mm |
| Radiator width | 150 mm |
| Radiator height | 165 mm |