Do you have a question about the Noctua NH-U12A and is the answer not in the manual?
Prepare for cooler installation by removing the motherboard if the case lacks a rear cut-out.
Install the Noctua backplate onto the motherboard, ensuring correct alignment with mounting holes.
Attach mounting bars to the backplate using plastic spacers and screws, aligning for desired orientation.
Clean the CPU surface and apply a small drop of thermal paste to the center of the heatspreader.
Mount the heatsink onto the CPU and secure it to the mounting bars by tightening screws sequentially.
Attach fans using clips and connect them to the motherboard's CPU fan header, optionally using adaptors.
Information on the 6-year warranty, contact details for support, and frequently asked questions.
Recommendation to remove the cooler for safety during system transport to prevent damage.
Screw LGA20xx bolts into the socket frame and attach mounting bars using thumb screws.
Prepare the CPU by cleaning and applying thermal paste before heatsink installation.
Mount the heatsink onto the CPU and secure it to the mounting bars using the provided screws.
Attach fans and connect them to the motherboard, utilizing adaptors for noise reduction if needed.
Advice on removing the cooler before transporting the system to prevent potential damage.
Details on warranty, customer support contact, and common questions for LGA20xx users.
Remove existing retention module and install the AMD backplate, or install if none present.
Select correct spacers and holes on mounting bars for AM4 or AM2+/AM3+/FM1/FM2+ sockets.
Clean CPU and apply thermal paste to the center of the heatspreader for optimal heat transfer.
Mount the heatsink and screw it onto the mounting bars, tightening screws evenly.
Attach fans using clips and connect to CPU fan header, with options for noise reduction adaptors.
Recommended to remove the cooler before transport to prevent damage from undue stress.
Information regarding warranty, customer support, and common questions for AMD installations.
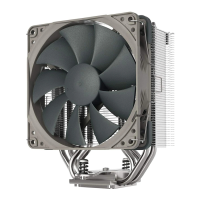
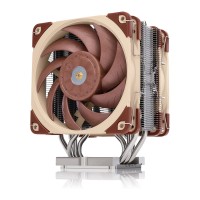
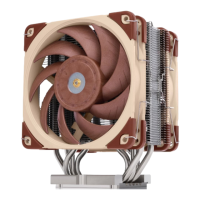
| Type | Cooler |
|---|---|
| Airflow | 102.1 m³/h |
| Bearing type | Self-Stabilising Oil-pressure (SSO) bearing |
| Fan diameter | 120 mm |
| Quantity per pack | 1 pc(s) |
| Suitable location | Processor |
| Maximum air pressure | 2.34 mmH2O |
| Minimum air pressure | 1.65 mmH2O |
| Rotational speed (max) | 2000 RPM |
| Rotational speed (min) | 450 RPM |
| Noise level (low speed) | 18.8 dB |
| Noise level (high speed) | 22.6 dB |
| Compatible processor series | - |
| Supported processor sockets | LGA 1150 (Socket H3), LGA 1151 (Socket H4), LGA 1155 (Socket H2), LGA 1156 (Socket H), LGA 1200 (Socket H5), LGA 2011 (Socket R), LGA 2066, Socket AM2, Socket AM2+, Socket AM3, Socket AM3+, Socket AM4, Socket FM1, Socket FM2, Socket FM2+ |
| Mean time between failures (MTBF) | 150000 h |
| Pulse-width modulation (PWM) support | Yes |
| Cables included | Fan |
| Fan connector | 4-pin |
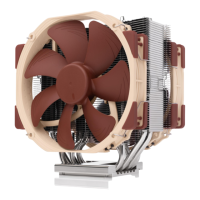
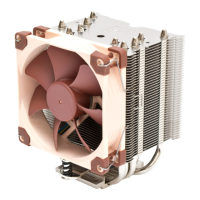
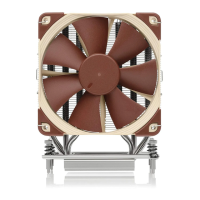
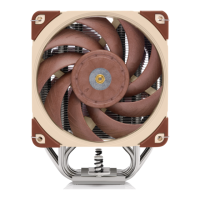
| Product color | Beige, Brown, Silver |
| Number of fans | 2 fan(s) |
| Radiator material | Aluminum |
| Base plate material | Copper |
| Number of fan blades | 9 |
| Rated voltage | 12 V |
| Harmonized System (HS) code | 84733080 |
| Depth | 112 mm |
|---|---|
| Width | 125 mm |
| Height | 158 mm |
| Weight | 1220 g |
| Fan dimensions (W x D x H) | 120 x 120 x 25 mm |