Training and Vendor Development
CMO Operations & Logistics
Multimedia Creation & Support CONFIDENTIAL
12.Sept.2007
13
Service Manual 5500 d RM-86 Copyright © 2006-2007 NOKIA Corporation. All rights reserved.
Approved 4.0
MGR
Page
(20)
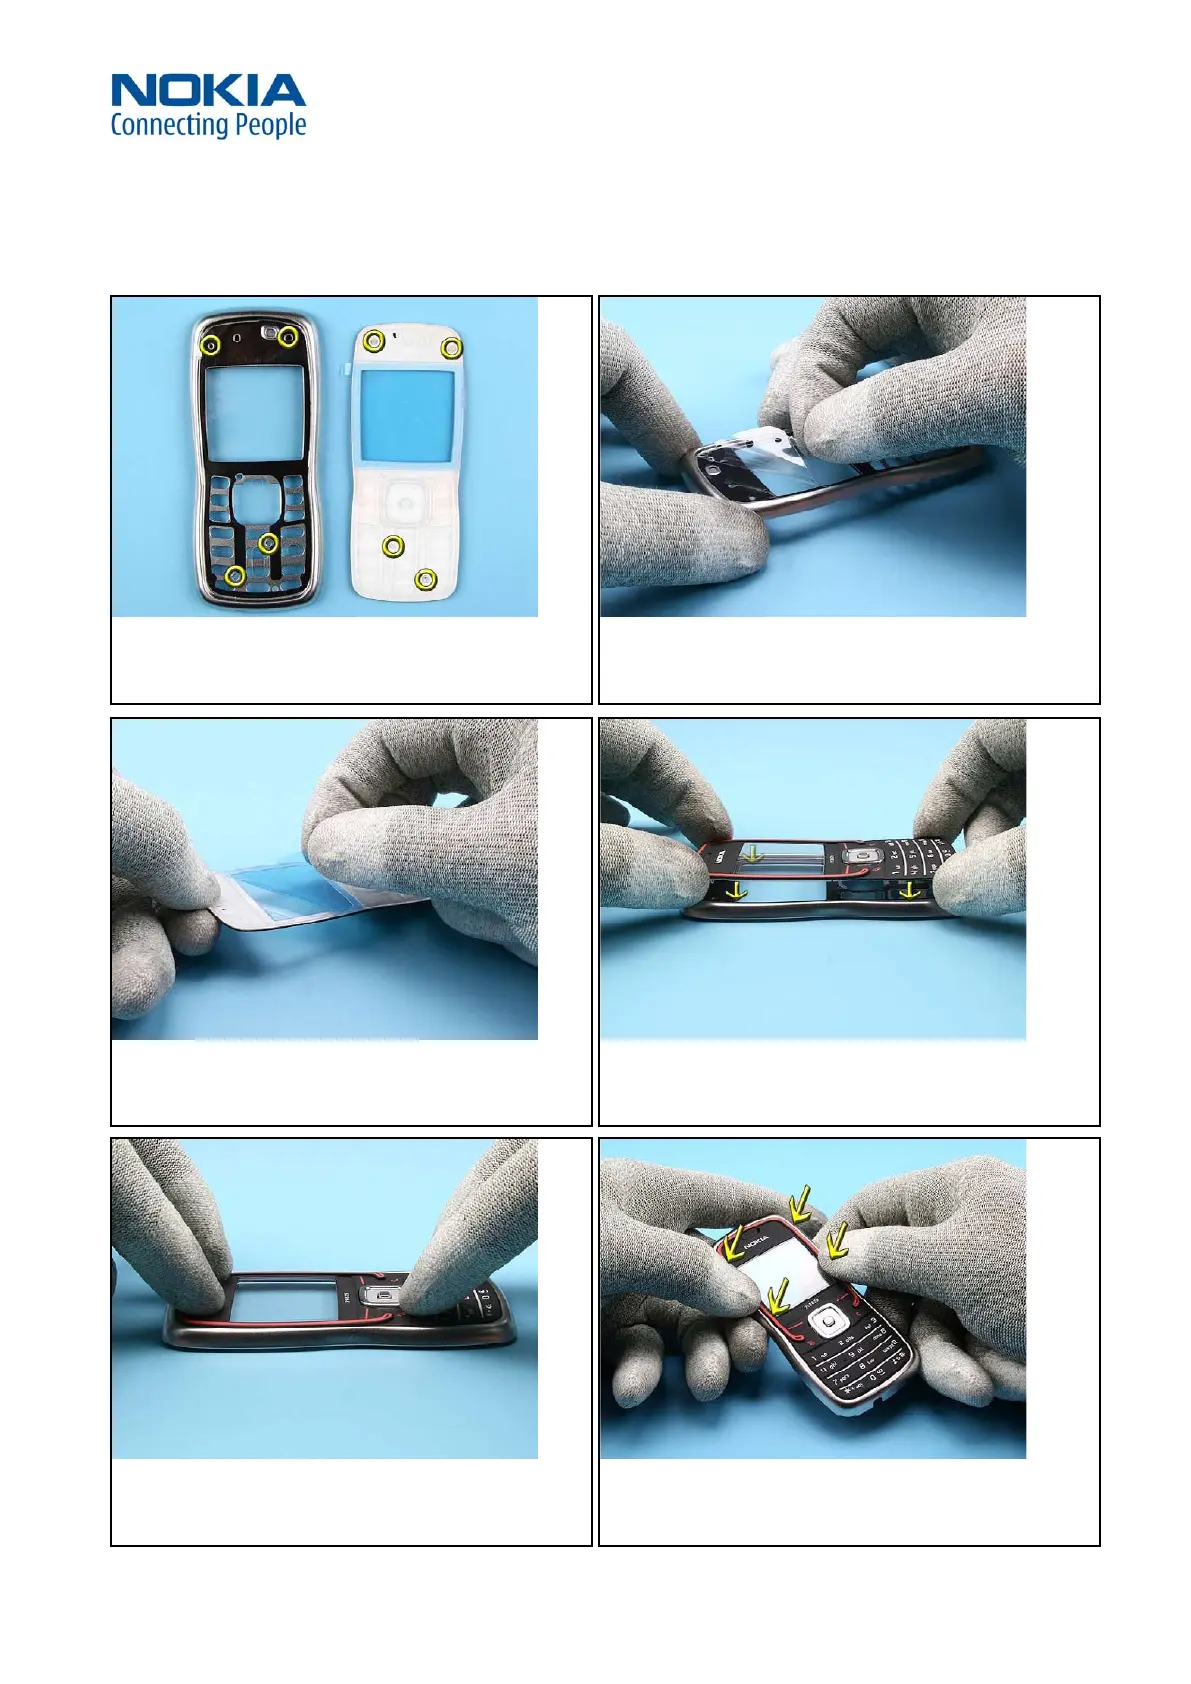
1. Note the holes in the A-COVER METAL FRAME (left pic.) and
the guide pins on the back of the KEYMAT (right pic.).
2. Remove the protective lm from the A-COVER METAL FRAME.
3. Remove the protective lm from the KEYMAT.
4. Hold the KEYMAT horizontally over the A-COVER METAL FRAME
and align the four guide pins on the KEYMAT with the four holes
in the A-COVER METAL FRAME.
5. Press down the KEYMAT on the A-COVER METAL FRAME.
6. Ensure that the KEYMAT is also glued correctly around the
window area.
ASSEMBLY INSTRUCTION - KEYMAT7.