L1L2 Service Manual
Co nf id e nt ial | Cop yright © 2011 Nokia | A ll rights reserved
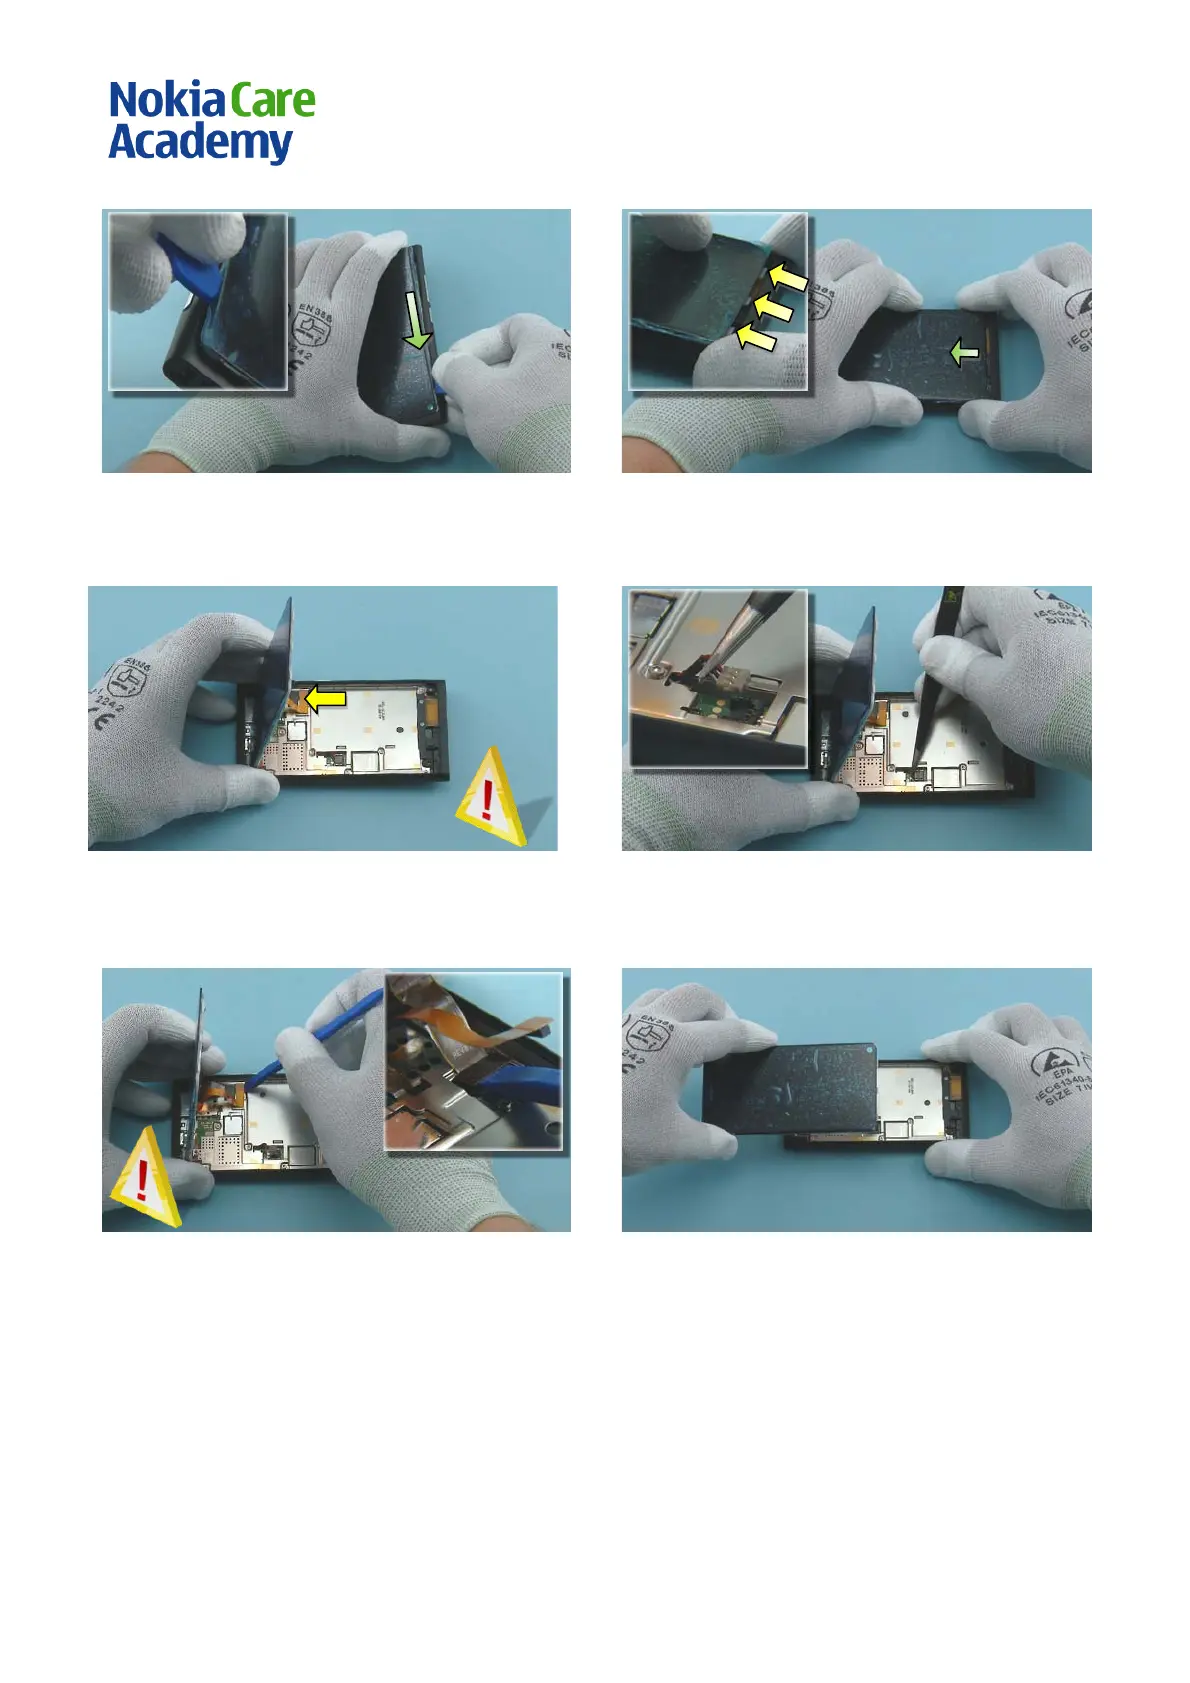
13) Use the SRT-6 to open the right side of the
DI SPLAY ASSE MBLY.
14) Slightly pull the DI SPLAY ASSE MBLY to direc tion
shown to release the three remaining clips.
15) Turn the DISPLAY ASSEMBLY over. Be careful not
to damage the connectors underneath the DI SPLAY
ASS EMBLY.
16) Disconnect the BATTERY with the tweezers to
avoid short circuit.
17) Use the SS-93 to disconnect the two DISPLAY
ASSEMBLY connectors. Be careful not to damage the
connectors or any nearby components.
18) Remove the DISPLAY ASSEMBLY.
 Loading...