Do you have a question about the Nokia TA-1012 DS and is the answer not in the manual?
Use the provided tray opener to access the SIM and memory card tray.
Place nano-SIMs or memory card into the designated slots on the tray.
Slide the SIM and memory card trays back into the device slots.
Plug a compatible charger into a wall outlet and connect the cable to your phone.
Charge if discharged, then press and hold power key to switch on.
Device supports GSM, HSPA, and LTE networks. Check service provider for 4G/LTE support.
Device has an internal, non-removable battery. Replace via authorized service facility.
5150-5350 MHz range restricted to indoor use in specific European countries.
Device meets CE guidelines for radio wave exposure with SAR limit of 2.0 W/kg.
Device meets FCC guidelines with SAR limit of 1.6 W/kg for ear and body-worn.
Product complies with essential requirements of Directive 2014/53/EU.
Device complies with FCC Part 15 and IC license-exempt standards.
| Network | GSM / HSPA / LTE |
|---|---|
| 2G bands | GSM 850 / 900 / 1800 / 1900 - SIM 1 & SIM 2 |
| 3G bands | HSDPA 850 / 900 / 1900 / 2100 |
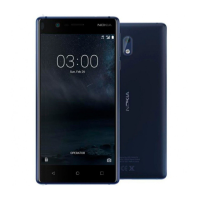
| Model | TA-1012 DS |
| Speed | HSPA |
| Weight | 160 g |
| SIM | Dual SIM (dual stand-by) |
| Display Type | IPS LCD |
| OS | Android 7.1.1 (Nougat) |
| Memory Card slot | microSDXC |