EasyManua.ls Logo

Nokia TA-1032 - User Manual

Nokia TA-1032
2 pages
Print Icon
To Next Page IconTo Next Page
Loading...
Get started
Nokia 3
USB micro-B USB-C
XXXXXXXXXXX
TA-1020/TA-1032 EN 1.0
Plug a compatible charger into a wall outlet,
andconnect the cable to your phone. Your phone
supports the USB micro-B cable. You can also
charge your phone from a computer with a USB
cable, butit may take a longer time.
If the battery is completely discharged, it may take
several minutes before the charging indicator is
displayed.
To switch your phone on, press and hold the power
key
until the phone vibrates. The phone guides
you through the setup.
1. Open the SIM tray and memory card tray by
putting the provided tray opener into the holes
next to the trays.
2. Put the nano-SIM into the slot 1 located on the
tray with the contact area face down. If you have
a second SIM, put it into the slot 2. If you have a
memory card, put the card into the slot located on
the memory card tray.
3. Slide the SIM and memory card trays back into
the slots.
Use only original nano-SIM cards. Use of
incompatible SIM cards may damage the card or the
device, and may corrupt data stored on the card.
For a printable user guide, online user guide,
andtroubleshooting help, go to www.nokia.com/
phones.
1. Insert the SIM
and memory card
2. Charge the battery
and switch your phone on
3. Learn more about
your new Nokia
BARCODE
Front camera
Power/Lock key
Volume keys
Microphone
Microphone
Audio connector
Charger connector
Home
Earpiece
SIM cards
MicroSD card
Loudspeaker
Main camera
Question and Answer IconNeed help?

Do you have a question about the Nokia TA-1032 and is the answer not in the manual?

Summary

Insert SIM and Memory Card

SIM and Memory Card Insertion

Instructions for inserting nano-SIM cards and memory cards into the device.

Charge Battery and Switch On Phone

Charging and Powering On

Steps for charging the battery and powering on the new Nokia phone.

Learn More About Your New Nokia

Accessing Online Support and Guides

Information on finding printable user guides, online guides, and troubleshooting help.

Product and Safety Info

Important Product and Safety Information

Covers essential info on safe device use, network compatibility, and power management.

Network Compatibility and Restrictions

Details on supported networks and specific frequency band restrictions for certain countries.

Copyrights and Other Notices

Declaration of Conformity

Statement of product compliance with EU essential requirements and directives.

FCC Notice and RF Safety

FCC compliance, interference guidelines, and radio frequency safety information.

SAR Certification Information

European RF Exposure Guidelines

Specific Absorption Rate (SAR) limits and testing information for European regions.

FCC RF Exposure Guidelines

Specific Absorption Rate (SAR) limits and testing information for the US market.

Overview

This document describes the Nokia 3, a mobile device designed for communication and various other functions. It provides instructions on how to get started with the device, including inserting SIM and memory cards, charging the battery, and switching the phone on. It also offers information on product safety, regulatory compliance, and SAR certification.

Device Overview

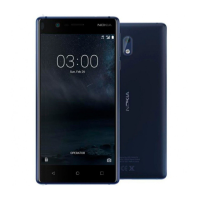
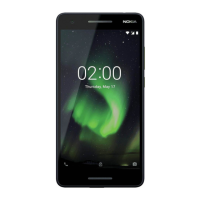
The Nokia 3 features a classic smartphone design with a front camera, earpiece, and various sensors on the front. The main camera is located on the rear. Physical controls include volume keys and a power/lock key on the side. Connectivity options include an audio connector, a charger connector (USB micro-B), and a loudspeaker. The device supports nano-SIM cards and microSD cards for expandable storage.

Getting Started

Inserting SIM and Memory Cards

To begin using the Nokia 3, you need to insert your SIM card(s) and optionally a memory card. The device comes with a provided tray opener, which is essential for this process.

  1. Open the Trays: Locate the small holes next to the SIM tray and memory card tray. Insert the provided tray opener into these holes to eject the trays.
  2. Insert SIM Cards: Place your nano-SIM card into slot 1 on the tray, ensuring the contact area faces downwards. If you have a second SIM card, insert it into slot 2. The device is designed to work with original nano-SIM cards only; using incompatible SIM cards may damage the card or the device and corrupt stored data.
  3. Insert Memory Card: If you wish to expand the device's storage, place your microSD card into the dedicated slot on the memory card tray.
  4. Close the Trays: Once the cards are in place, carefully slide the SIM and memory card trays back into their respective slots until they are flush with the device's body.

Charging the Battery and Switching On

The Nokia 3 is equipped with an internal, non-removable rechargeable battery. It is crucial to charge the device before its first use or when the battery is depleted.

  1. Connect the Charger: Plug a compatible charger into a wall outlet. The Nokia 3 supports a USB micro-B cable. Connect the cable to the charger connector on your phone. While it is possible to charge the phone from a computer using a USB cable, this method may take longer.
  2. Charging Indicator: If the battery is completely discharged, it may take a few minutes for the charging indicator to appear on the screen.
  3. Switch On: To power on your device, press and hold the power key until the phone vibrates. The device will then guide you through the initial setup process.

Usage Features

Network Connectivity

The Nokia 3 supports various network types, including GSM 850/900/1800/1900, WCDMA 1/2/5/8, and LTE 1/3/5/7/8/20/28/38/40. It requires a subscription with a service provider to function.

  • 4G/LTE Support: It's important to note that 4G/LTE might not be supported by all network service providers or when roaming. In such cases, you might experience limitations in making/receiving calls, sending/receiving messages, or using mobile data. To ensure seamless operation when full 4G/LTE service is unavailable, it is recommended to adjust the preferred network type from 4G to 3G via the device's settings (Settings > Mobile networks > Preferred network type > 2G/3G). For further details, contact your network service provider.

Wireless Technologies

The device incorporates several wireless technologies for connectivity:

  • Bluetooth: Supports Bluetooth for short-range wireless communication with other devices.
  • WLAN: Supports Wi-Fi connectivity on both 2.4 GHz and 5 GHz bands. For certain regions, the device is restricted to indoor use only when operating in the 5150 to 5350 MHz frequency range.
  • NFC: Includes Near Field Communication for short-range interactions, such as contactless payments or quick pairing with compatible devices.

Camera Functionality

The Nokia 3 is equipped with both a main camera and a front camera, allowing for photography and video recording. When using the flash, it is advised to maintain a safe distance and avoid using it on people or animals at close range. Do not cover the flash when taking photos to ensure optimal lighting.

Maintenance Features

Battery Replacement

The device's battery is internal and non-removable. Attempting to remove it yourself may damage the device. For battery replacement, it is recommended to take the device to the nearest authorized service facility.

Memory Card Usage

The device supports compatible memory cards to expand storage. Using incompatible cards may damage the card, the device, and corrupt stored data. It is important to use only approved memory cards.

Software and Apps

Pre-installed system software and applications consume a significant portion of the device's memory space. This is a standard characteristic of modern smartphones.

Regulatory and Safety Information

The Nokia 3 complies with various international and regional safety guidelines.

  • Electronic Label: Certification information is available as an electronic label within the device's settings (Settings > About Phone > Certification).
  • Declaration of Conformity: HMD Global Oy declares that this product complies with the essential requirements and other relevant provisions of Directive 2014/53/EU. A copy of the Declaration of Conformity can be found online.
  • FCC Notice: The device complies with part 15 of the FCC rules, ensuring it does not cause harmful interference and accepts any received interference. Any unauthorized modifications could void the user's authority to operate the equipment. The device has been tested and found to comply with Class B digital device limits, designed to provide reasonable protection against harmful interference in residential installations. If interference occurs, users are advised to try reorienting the receiving antenna, increasing separation between equipment and receiver, connecting to a different circuit outlet, or consulting a technician.
  • SAR Certification: The device meets guidelines for exposure to radio waves as set forth by the Council of Europe (CE) and the Federal Communications Commission (FCC). The Specific Absorption Rate (SAR) limit for mobile devices in Europe is 2.0 W/kg, and for the FCC, it is 1.6 W/kg. The highest SAR values for this device, when tested at the ear and on the body (at a separation distance of 0.5 cm for CE and 1.5 cm for FCC), are provided in the documentation. To maintain compliance with RF exposure guidelines for body-worn operation, it is recommended to use accessories that maintain the specified separation distance and do not contain metallic components. SAR information is available on the FCC website.
  • RF Exposure: The World Health Organization (WHO) states that current scientific information does not indicate the need for special precautions when using mobile devices. For those interested in reducing exposure, limiting usage or using a hands-free kit is recommended.

Additional Information

For a printable user guide, online user guide, and troubleshooting help, users can visit the Nokia website at www.nokia.com/phones. The device's surface is nickel-free.

Nokia TA-1032 Specifications

General IconGeneral
Network TechnologyGSM / HSPA / LTE
Announced2017, February
StatusAvailable. Released 2017, June
SIMSingle SIM (Nano-SIM) or Dual SIM (Nano-SIM, dual stand-by)
Display TypeIPS LCD
ProtectionCorning Gorilla Glass 3
Operating SystemAndroid 7.0 (Nougat), upgradable to Android 9.0 (Pie)
GPUMali-T720MP1
Card slotmicroSDXC (dedicated slot)
Main Camera Video720p@30fps
LoudspeakerYes
3.5mm jackYes
WLANWi-Fi 802.11 b/g/n, hotspot
GPSYes, with A-GPS
NFCYes
RadioFM radio
USBmicroUSB 2.0, USB On-The-Go
ModelTA-1032
BuildAluminum frame, plastic back
Resolution720 x 1280 pixels
ChipsetMediatek MT6737
Internal Storage16GB 2GB RAM
Main Camera8 MP, AF
Main Camera FeaturesLED flash
Selfie Camera8 MP, f/2.0
Bluetooth4.0, A2DP
SensorsAccelerometer, proximity, compass
BatteryNon-removable Li-Ion 2630 mAh battery
ColorsMatte Black, Copper
Display Size5.0 inches

Videos

How to Hard Reset Nokia TA-1032 Nokia 3 Pin Pattern Password Lock Remove

How to Hard Reset Nokia TA-1032 Nokia 3 Pin Pattern Password Lock Remove

Related product manuals