Do you have a question about the Nokia TA-1024 and is the answer not in the manual?
Instructions for opening the SIM tray and inserting nano-SIM and memory cards into the correct slots.
Warning against using incompatible SIM cards, which may damage the device or corrupt data.
Guide on charging the phone via wall outlet or computer and switching the device on.
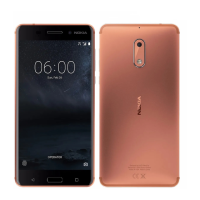
This document describes the Nokia 5, a mobile device designed for communication and various smart functionalities. It covers initial setup, charging, and important safety and regulatory information.
The Nokia 5 is a smartphone equipped with a main camera, front camera, loudspeaker, microphone, and an earpiece for calls. It features a charger connector for power and data transfer, and an audio connector for headphones. The device supports SIM cards for cellular connectivity and microSD cards for expandable storage. Navigation and interaction are facilitated by a home button, volume keys, and a power/lock key. The device operates on various GSM, WCDMA, and LTE networks, providing comprehensive mobile communication capabilities. It includes an internal, non-removable, rechargeable battery.
Initial Setup: To begin using the Nokia 5, users must first insert their SIM and memory cards. This involves opening the SIM tray and memory card tray using the provided tray opener. Nano-SIM cards are placed into designated slots (slot 1 and optionally slot 2 for a second SIM), with the contact area facing down. A memory card is inserted into its dedicated slot on the memory card tray. After insertion, the trays are slid back into the device. It is crucial to use only original nano-SIM cards to prevent damage to the card or device and to avoid data corruption.
Charging and Powering On: The device is charged by plugging a compatible charger into a wall outlet and connecting the cable to the phone's USB micro-B port. While charging from a computer via a USB cable is possible, it may take longer. If the battery is completely discharged, the charging indicator may take several minutes to appear. To power on the phone, the user presses and holds the power key until the device vibrates, after which it guides them through the initial setup process.
Network Connectivity: The Nokia 5 supports GSM, WCDMA, and LTE networks. Users should be aware that 4G/LTE support may vary depending on their network service provider or when traveling. In cases where full 4G/LTE service is unavailable, it is recommended to change the preferred network type to 2G/3G via the device settings (Settings > Mobile networks > Preferred network type).
Safety and Regulatory Information: The device adheres to guidelines for exposure to radio waves, as set forth by the Council of Europe (CE) and the Federal Communications Commission (FCC). Users are advised to maintain a safe distance when using the flash and avoid covering it during photo-taking. The device is restricted to indoor use only when operating in the 5150 to 5350 MHz frequency range in certain European countries. For body-worn operations, a separation distance of 1.5 cm from the body should be maintained, especially when using accessories without metallic components, to comply with RF exposure requirements.
General Use: The device includes pre-installed system software and applications that consume a significant portion of memory space. For sending data or messages, a stable network connection is required; transmission may be delayed until such a connection is established. During general use, the operating power of the mobile device is automatically adjusted to minimize interference and optimize system efficiency, resulting in SAR values typically well below the maximum stated limits.
Battery Replacement: The Nokia 5 has an internal, non-removable, rechargeable battery. Users should not attempt to remove the battery themselves to avoid damaging the device. For battery replacement, the device should be taken to the nearest authorized service facility.
Accessory Compatibility: The device is designed to be charged with specific charger models (e.g., FC0100, FC0101, FC0102, FC0103, FC0111) depending on the region. While HMD Global may offer additional battery or charger models, third-party chargers that comply with applicable USB requirements and connect to the device's USB connector may also be compatible. Only compatible memory cards approved for use with the device should be used to prevent damage and data corruption.
Software and Updates: The device's electronic label provides certification information, accessible via Settings > About > Certification. This allows users to verify compliance with relevant standards. For comprehensive user guides, online support, and troubleshooting assistance, users can visit the official Nokia website (www.nokia.com/phones). The World Health Organization (WHO) suggests limiting usage or using hands-free kits to reduce exposure to radio frequency energy, though current scientific information does not indicate the need for special precautions.
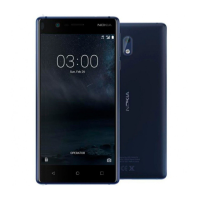
| Model | Nokia 3 |
|---|---|
| Display Size | 5.0 inches |
| Resolution | 720 x 1280 pixels |
| RAM | 2 GB |
| Internal Storage | 16 GB |
| Expandable Storage | microSD, up to 256 GB |
| Rear Camera | 8 MP |
| Front Camera | 8 MP |
| Battery Capacity | 2630 mAh |
| SIM | Single SIM (Nano-SIM) or Dual SIM (Nano-SIM, dual stand-by) |
| GPU | Mali-T720MP1 |
| Video | 720p@30fps |
| Loudspeaker | Yes |
| 3.5mm jack | Yes |
| GPS | Yes, with A-GPS |
| NFC | Yes |
| Radio | FM radio |
| USB | microUSB 2.0, USB On-The-Go |
| Sensors | Accelerometer, gyro, proximity, compass |
| Operating System | Android 7.0 Nougat |
| Weight | 140 g |
| Dimensions | 143.4 x 71.4 x 8.5 mm |
| Protection | Corning Gorilla Glass |
| Chipset | Qualcomm MSM8937 Snapdragon 430 |
| CPU | Quad-core 1.4 GHz Cortex-A53 |
| Card slot | microSD, up to 256 GB |
| Main Camera Features | LED flash, panorama |
| WLAN | Wi-Fi 802.11 a/b/g/n, dual-band, WiFi Direct, hotspot |
| Bluetooth | 4.0, A2DP |
| Type | Li-Ion, non-removable |
| Colors | Matte Black, Tempered Blue, Silver White, Copper White |