Do you have a question about the Nokia TA-1325 and is the answer not in the manual?
Instructions on how to insert SIM and memory cards into the phone's tray.
Steps for charging the device and turning it on for the first time.
Details on Specific Absorption Rate (SAR) compliance and limits for European and FCC standards.
Legal notices including EU Declaration of Conformity and FCC compliance information.
This document describes a mobile device, focusing on its physical features, setup, and safety information.
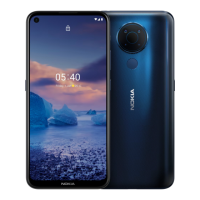
The device is a mobile phone designed for communication, internet access, and various applications. It features a touchscreen interface, physical buttons for power and volume control, and a dedicated key for Google Assistant or Google Search, depending on regional availability. It supports cellular networks (GSM, WCDMA, LTE) for calls, messages, and mobile data, and also includes Bluetooth and WLAN for wireless connectivity. The device is equipped with a camera, a front camera, a fingerprint sensor for security, and a loudspeaker and earpiece for audio. A headset connector allows for private audio listening and communication.
To begin using the device, users must first insert a SIM card and optionally a memory card. The SIM card tray is accessed by pushing a tray opener pin into a designated hole and sliding the tray out. Nano-SIM cards are placed into the SIM slots with the contact area face down. For dual-SIM phones, a second SIM card can be inserted into the SIM2 slot. The presence of two IMEI codes on the sales box label indicates a dual-SIM phone. If a memory card is used, it is placed in the memory card slot before sliding the tray back into the device. It is crucial to use only original nano-SIM cards and compatible memory cards to prevent damage to the card or the device and to avoid data corruption. Users are explicitly warned not to remove the memory card when an app is using it. Both SIM cards are available when the device is idle, but if one SIM card is active (e.g., during a call), the other may be temporarily unavailable.
The device is charged by plugging a compatible charger into a wall outlet and connecting the USB-C cable to the phone. Charging can also be done via a USB cable connected to a computer, though this may take longer. If the battery is fully discharged, the charging indicator may take several minutes to appear. To switch on the phone, the power key must be pressed and held until the device vibrates, after which the phone guides the user through the initial setup process.
The device supports 4G/LTE networks, but users are advised that 4G/LTE might not be supported by all network service providers or when traveling. In such cases, it is recommended to change the preferred network type from 4G to 3G in the device settings (Settings > Network & Internet > Mobile network > Advanced > Preferred network type) to ensure seamless operation. A good network connection is necessary for sending data or messages, and sending may be delayed until a connection is available.
The device adheres to guidelines for exposure to radio waves, with specific absorption rate (SAR) values provided for both European (CE) and US (FCC) regulations. Users are advised to maintain a separation distance from the body when using the device with accessories that do not contain metal, to ensure compliance with RF exposure guidelines. The device has an electronic label for certification information, accessible via Settings > System > Certification.
The device contains an internal, non-removable, rechargeable battery. Users are cautioned against attempting to remove the battery or back cover, as this may damage the device. Battery replacement should only be performed by an authorized service facility. The device is designed to be charged with specific charger models (e.g., CH-21E, CH-21X, CH-21U, CH-21A, CH-21N, CH-21B), and charging time may vary based on device capability.
Only compatible memory cards approved for use with this device should be used to prevent damage and data corruption. Some accessories, such as chargers, headsets, or data cables, may be sold separately.
The device's surface is nickel-free. Certain parts of the device are magnetic, so metallic materials may be attracted to it. Credit cards or other magnetic stripe cards should not be placed near the device for extended periods to avoid damage.
When using the flash, users should maintain a safe distance and avoid using it on people or animals at close range. The flash should not be covered while taking a photo.
Pre-installed system software and applications consume a significant portion of the device's memory space. For online user guides and troubleshooting assistance, users can visit www.nokia.com/mobile-support.
| Model | Nokia TA-1325 |
|---|---|
| Category | Telephone |
| Network | GSM / HSPA / LTE |
| Build | Glass front, plastic back, plastic frame |
| SIM | Single SIM (Nano-SIM) or Dual SIM (Nano-SIM, dual stand-by) |
| Display Type | IPS LCD |
| Display Size | 6.52 inches, 102.6 cm2 (~81.6% screen-to-body ratio) |
| Resolution | 720 x 1600 pixels, 20:9 ratio (~269 ppi density) |
| CPU | Octa-core (4x1.6 GHz Cortex-A55 & 4x1.2 GHz Cortex-A55) |
| GPU | IMG8322 |
| RAM | 2GB |
| Internal Storage | 32GB |
| Front Camera | 5 MP |
| Loudspeaker | Yes |
| 3.5mm jack | Yes |
| WLAN | Wi-Fi 802.11 b/g/n, hotspot |
| Bluetooth | 4.2, A2DP |
| GPS | Yes, with A-GPS |
| NFC | No |
| Radio | FM radio |
| USB | microUSB 2.0 |
| Sensors | Accelerometer, proximity |
| Status | Available |
| OS | Android 11 (Go edition) |
| Chipset | Unisoc SC9863A |
| Main Camera | 13 MP, AF + 2 MP |
| Colors | Charcoal, Cyan |
| Battery | Li-Po 4000 mAh, non-removable |