Nokia X2-
RM-618
Service Manual Level 1&2
21 Confidential • Copyright © 2010 NOKIA • All rights reserved Version 2.0
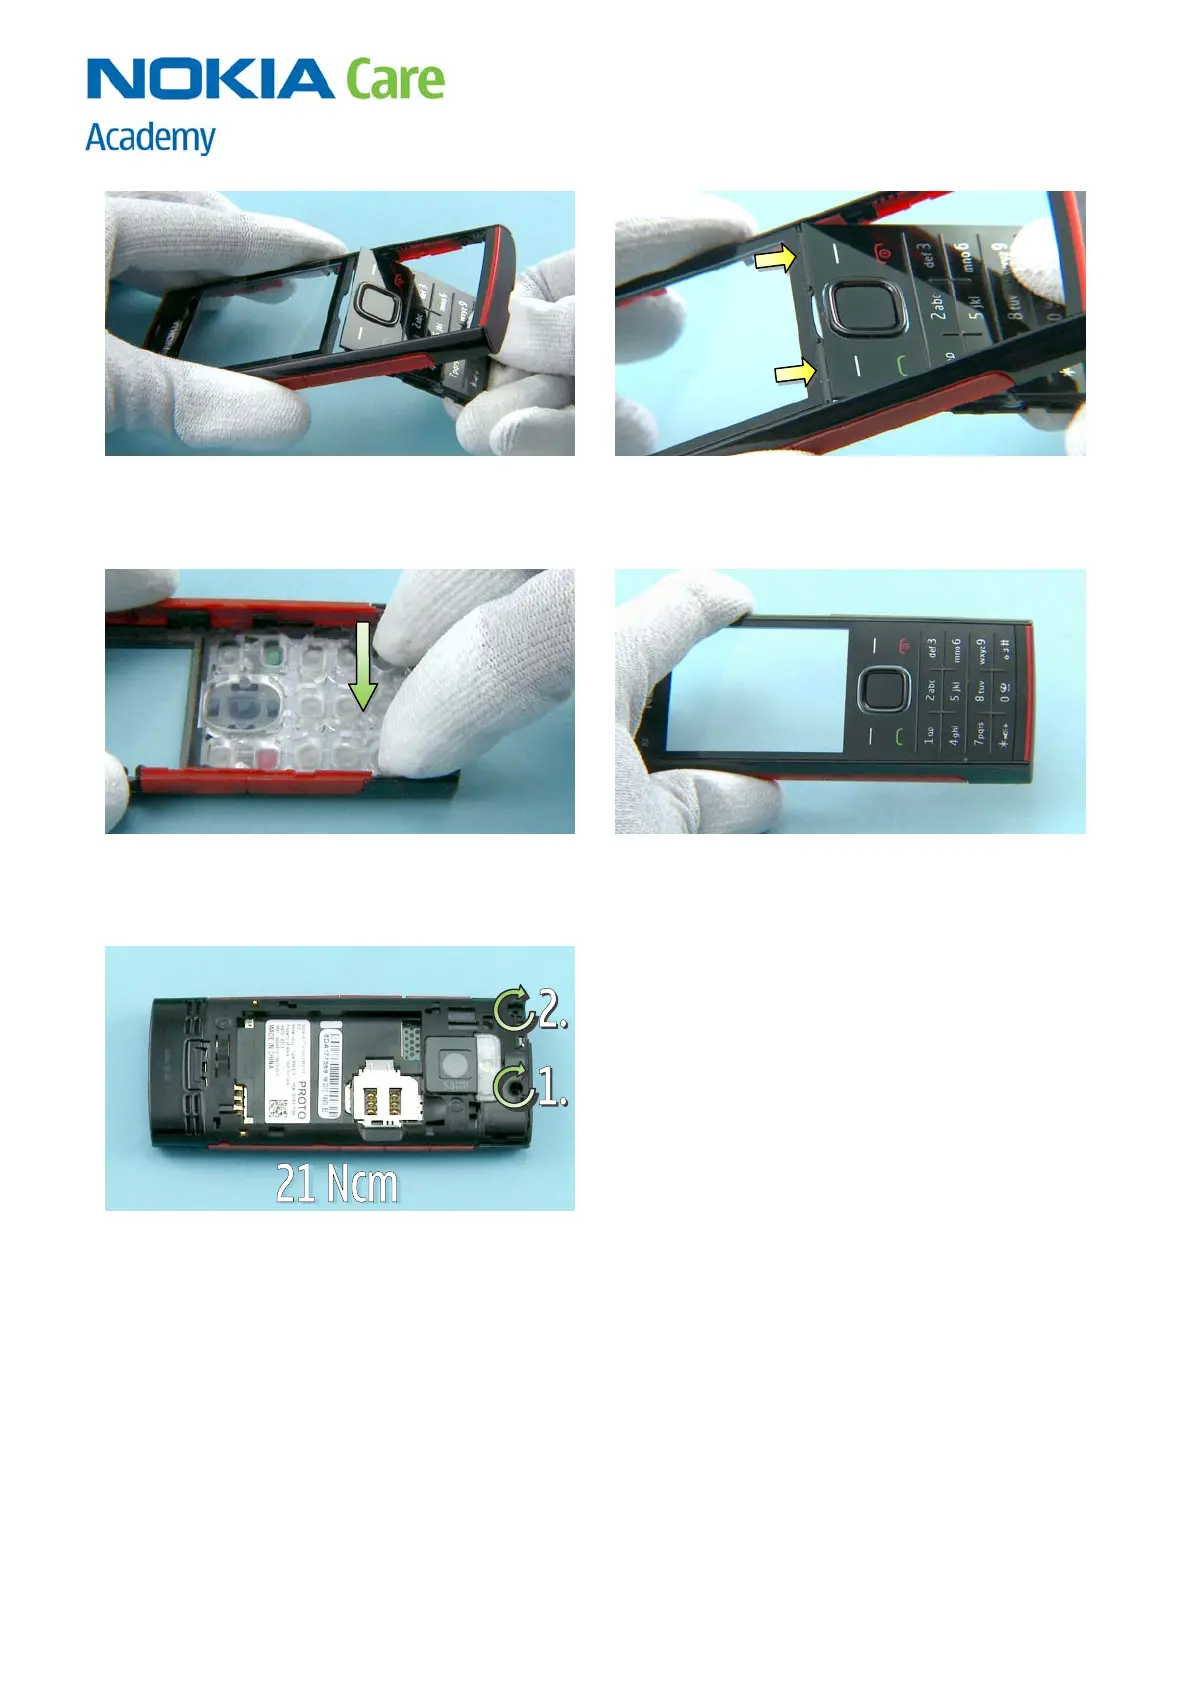
8) Place the KEYPAD below the A-COVER as shown. 9) Make sure that the KEYPAD covers the bottom
end of the A-COVER window shown by the arrows.
10) Press down the KEYPAD to attach the clips. 11) The KEYPAD is now assembled.
12) Tighten the two TORX + size 6 screws to the
torque of 21 Ncm in the order shown.

 Loading...