Reverse The Door Swing
1. Remove the door from the refrigerator by removing the
three screws that attach the door hinge to the bottom of
the refrigerator.
2. Open the door and pull it off of the top hinge pin.
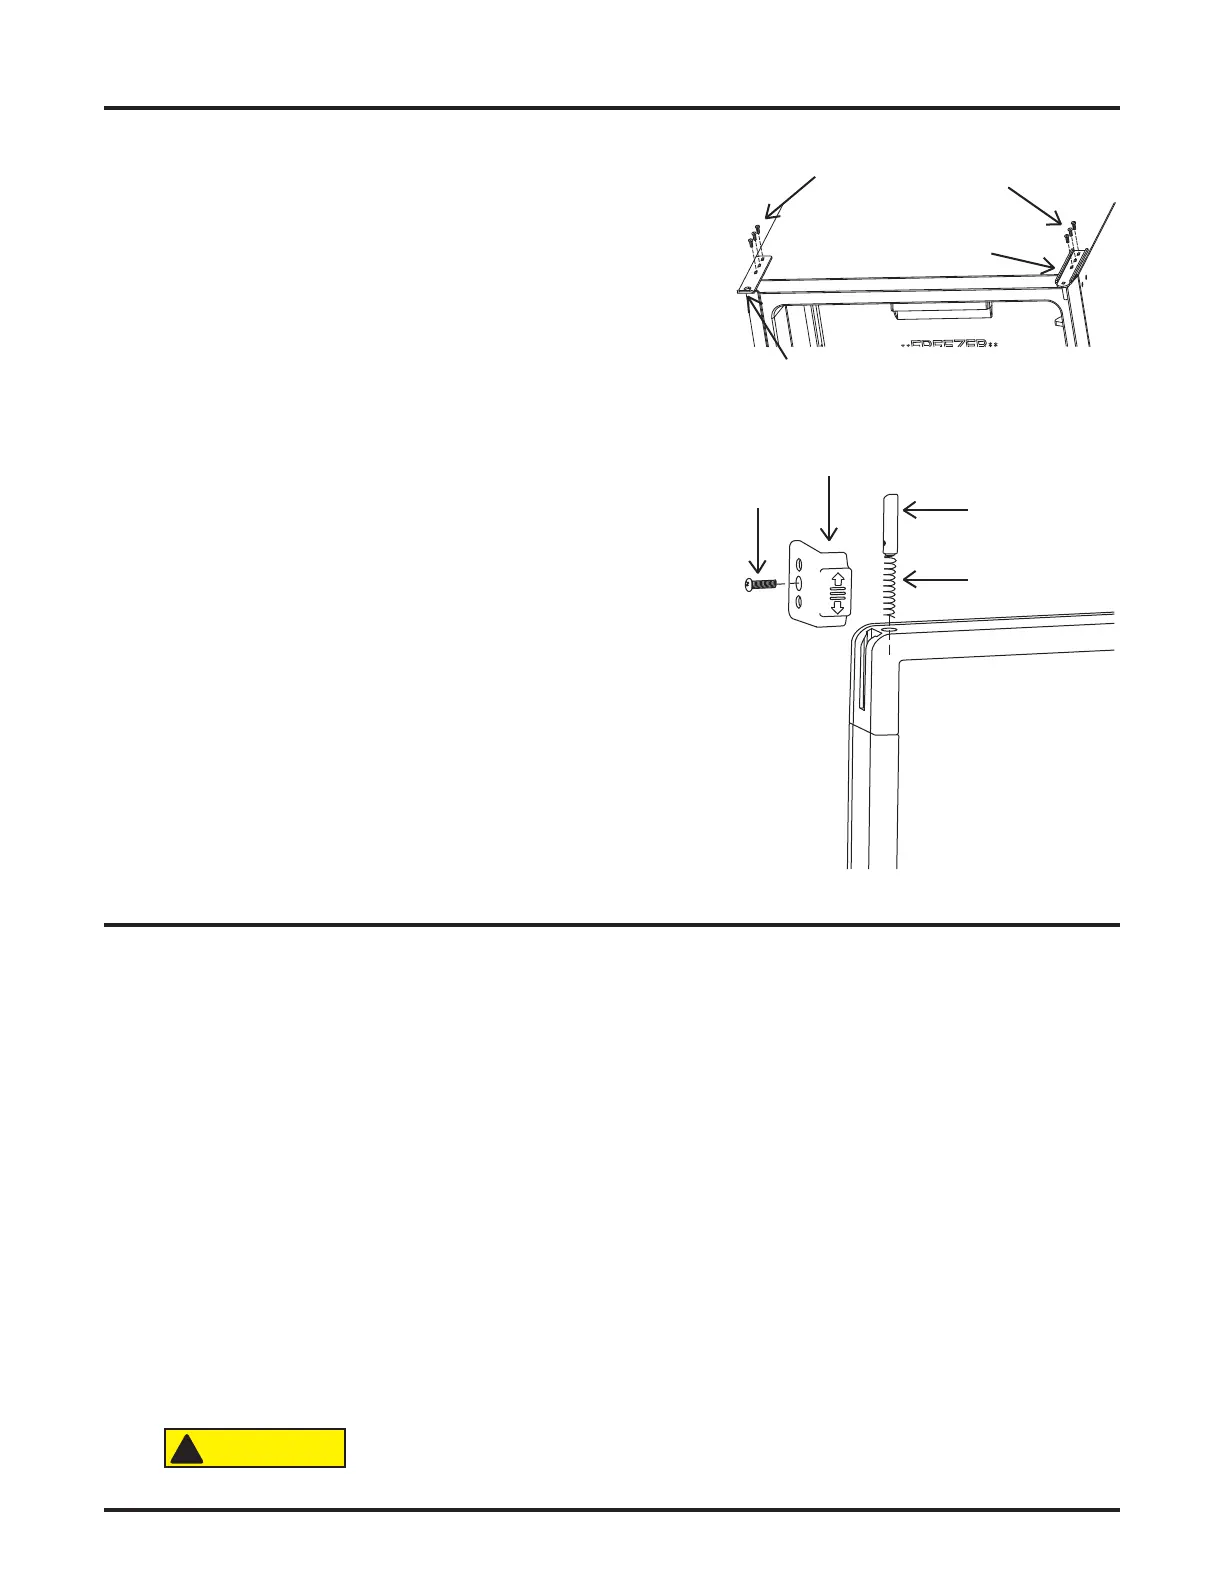
3. Remove the three screws that attach the grill. 4. Remove
the three screws that attach the upper hinge.
5. Remove the bolt that attaches the door latch plate to the
top of the refrigerator.
6. Remove the upper hinge and the door latch plate from
the refrigerator.
7. Attach the upper hinge and the door latch plate to the
opposite sides of the refrigerator.
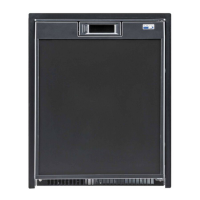
8. Remove the screw that attaches the latch handle and
the latch pin.
9. Remove the latch handle pin and the coil spring from the
door.
10. Move the set screw to opposite side of the latch pin.
11. Assemble the coil spring and the latch pin into the
opposite side of the door.
12. Put the door onto the refrigerator and make sure that
the gasket seals correctly.
13. Install and tighten the three screws that attach the door
hinge to the bottom of the refrigerator.
Connect The Electrical Components
Electrical Current Necessary
DC Operation DC105 - 12 volts DC voltage (10.9V min. -17V max.)
- 24 volts DC voltage (22.7V min. -31.5V max.)
This refrigerator operates on DC electronic sources. Operation out of these limits may damage the
refrigerator’s electrical circuit parts and will void the warranty.
Make no changes to any of the electrical wiring supplied with the refrigerator. Any changes that you
make to the electrical wiring will void the warranty.
Connect The 12/24 Volts DC Supply
To reduce the risk of electrical interference from other DC appliances and induction from voltage
spikes:
- The refrigerator must have an independent 12/24 volt DC supply
- Route the DC power supply wires including the fuses directly from the battery to the refrigerator
- Twist the DC power supply wires from the battery to the refrigerator
Do not use a converter or a battery charge to supply the DC power to the
refrigerator. These devices do not supply filtered DC power. When using
a converter or a battery charger, make sure a battery is in line between
them and the refrigerator.
!
NOR001204NOR001205
13
Bolts
Latch Handle
Latch Pin
Coil Spring
Bolts Bolts
Door Hinge
Door Lock Panel