Corner fridge
5. The magnetic seal can be compressed after being packed and transported. It will return to
original shape once unpacked. Door can be adjusted using adjustment plate supplied it seal is
compressed - see fig. 6B. If magnetic seal presses to hard on door seal or is twisted, open door
90° and loosen hinge screws to floor/ceiling move adjustment plate inwards between hinge and
ceiling/floor and screw securely. See fig. 6A.
6. Handle: The centre of the holes of the door handle must be fixed vertically, 40mm from the
outer edge of the door. The length of the screw will vary depending on the type of door handle
and the thickness of the wooden door panel. The door itself is 35mm thick. The correct number
of holes must be drilled. Washers may be used for better stability. Put the washer onto the screw
and tighten the screw with a hand tool.
7. Air grilles. Cut hole in plinth for air grille.
5. Fitting furniture sides (see figure 8)
1. Preparation: Remove protective film. Corner fridge must be in place without shelves and other
internal fixtures in kitchen with door and front fitted.
2. Secure kitchen fronts. Drill hole in external steel plate through bushings using a 4.5 mm drill bit.
Position cover sides level with upper edge of corner fridge and pull as far forwards towards
furniture front as possible to minimise gap between front and cover side. Mark hole position on
furniture front using a long awl through drilled holes on cover sides. For min. 16mm kitchen
front thickness, pre-drill min. 10mm in marked hole in cover side using a a 2.5 mm drill bit. The
screws supplied (4.0 x 30mm) will extend 9mm into the cover side. NOTE: Take into account the
kitchen front thickness to avoid drilling through them. Replace the cover side and screw into
place. Seal holes with plastic plugs. Any gaps left between the cover side and kitchen wall can be
sealed with sealant or a moulding strip. The rest of the kitchen can now be fitted.
Fig. 8
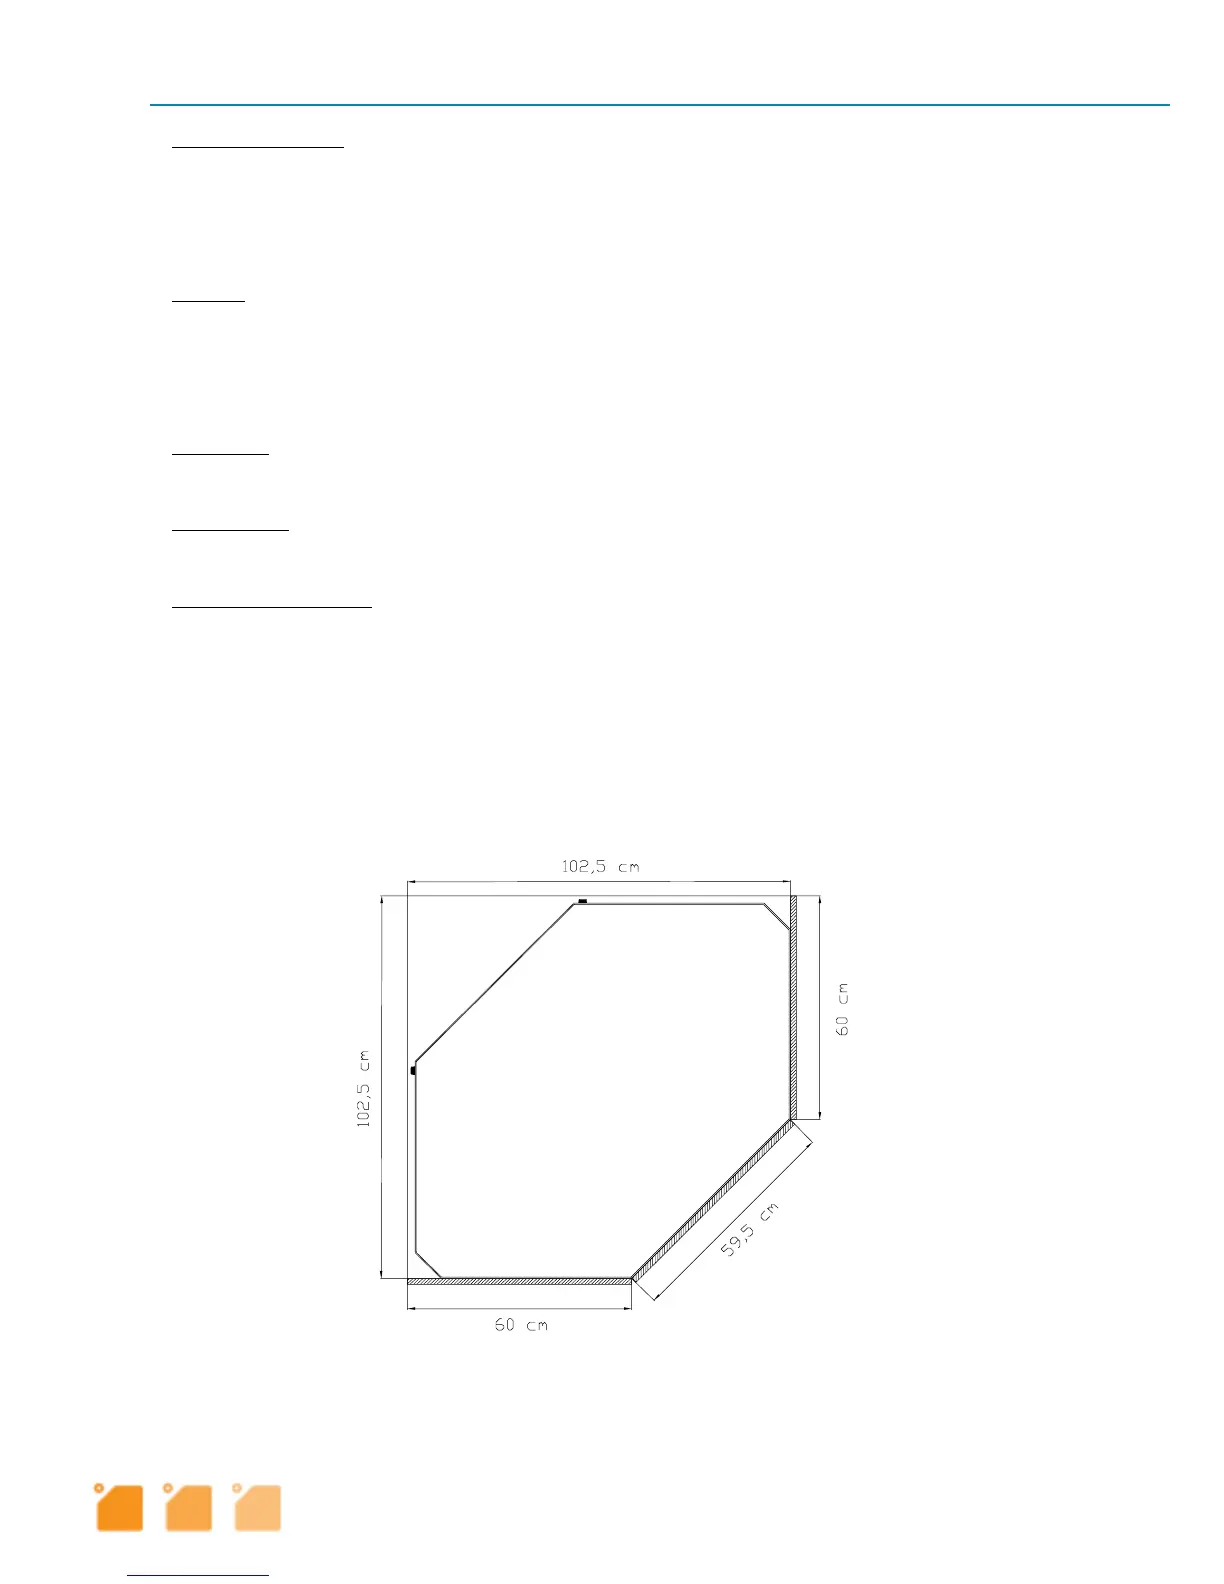
Integration
- distances
8