7
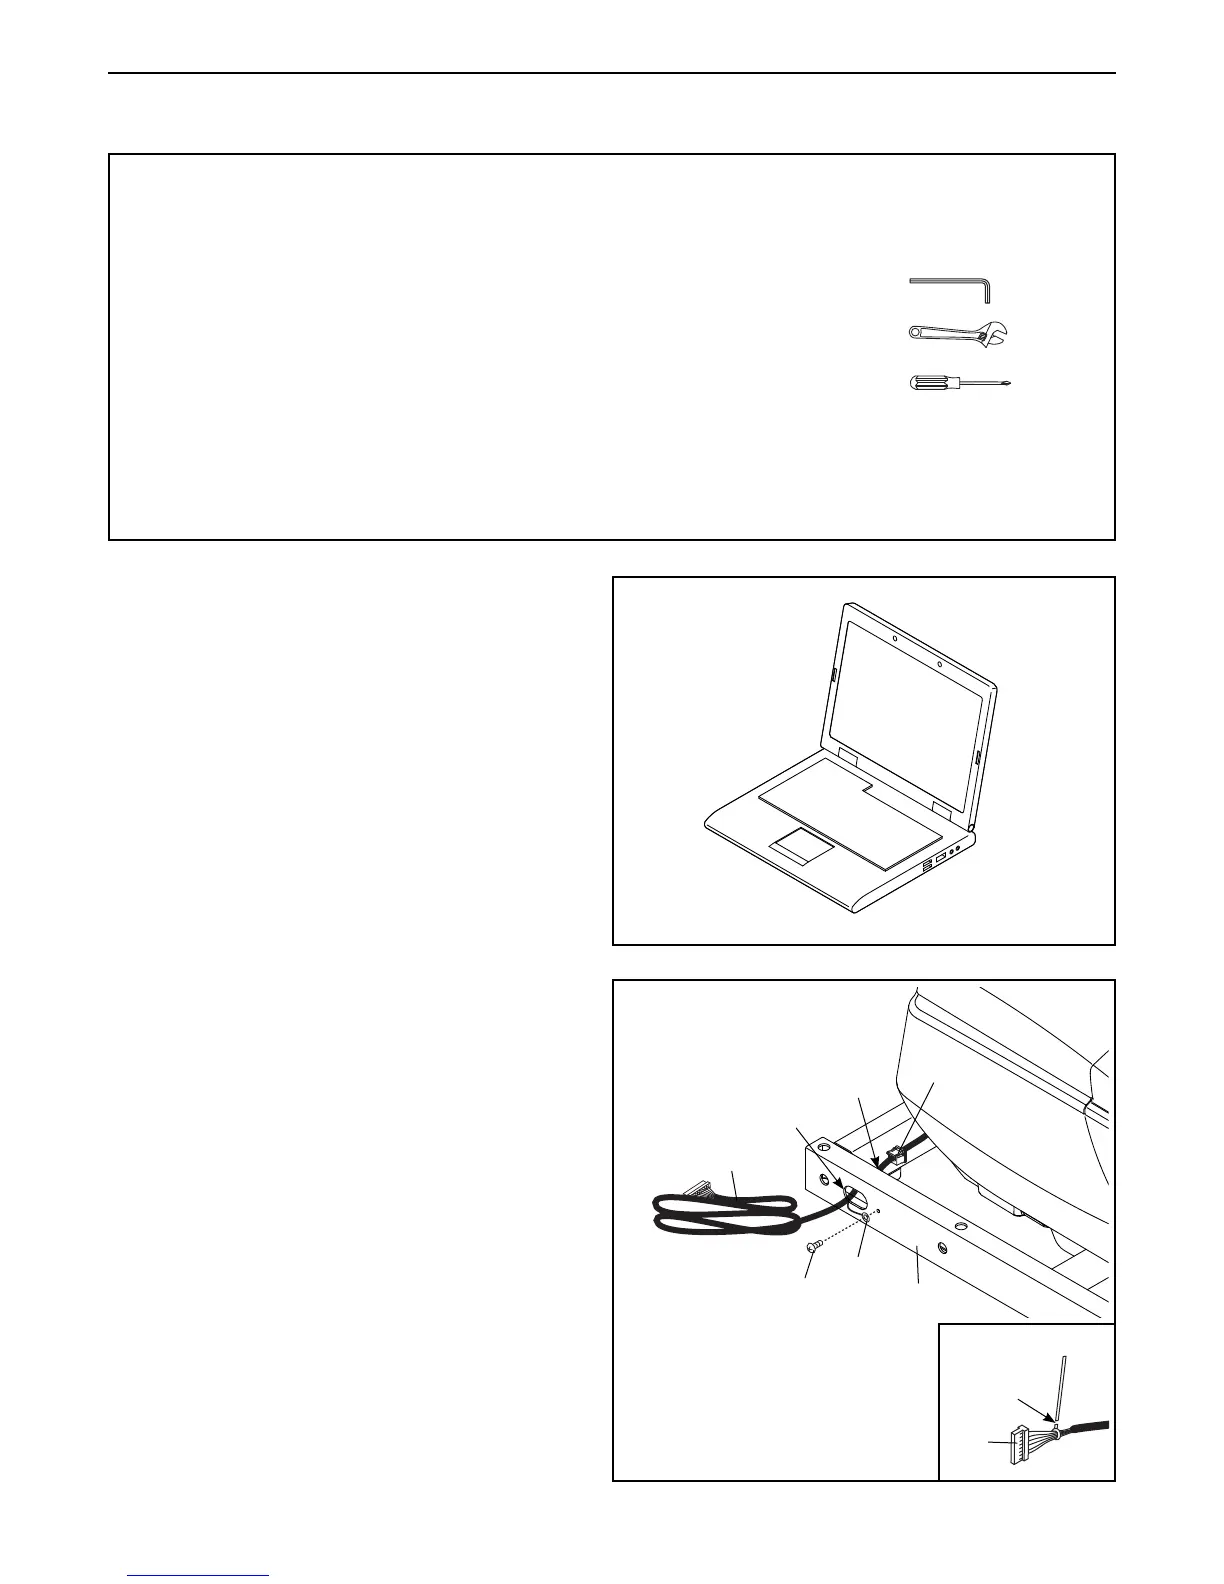
2. Pull the Upright Wire (81) and the ground wire
(A) through the indicated hole in the Base (94).
Attach the ground wire (A) to the Base (94) with a
#8 x 1/2" Silver Screw (10).
Press the Grommet (77) into the square hole in
the Base (94).
See the inset drawing. Cut the plastic tie near
the Upright Wire (81).
81
2
94
Hole
Square
Hole
10
A
77
Cut
81
ASSEMBLY
• Assembly requires two persons.
• Place all parts in a cleared area and remove the
packing materials. Do not dispose of the packing
materials until you nish all assembly steps.
• After shipping, there may be an oily substance
on the exterior of the treadmill. This is normal. If
there is an oily substance on the treadmill, wipe
it off with a soft cloth and a mild, non-abrasive
cleaner.
• Left parts are marked “L” or “Left” and right parts
are marked “R” or “Right.”
• To identify small parts, see page 6.
• Assembly requires the following tools:
the included hex key
one adjustable wrench
one Phillips screwdriver
To avoid damaging parts, do not use power tools.
1. Go to www.iconsupport.eu on your computer
and register your product.
• activates your warranty
• saves you time if you ever need to contact
Customer Service
• allows us to notify you of upgrades and offers
Note: If you do not have Internet access, call
Customer Service (see the front cover of this
manual) to register your product.
1

 Loading...