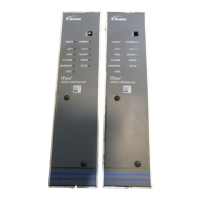
1. Install the new controller board (see a in Figure 1) and
secure with the seven screws (see b in Figure 1).
Installing th e Controller Board
e
b
Figure 1
2. Re-install the four hexagonal stands (see c in Figure 1).
3. Re-install the four plastic standoffs(see f in Figure 1).
a: Controller board b: Seven screws c: Four hexagonal stands d: Power supply board e: Four screws
f: Plastic standoffs
c
a
d
4. Install the power supply with the four mounting screws (see
d in Figure 1).
5. Reconnect the following:
6. Re-installthetouchscreenpanel(seeFigure2in
Removing the Controller Board). Reconnect the following:
7. Re-connect the display ribbon cable (see b in Figure 2 in
Removing the Controller Board). Make sure to lock the ribbon
cable in place by pressing the cable connector.
8. Re-install the pattern controller front cover by
re-fastening the four captive screws (see a in Figure 1 in
Removing the Controller Board).
9. Turn on the power supply.
f
S main line voltage supply terminal block (see e Figure 4)
in Removing the Controller Board)
S 24 VDC supply cable (see f Figure 4 in Removing the
Controller Board)
S power supply ground wire (see i Figure 4 in Removing
the Controller Board)
S touch screen panel 24 VDC power supply
cable (see a Figure 3) in Removing the Controller Board)
S touch screen panel ground wires (see c Figure 3 or g in
Figure 4 in Removing the Controller Board)
S Ethernet cable (see b Figure 3) in Removing the Controller
Board)

 Loading...