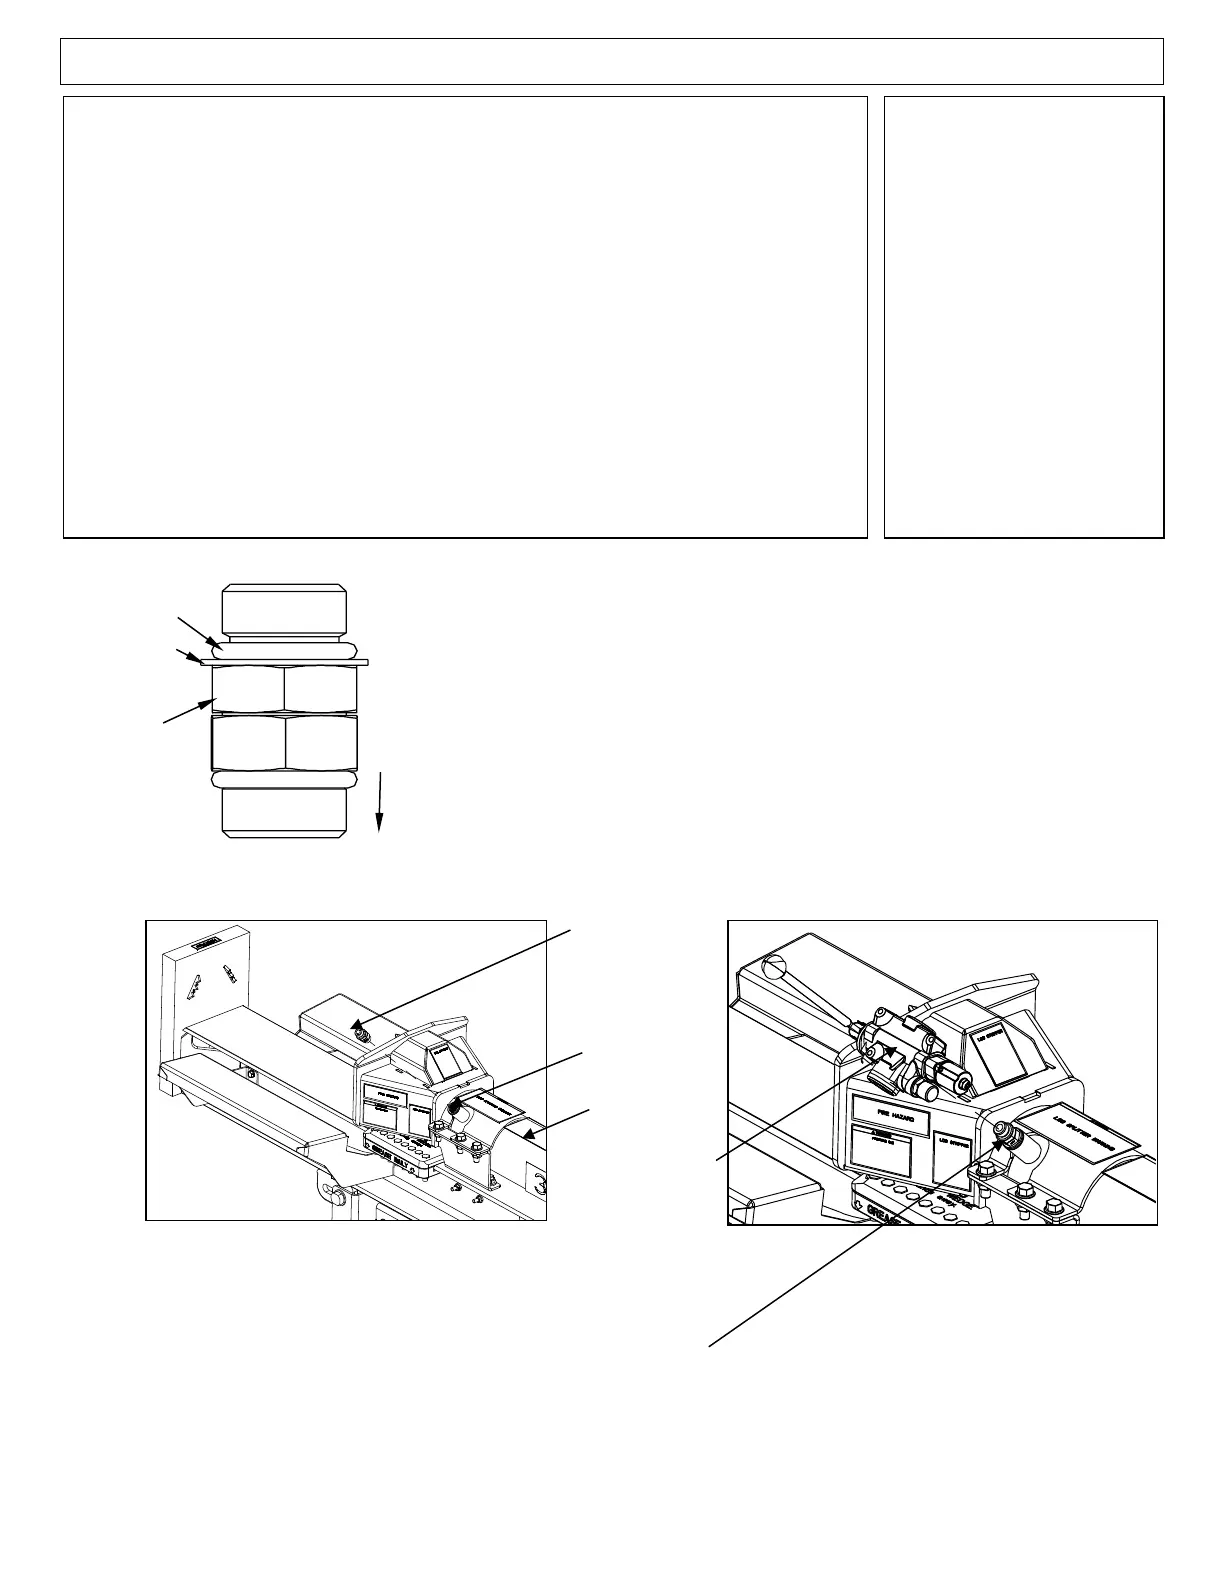
Step 11 – Valve Installation
• Remove plug from cylinder port and discard
• Lubricate O-ring and threads on fitting with clean oil
• Orient (1) Valve Fitting so that nut/washer/O-ring assembly is facing
up. Turn fitting into cylinder port until finger-tight
• Torque to 27-43 ft.-lb.
• Looking at fitting from end with nut/washer/O-ring assembly, turn nut
clockwise as far as possible
• Use valve port marked “A” to thread the control valve onto the fitting
until control valve touches washer
• Hold control valve in orientation shown below and torque nut to 37-46
ft.-lb.