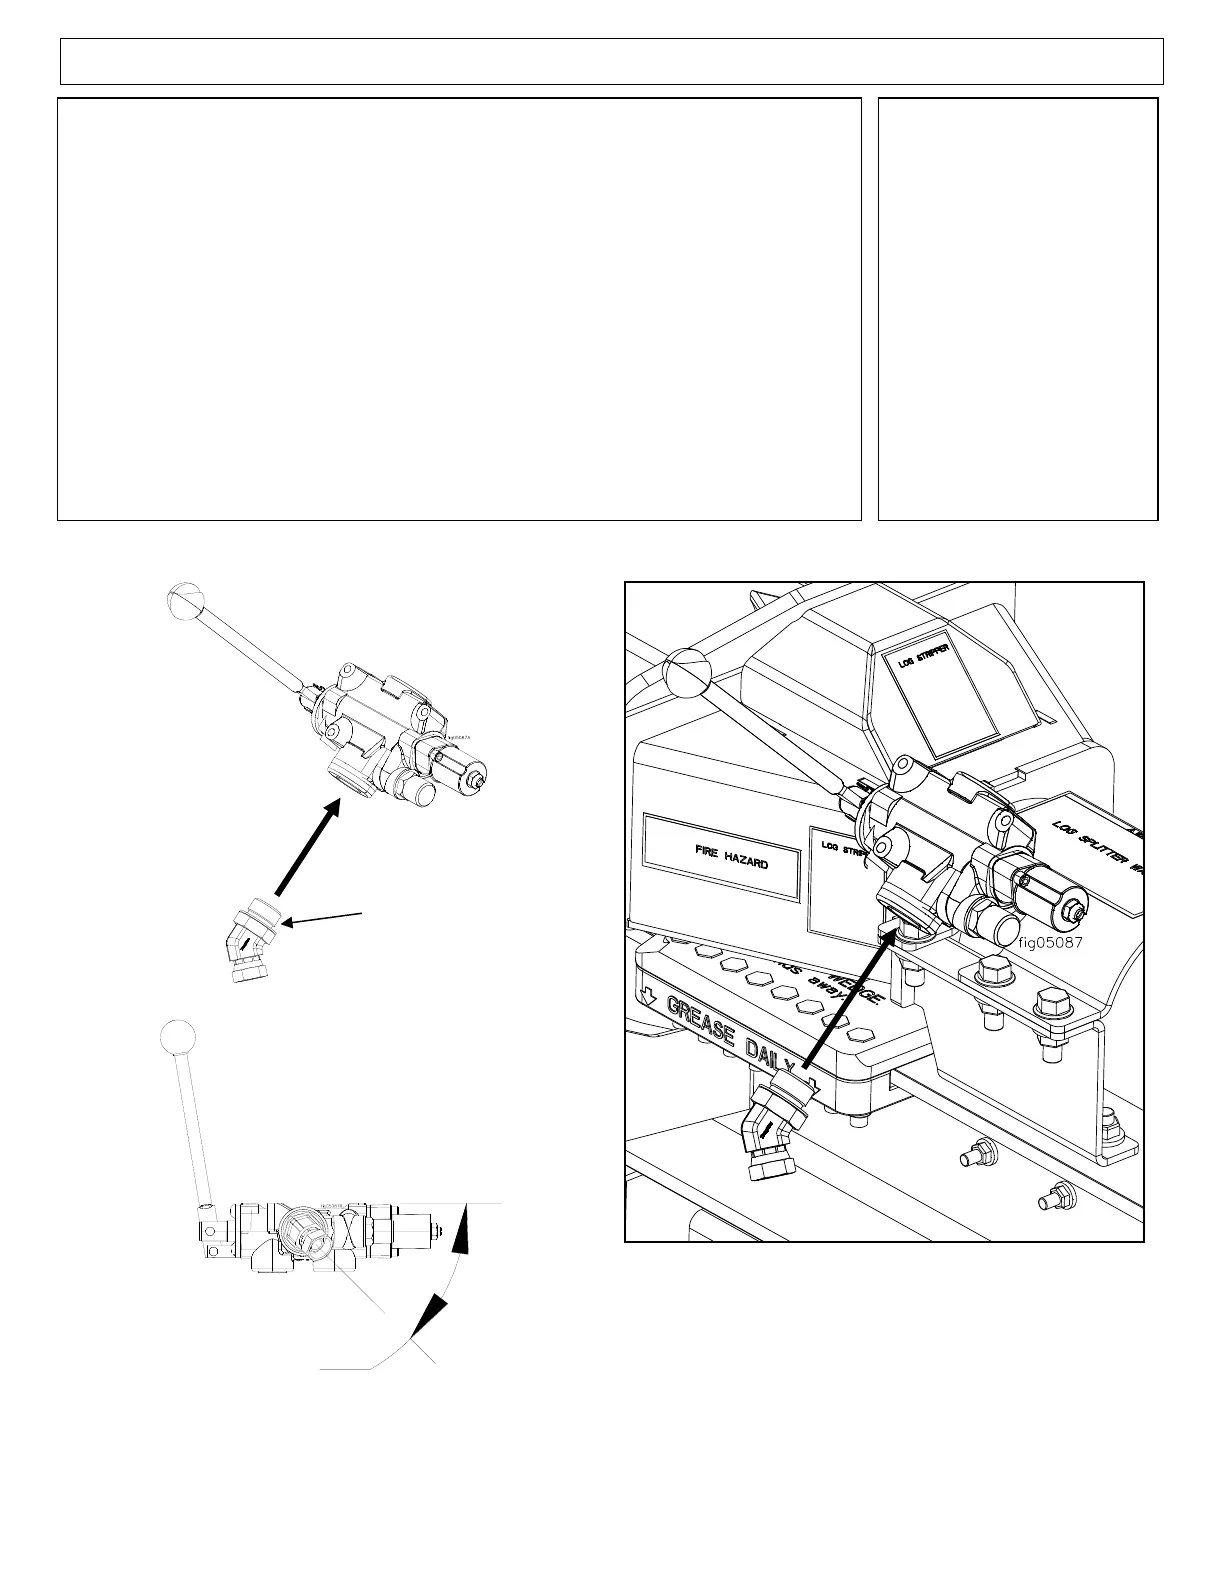
Step 12 – Valve Installation Continued
• Remove plugs from ports in control valve
• Lubricate O-ring and threads on fitting with clean oil
• Looking at fitting from end with nut/washer/O-ring assembly, turn nut
clockwise as far as possible
• Using wrench, turn (1) Valve to Hydraulic Pump Fitting into valve port
marked “IN” until washer touches control valve. Continue turning until
washer touches thread nearest wrench pad
• Back off fitting counterclockwise not exceeding one revolution until it
is oriented in the correct position
• Place wrench on the wrench pad of fitting to prevent fitting from
turning and torque nut to 70-87 ft.-lb.



 To Next Page