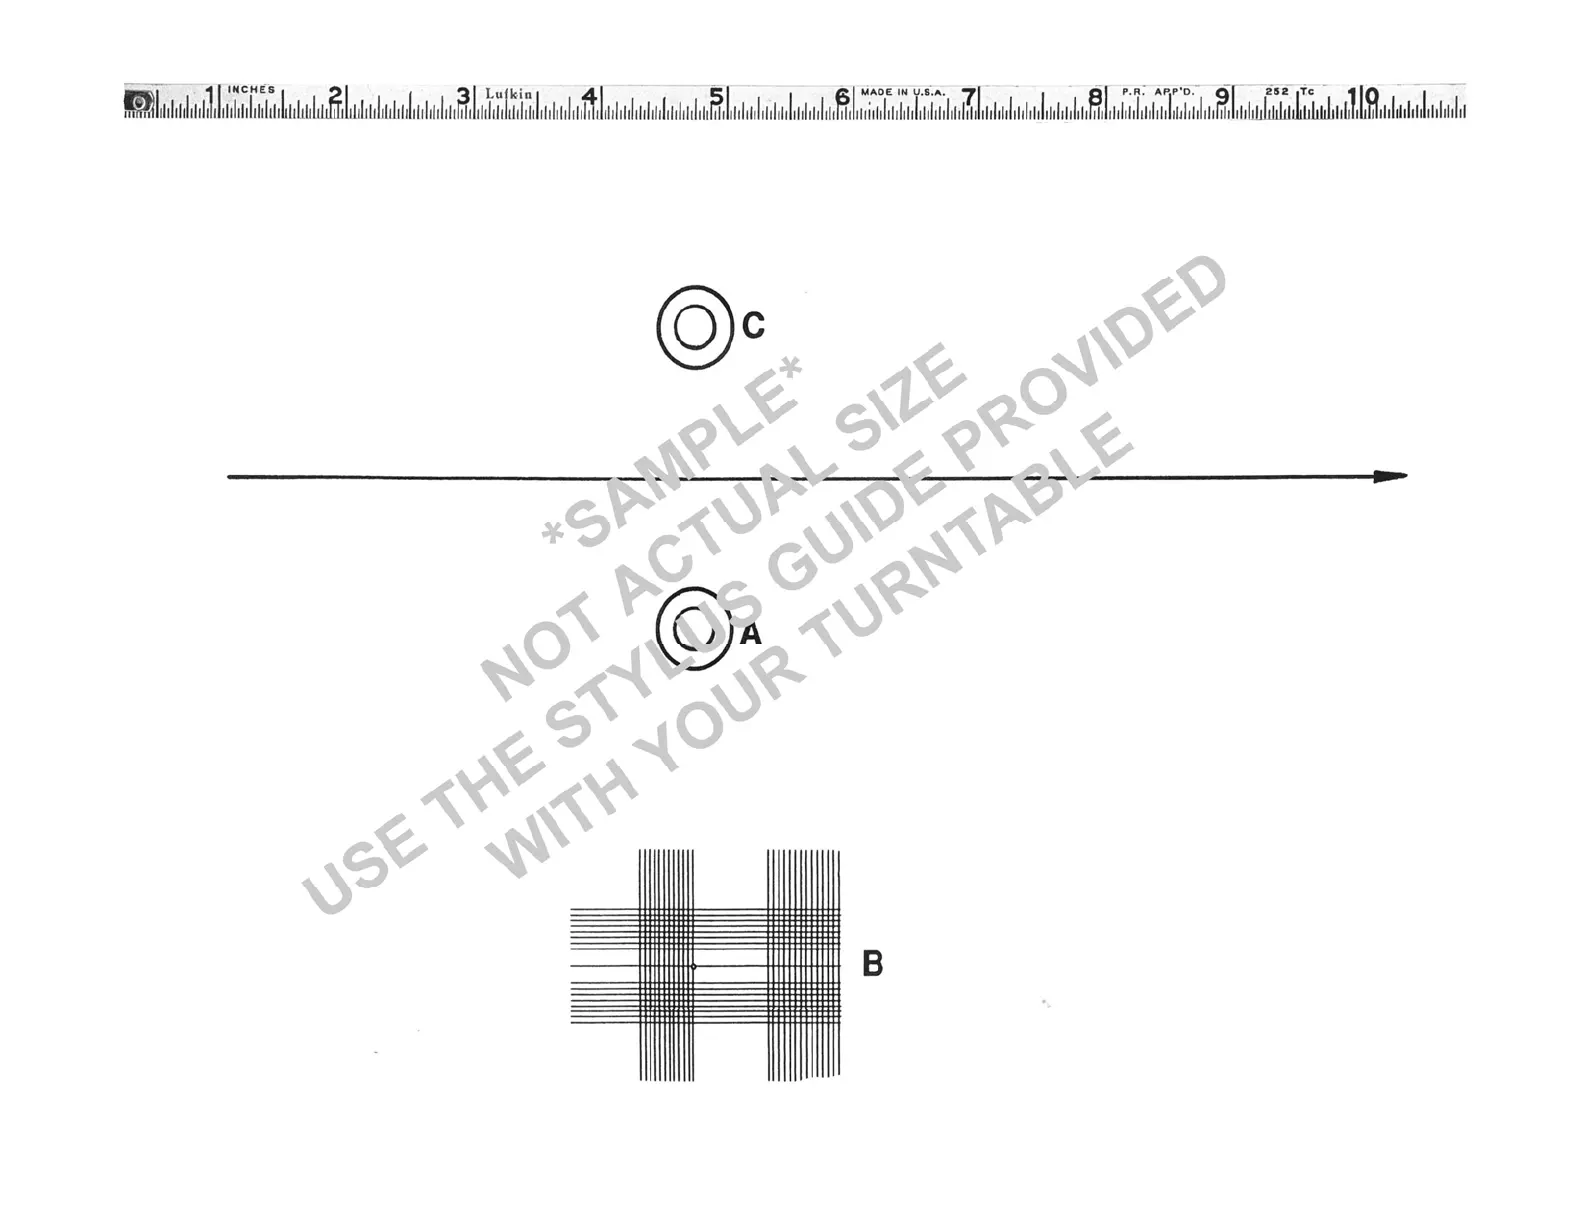
1. Initially mount the cartridge midway in the headshell
slots.
2. Level the ‘playing field’; set a nominal tracking force and
arm height, and zero the bias (‘antiskating’) force.
3. Slip hole ‘A’ of the gauge over the turntable spindle.
4. Point the arrow directly at the vertical pivot axis of the
arm.
5. Adjust the cartridge position and angle such that the
stylus sits in the center of the small circle on line ‘B’, and
the cantilever (viewed from the front) lies exactly above
and along line ‘B’. If you cannot see the cantilever well
enough for sighting, then align the cartridge body to the
grid. Make sure the arrow is still on target!
6. Re-adjust the tracking force, and if necessary, repeat
step 5.
7. (optional) Confirm the setting using hole ‘C’ instead of
hole ‘A’. Please note that the alignment of hole ‘A’ is
far more accurate and critical.
8. Set the bias force, and perfect this together with the
tracking force and V.T.A. (arm height) by listening.
Polaris Plus
Stylus Alignment
Gauge
(standard pattern)
Pivot to Stylus:
Anna Arm 12” = 294mm (11 37/64 in.)
Anna Arm 10” = 222mm (8 ¼ in.)
Spacearm = 210mm (8 17/64 in.)
Interspace Arm = 210mm (8 17/64 in.)