Page 8 of 10
INSTALLATION & SERVICING INSTRUCTIONS (continued)
LIGHTING & CONTROLLING THE FIRE – MANUAL FIRE
FOR A FIRE WITH THERMATRONIC ELECTRONIC CONTROL SYSTEM SEE SEPARATE OPERATING INSTRUCTIONS
a. Turning pilot on from off position depress knob and turn anti-clockwise until it sparks.
More than one attempt may be required to light the pilot. Once lit hold in for about 10 seconds.
Release knob and turn to pilot position.
b. To turn burner on from pilot position depress knob and turn anti-clockwise to low flame.
To go to high flame depress knob again and turn anti-clockwise as far as it will go.
The flame can be varied to any point between high and low as desired.
c. To turn off depress knob and turn clockwise depressing knob at each point as you go
all the way round to off.
Important Notes
a. This appliance is fitted with an oxygen depletion sensing system which automatically shuts off the gas supply to the main
burner if the oxygen level in the room is depleted, due to lack of air or an obstructed flue.
b. If the fire shuts down for any reason, attempt to re-start it. If there is a continuing problem call in a specialist engineer.
c. There are no user replaceable parts in this appliance.
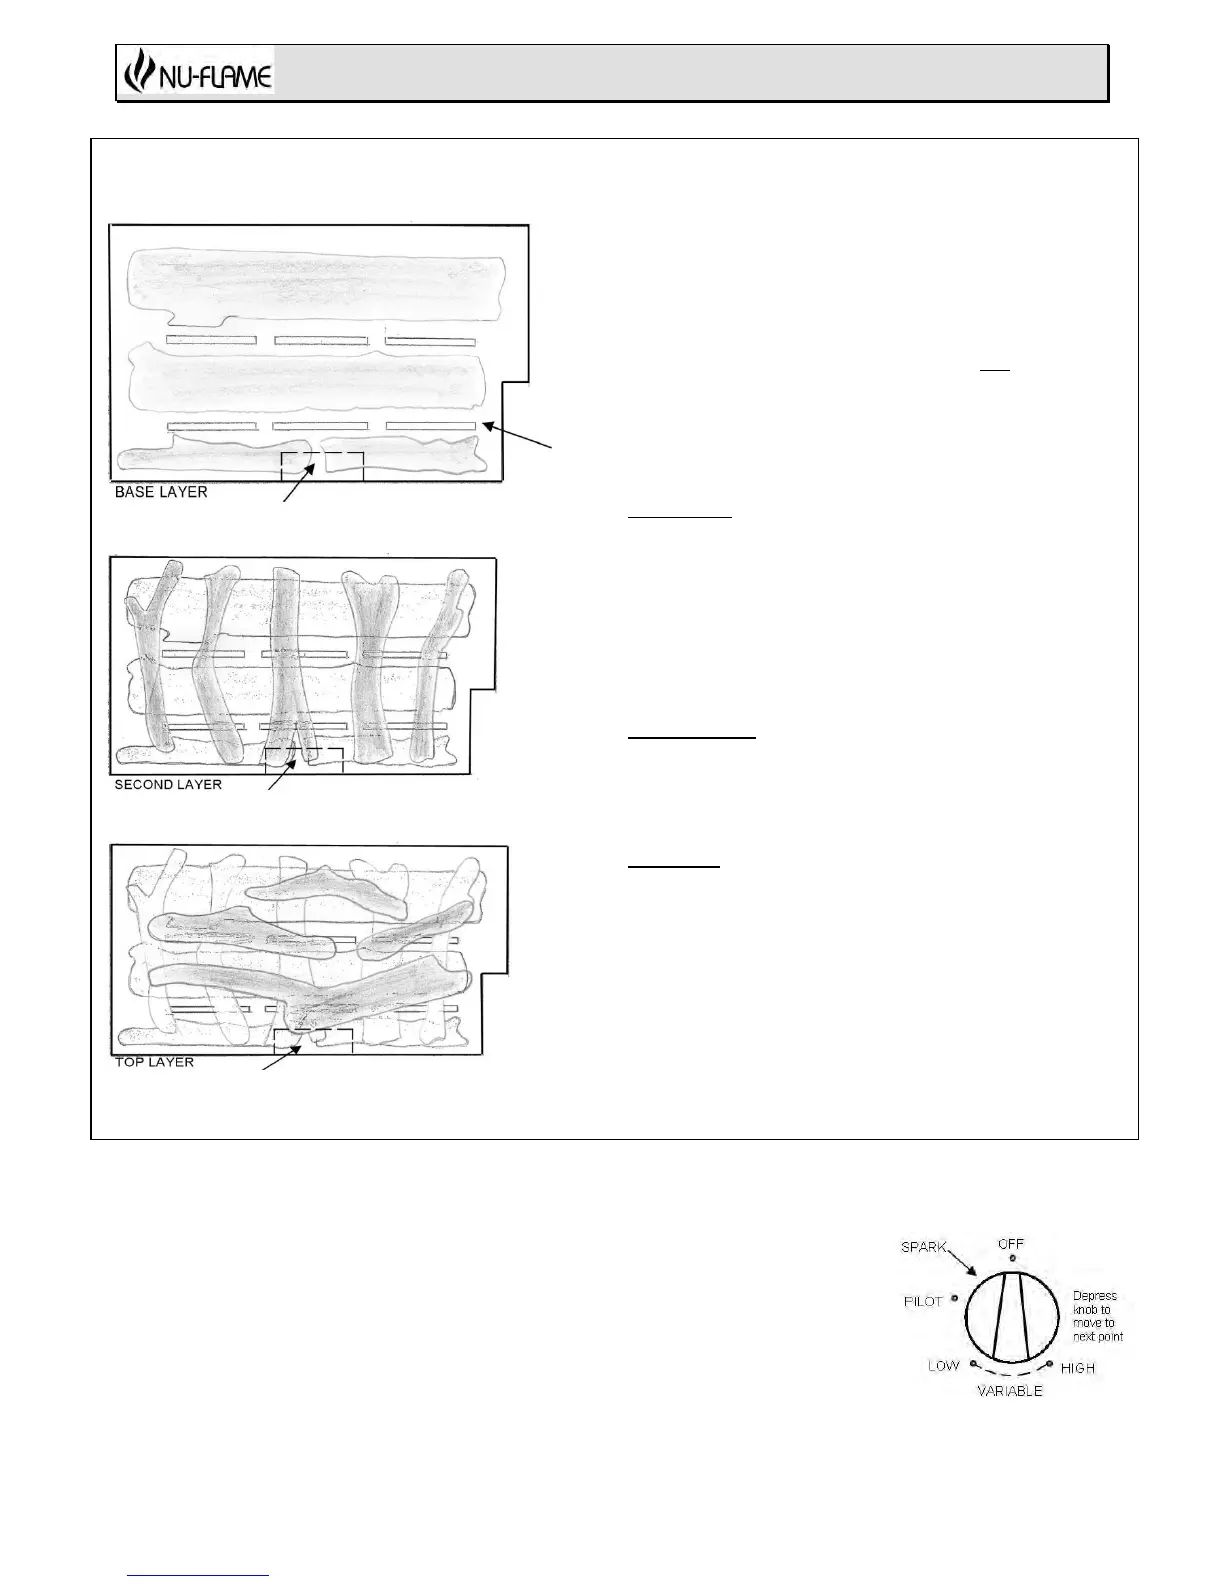
LAYOUT FOR SIMULATED LOGS / DRIFTWOOD
In case of burners with the alternative central position the front base logs
must be positioned further to the left and right to ensure the pilot cut out is clear.
In case of burners with the alternative central position the front base logs
must be positioned further to the left and right to ensure the pilot cut out is clear.
In case of burners with the alternative central position the front base logs
must be positioned further to the left and right to ensure the pilot cut out is clear.
Due to the many pan sizes and shapes there is not an exact pattern
and these layouts are intended as a guide to illustrate the general
principles. Do not overload the fire as it will spoil the appearance of
the fire and cause sooting. Do not put more than 3 layers of
simulated logs or simulated driftwood on any fire.
Note: Similated logs/driftwood are supplied in standard sized sets
and, depending on the size of the fire it might not be necessary to
use all the simulated logs/driftwood supplied. Do not add further
simulated logs/driftwood.
For a smooth ignition make sure the pilot frame has access to
the burner slot.
BASE LAYER
Lay the logs sideways keeping the burner slots clear and ensuring
that the pilot flame has access to the burner slot for good ignition (if
the ignition is slow the fire must be re-laid to achieve a good ignition
time).
Use the large straightish logs for the back row and the medium
straightish logs for the centre between the burner slots. Using smaller
logs for the front row.
SECOND LAYER
Lay logs/driftwood across base ceramics laying front to back in a
random arrangement.
TOP LAYER
Lay logs/driftwood across second layer ceramics as shown in
drawing to achieve a random arrangement.
For burners that are different shapes to the above illustrations follow
the basic principles shown, i.e. small simulated logs/driftwood on
the base layer, positioned across the gas outlet slots. The second
layer positioned across the bottom layer (along the width of the
burner) and the top layer positioned across the second layer.
 Loading...