How to Use Product
E5
Set the output by pressing the
channel 2 low frequency output
FRQWUROEXWWRQµŸ¶µź
A level is displayed on the low
frequency display unit (FND) of
WKHFKDQQHO&+
The level can be adjusted
EHWZHHQDQG
TUFQ
Set the channel 2 low frequency
mode by pressing the channel 2
start/stop button (CH2) of the
FRQWUROOLQJXQLW
TUFQ
How to use channel 2 (CH2)
TUFQ
TUFQ
TUFQ
Press the power switch on the
side of the power cord
connection unit to turn on the
SURGXFW
Connect the power cord to the
EDFNVLGHRIWKHSURGXFWDQG
FRQQHFWLWWRWKHSRZHURXWOHW
Check out the working voltage
EHIRUHXVH
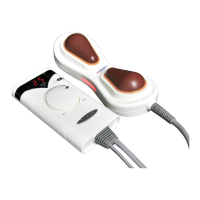
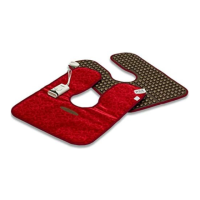
Connect the low frequency patch
(low frequency stick) cable to the
FKDQQHOWHUPLQDO
How to Use Product
- How to use Channel 2
Introduction
·'RQRWXVHLWIRURWKHUXVDJHVWKDQWKHGHVFULEHGSXUSRVHVRIXVHV
Â&KHFNRXWWKHZRUNLQJYROWDJHEHIRUHXVH
i
Notice
Connect the low frequency
patch and low frequency stick
WRWKHFRUUHVSRQGLQJFKDQQHO
Ex 1) Channel 1 = Low
IUHTXHQF\VWLFN&KDQQHO
Low frequency patch
Ex 2) Channel 1 = Low
IUHTXHQF\SDWFK&KDQQHO
Low frequency stick
i
ON
Power
OFF
ON
Power
OFF
HEAT
M1 M2
LH
M
L F
AUTO
TIME
CH2CH1
HEAT
M1 M2
LH
M
L F
AUTO
TIME
CH2CH1
CH2
CH2 CH1