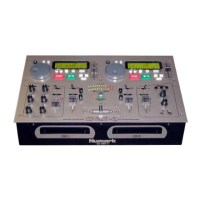
6
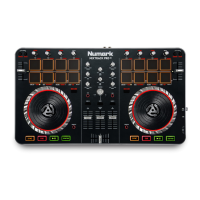
PAD MODE COMMANDS
The lower row of pads has different functions depending on their mode: Looping Mode, Sample Mode, or Hot
Cue Mode.
To select a mode, hold down the SHIFT button and press one of the lower pads. An LED under
the pad section indicates the currently selected mode.
Looping Mode: Press Shift + Loop In to assign the lower 4 pads to the functions listed below:
• Loop In – Sets the beginning of a loop. After a Loop Out point is set, when this button is pressed again, it
will allow for fine adjustment of the Loop In point.
• Loop Out – Sets the end point for the loop. When this button has been pressed after a Loop Out point has
been set, it will allow for fine adjustment of the Loop Out point.
• Reloop – When this is pressed inside a loop, this will turn the loop off. When pressed outside a loop, this
will activate the loop and start playback from its Loop In point. If a loop has not been set, this button will
have no effect.
• Loop x1/2 – Cuts the currently playing loop in half. Press Shift + Loop x1/2 to double the length the
currently playing loop.
Sample Mode: Press Shift + Loop Out to assign the lower 4 pads to the functions listed below:
• Sample 1 (S1) – Plays the sample assigned to Sample Pad 1.
• Sample 2 (S2) – Plays the sample assigned to Sample Pad 2.
• Sample 3 (S3) – Plays the sample assigned to Sample Pad 3.
• Sample 4 (S4) – Plays the sample assigned to Sample Pad 4.
Hot Cue Mode: Press Shift + Reloop to assign the lower 4 pads to the functions listed below:
• Cue 1 (C1) – If a cue point has not already been set for the loaded track, this control will mark Cue Point
1. If a cue point has already been set, this control will jump to Cue Point 1.
• Cue 2 (C2) – If a cue point has not already been placed on the loaded track, this control will mark Cue
Point 2. If a cue point has already been set, this control will jump to Cue Point 2.
• Cue 3 (C3) – If a cue point has not already been placed on the loaded track, this control will mark Cue
Point 3. If a cue point has already been set, this control will jump to Cue Point 3.
• Delete Cue (C) – Press this button, and then press one of the other pads in the row to delete its cue point.
SIDE PANEL
1. Headphone Output – Connect headphones to these 1/4”
and 1/8” jacks for monitoring the signal. The headphone
volume is controlled using the Cue Gain knob.
2. Microphone Input – Connect a standard dynamic
microphone to this 1/4” jack.
3. Mic Gain – Adjusts the level for the microphone input.
REAR PANEL
1. Master Output (RCA) – Use standard RCA cables to connect
this output to a speaker or amplifier system.
2. USB – Sends USB MIDI data to control various software
parameters.