3
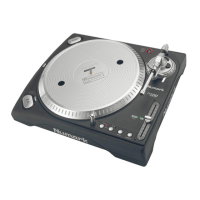
REAR PANEL FEATURES
AC IN 100V-240V
50-60Hz 50W
POWER
USB LINK
HIGH LOWRIGHT LEFT
REMOTE
DECK B
L
R
L
R
OUTPUT
DECK A
DECK
LOCATION
MOTOR
TORQUE
2
1
37
8
6
5
4
1. POWER IN – Use the included power cable to connect V7 to a power outlet. While the power is switched off, plug the
cable into V7 first, then plug the cable into a power outlet.
2. POWER SWITCH – Turns V7 on and off. Turn on V7 after all input devices have been connected and before you turn
on amplifiers. Turn off amplifiers before you turn off V7.
3. USB – This USB connection sends and receives audio and control information from a connected computer.
4. DECK A / DECK B OUTPUT (RCA) – Use standard RCA cables to connect these outputs for Deck A and Deck B to the
left and right channels (respectively) of your mixer.
5. MOTOR TORQUE – Flip this switch to adjust the torque of the PLATTERS. At the high setting, the PLATTERS will have
the heavier, stronger feel of “modern” turntables. At the lower setting, they are lighter and more graceful – the feel of a
“classic” turntable.
6. REMOTE – Reserved for future use.
7. LINK CONNECTION – If you are using two V7s, connect their LINK CONNECTIONS with the included link cable.
8. DECK LOCATION SWITCH – Reserved for future use.
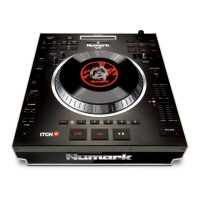
TOP PANEL FEATURES
USEFUL TERMS:
Audio Pointer: The
current position in a track
from where audio will play.
When you select a track
and begin playing, the
Audio Pointer will usually
start from the beginning and
stop at the end.
Cue Point: A marked
position in a track, which
will be permanently stored
by the software. You can
set, return to, or delete Cue
Points with the CUE
CONTROLS.
Temporary Cue Point: A
marked position in a track,
which will only remain while
that track is still loaded in
the Deck. You can set and
return to the Temporary
Cue Point with the CUE
button.
1
234
9
10 11 12 13
14
15 16 17 18
19
20
35
36
37
38
21
22
26
28
29
30 31 32
33 3334
39
40 41
42
29
23
24
27
27
25
6
5
788888