Take off the top cover using the 3mm Allen wrench on the four screws holding it on. Be careful at this
point not to drop the cover as wires could be pulled from the up/down switches housed within.
Locate the main power lead, straighten out and feed it down the back of the control unit and out of the
bottom.
Attach your specific plug. The unit requires a 208/230 volt, 20 amp circuit which the wiring will safely
handle. We realize all shops have different plug configurations (i.e. welder plug, compressor plug, A/C
plug) and most of these require more amperage than your Sprinter lift. Note that if you choose to plug
the unit in one of these outlets, the breaker (30, 40, or 50 amp) will not protect the wiring in the lift.
Wires are Blue, Brown and Yellow/Green. Blue and Brown are your “hot” leads and Yellow/Green is
ground
Remove the dipstick and add 2 gallons of AW32 Hydraulic fluid which is available at most auto parts
stores. Pay NO attention to the level on the dipstick, 2 gallons is the appropriate amount of fluid.
Attach the Quick Connect hydraulic hoses from the lift to the control stations. IT MAKES NO
DIFFERENCE WHICH HOSE IS CONNECTED TO WHICH OUTLET. The system is the Nussbaum exclusive
“Twin Cross Master Hydraulic” system which operates perfectly no matter the hose connection.
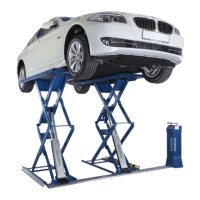
Turn on the lift and raise to full height.
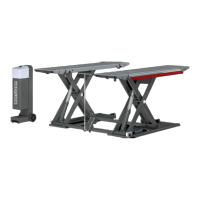
Attaching the ramps can be the most challenging item during set up.
1) Make sure the ramps are in the correct positions. The lock release lever on the ramp should be
facing the outside of the lift when installed
2) Attach 1 snap ring on each pin
3) Start two pins from the inside/out in a ramp
4) Turn over and slide pins through openings on platform ends
5) Attach remaining snap rings on the outside of pin
6) To release the ramp, lift the release pin while lifting the end of the ramp slightly, then lower
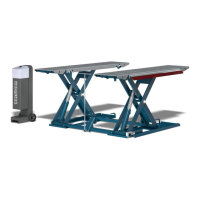
Putting on wheels.
The lift must be raised to a minimum of 15” to attach wheels for portability. The rear wheels are
stored on top of the plate under the rear scissor. Take them off and place in holes on the side of the rear
scissors.
Place the front swivel wheel over the front transverse bar. There is a “lockdog” built into the transverse
bar which the swivel wheel will slide over.
Lower the lift fully and all three wheels will engage.
Pull to desired location. You can either set the control unit on top of the platforms to change locations
or disconnect the hoses and move separately.
(Note the edge of the driveway. This is what happens if you place the lift with the long side at the edge
of the driveway instead of across it.)
This handy hanger can be mounted in a convenient location to store your tow bar on.