Page 2
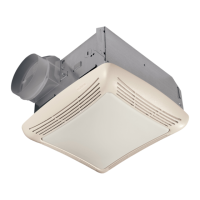
MODEL 757SNNT
TYPICAL INSTALLATIONS
(continued)
SUSPENDED CEILINGS
Housing hung with wires - 3-point mount.
3. Set housing aside and drive nails partially into joist at the
top of both keyhole marks.
4. Hang housing from nails and pound nails tight. To ensure
a noise-free mount, pound another nail through the top
hole of each mounting tab.
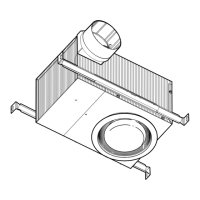
INSTALL THE HOUSING
(continued)
New Construction
Existing Construction
2. In attic, position mounting brackets against joist. Trace
outline of housing on ceiling material.
1. Choose the location for your fan/light in the ceiling. For
best possible performance, use the shortest possible duct
run and a minimum number of elbows.
3. Set housing aside and cut ceiling opening slightly larger
than marked.
INSTALL THE HOUSING
1. Choose the location for your fan in the ceiling. For best
possible performance, use the shortest possible duct run
and a minimum number of elbows.
2. Position mounting brackets against joist so that bottom
edge of housing will be flush with finished ceiling.
Additional positioning feature for 5/8”, 1”, &
1-1/4” thick ceiling material:
Holes in corners of housing are labeled with
various ceiling material thicknesses. Position
housing so bottom edge of joist is visible through
a matched set of holes. The housing is now in the
proper position for that ceiling material thickness.
Additional positioning feature for 1/2” thick
ceiling material:
Bend two tabs, on side of housing,
90
0
outward. Lift
housing until tabs contact underside of joist.
Mark the keyhole slot on both mounting brackets.
New Construction
5/8
1
1-1/4
TAB
HOLES
BOTTOM EDGE OF JOIST
- PLEASE NOTE -
THE FOLLOWING INSTALLATION ILLUSTRATIONS SHOW 2 X
6 JOISTS. IF YOU HAVE A TRUSS OR “I”-JOIST INSTALLA-
TION, MOUNT THE VENTILATOR TO THE ADDITIONAL FRAM-
ING IN THE SAME MANNER. (Additional framing must be a
2x6 (minimum height), at least 9-inches long.)