INSTALLATION AND USE & CARE INSTRUCTIONS
INSTALLATION
6
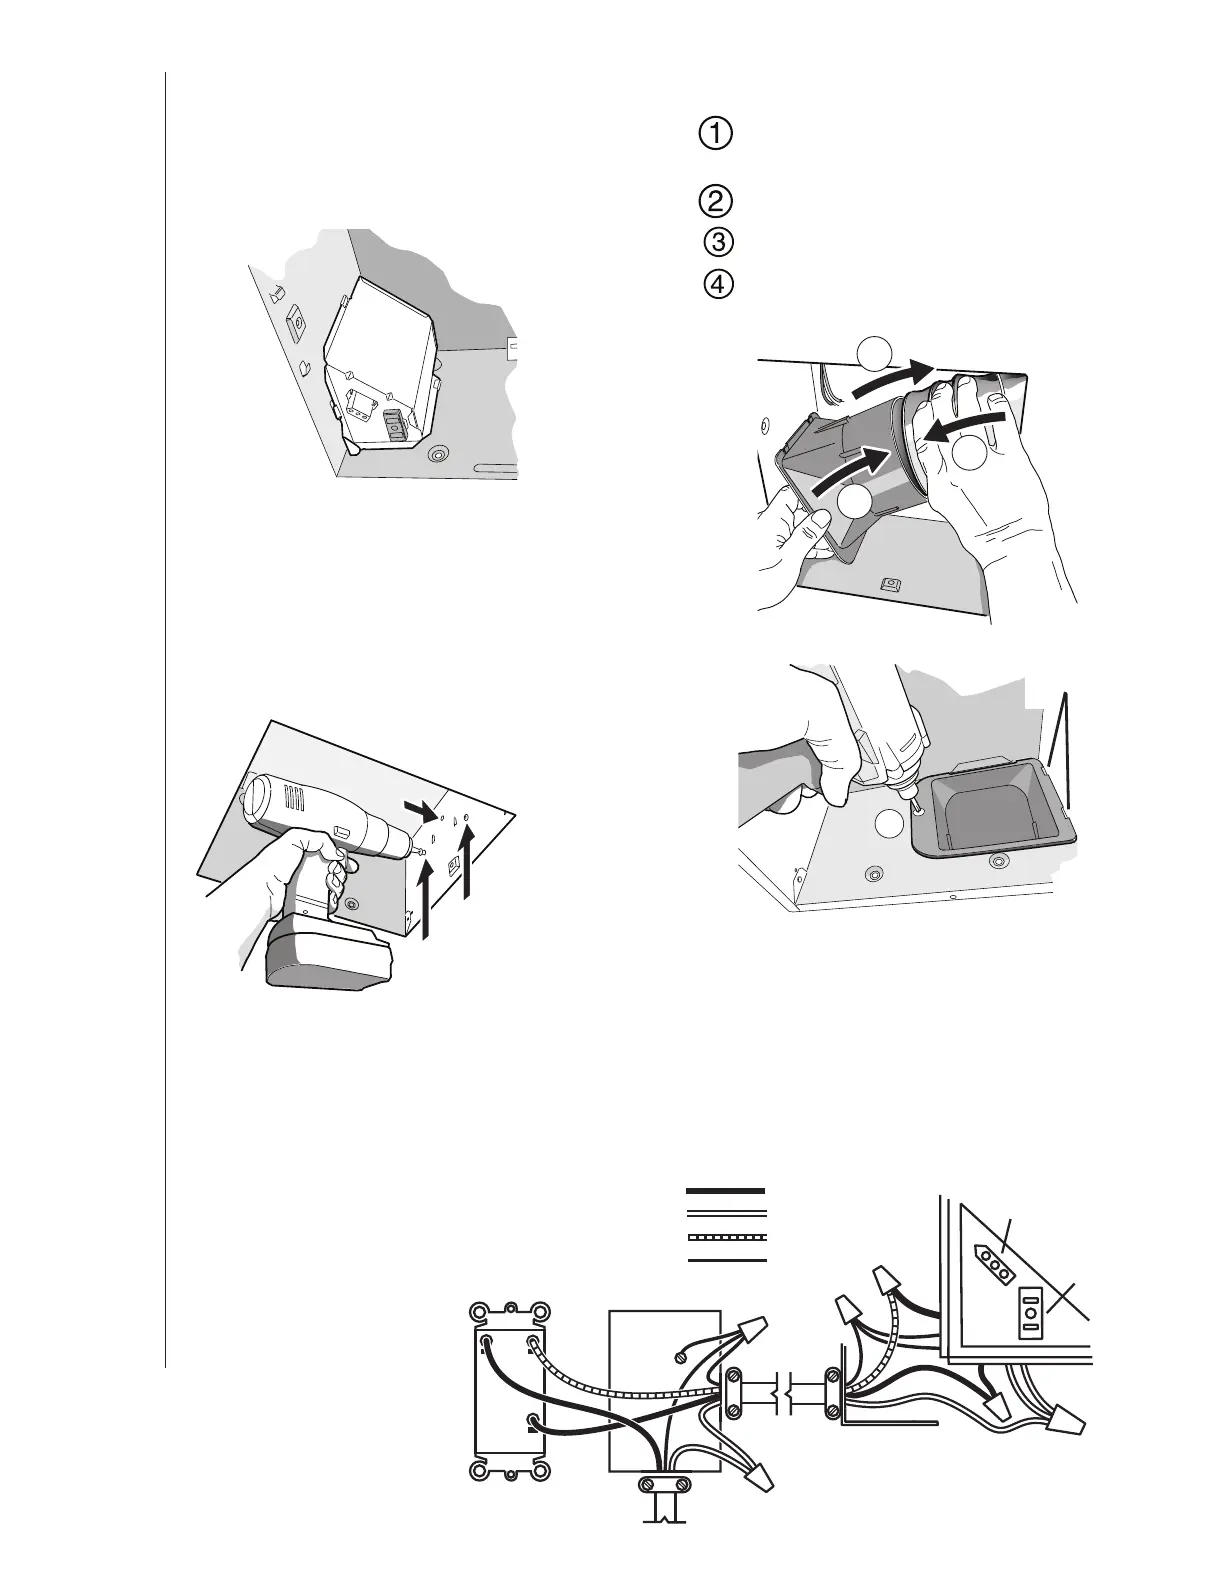
SWITCH BOX
LIGHT
FAN
DUAL CONTROL
(purchase separately)
WHITE
BLACK
RED
GROUND
(bare)
WIRING PLATE
120 VAC LINE IN
RECEPTACLE
(FAN)
RECEPTACLE
(LIGHT)
WIRING DIAGRAM
7. Connect wiring.
Connect power cable to housing with appropriate UL
approved connector. Make wiring connections as shown
in “Wiring Diagram” section. Re-install wiring panel and
secure with screw from parts bag.
9. Connect 4-in. round duct.
Pull existing ducting through housing discharge
opening.
Attach and tape ducting to duct connector.
Push connector/ducting back through opening.
Engage tabs and secure with screw from parts
bag.
Install blower. Finish ceiling, then
install grille.
See Steps 9 & 10 on Page 5.
8. Mount fan to ceiling structure.
Mount housing to ceiling structure with standard
drywall or wood screws in locations shown.
*
Center hole optional.
1
2
3
4
TABS