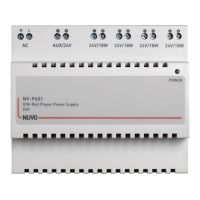
3
1 2 3
Fig. 3
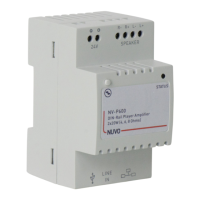
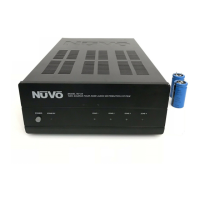
STEP 4: Connect the amplifier to the power supply. (Fig. 3, Number 2)
Note: Only use the 24 V/18 W connection points. Do not use the AUX/24 V connection points for this application.
– Insert the exposed end of the cable into the connection point for the 24 V/18 W (+) on the P600 amplifier.
– Tighten the 24 V (+) screw to secure the cable.
Note: Make sure the end of the cable is securely held under the screw.
– Run the other end of the cable to an open 24 V/18 W (+) connection point on the P601 power supply.
– Insert the exposed end of the cable into the 24 V/18 W (+) connection point on the power supply.
– Tighten the screw down to secure the cable.
Note: Make sure the end of the cable is securely held under the screw.
– Repeat the wiring process for the 24 V (-) connection point on the amplifier and power supply.
– Repeat the connection process for each amplifier.
Note: A total of four P600 amplifiers can be connected to one P601 power supply unit.
STEP 5: Connect the speakers to the amplifier. (Fig. 3, Number 3)
– Pull the wire from the R (+) connection point on the speaker to the R (+) connection point on the amplifier.
– Insert the exposed end of the wire into the R (+) connection point on the amplifier.
– Tighten the R (+) screw to secure the wire.
Note: Make sure the end of the wire is securely held under the screw.
– Repeat the wiring process for the R (-) connection points on the amplifier and speaker.
– Repeat the wiring process for the L (+) connection points on the amplifier and speaker.
– Repeat the wiring process for the L (-) connection points on the amplifier and speaker.
– Repeat the connection steps for each amplifier.
STEP 6: Plug the Ethernet cable into the Ethernet port ( ) on the bottom of the P600.
STEP 7: Plug a USB drive into the USB port ( ) on the bottom of the P600. (Optional)
STEP 8: Plug the 3.5 mm stereo input line into the analog stereo input jack ( ). (Optional)
Note: Connecting a compatible audio device to the P600, using an analog stereo input line, allows the user to play music selections from the
connected device.
STEP 9: Connect the P601 power supply cable to the DIN rail enclosure power using the AC connection points N and L. (Fig. 3, Number 1)
STEP 10: Turn on the main power supply to the DIN rail enclosure.
STEP 11: Download and launch the Nuvo Player Portfolio app from the Apple App Store or the Google Play Marketplace. Follow the
on-screen instructions in the App to complete the setup.