nuwavenow.com | 13
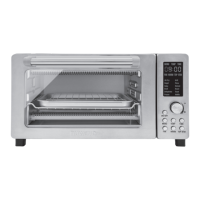
FAN
1. Press FAN to adjust the fan speed.
FAN3 is the default and the fastest
setting.
2. Press FAN to lower the fan speed.
Each button press will lower the
speed setting to FAN2, then FAN1
until the fan is off on setting FAN0.
3. Press FAN again to return to the
default FAN3.
WARM
1. After setting your cooking
temperature and time, press WARM
to keep your food warm after the
Bravo is done cooking. The default
for Warm is 140ºF for 1 hour.
2. Turn the START/PAUSE dial to
adjust the warming temperature up
to 200ºF.
3. Press TIME and turn the START/
PAUSE dial to adjust the warming
time up to 3 hours, if desired.
4. Press START/PAUSE to start
cooking. The Bravo will go through
a regular cooking cycle then will go
into Warm at the set temperature
and time.
Using Warm as an Independent
Function
1. Press and hold WARM for 1 second
(until you hear a beep). The Bravo
will begin the warming function at
the default settings.
2. Turn the START/PAUSE dial to adjust
the warming time up to 3 hours
3. To adjust the warming temperature,
press TEMP and use the START/
PAUSE dial to adjust the warming
temperature up to 200ºF.
4. When the warming time runs out,
the display will show End and the
Bravo will beep 3 times.
0 1
:
0
0
2. The cooking time can be adjusted by
turning the START/PAUSE dial. The
maximum cooking time depends on
the set cooking temperature.
• 50F~275F: 00:00-99:99
(0-min. to 99-hrs., 99-min.)
• 280F~400F: 00:00-24:00
(0-min. to 24-hrs.)
• 405F~450F: 00:00-01:00
(0-min. to 1-hr.)
3. The cooking time can be adjusted by
turning the START/PAUSE dial. The
Bravo will continue to cook at the
new time setting.
• The cooking temperature can be
adjusted by pressing TEMP and
turning the START/PAUSE dial.
The Bravo will continue to cook at
the new temperature setting.
F A
3
INSTRUCTIONS