Jetson TX2 Developer Kit DA_09452-003 | 12
• Multimedia API Reference
• OpenCV Documentation
HOW TO INSTALL JETPACK
Installing JetPack to your developer kit requires you to perform these steps, detailed in
the sections below:
1. Download and install NVIDIA SDK Manager on the Linux host computer.
2. Connect your developer kit to the Linux host computer.
3. Put your developer kit into Force Recovery Mode.
4. Use SDK Manager to select and install desired components.
Download SDK Manager on the Linux Host Computer
You must have a Linux host computer to run SDK Manager and flash the developer kit.
Supported host operating systems are:
• Ubuntu Linux x64 Version 18.04 or 16.04
Follow these instructions to download and install NVIDIA SDK Manager
.
Note: SDK Manager can flash and install software on a target Jetson device, but it
cannot run directly on that device. Whether or not a Jetson device is
present, you can use SDK Manager to update software on the Linux host.
Connect Developer Kit to the Linux Host Computer
Prepare your Jetson TX2 Developer Kit for initial setup as follows. For “headless” setup,
skip the first two steps.
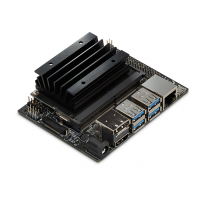
• Connect an external HDMI display to the carrier board’s HDMI port.
• Connect a USB keyboard and mouse to a USB hub (not included) and connect the
hub to the developer kit’s USB Type-A port. (The USB Micro AB port will be
needed for flashing.)
• Insert the Micro-B end of the included USB Micro-B to USB A cable to the carrier
board’s USB Micro-AB port. Connect the other end to your Linux host computer.
• Connect the included AC adapter to the carrier board's power jack. Plug the AC
adapter into an appropriately rated electrical outlet.
Use only the supplied AC adapter, as it is appropriately rated for your device.