OASIS Technical Bulletin OAS036RevC
Kalix – Expansion Tank Installation
090805 4 of 4 OAS036RevC
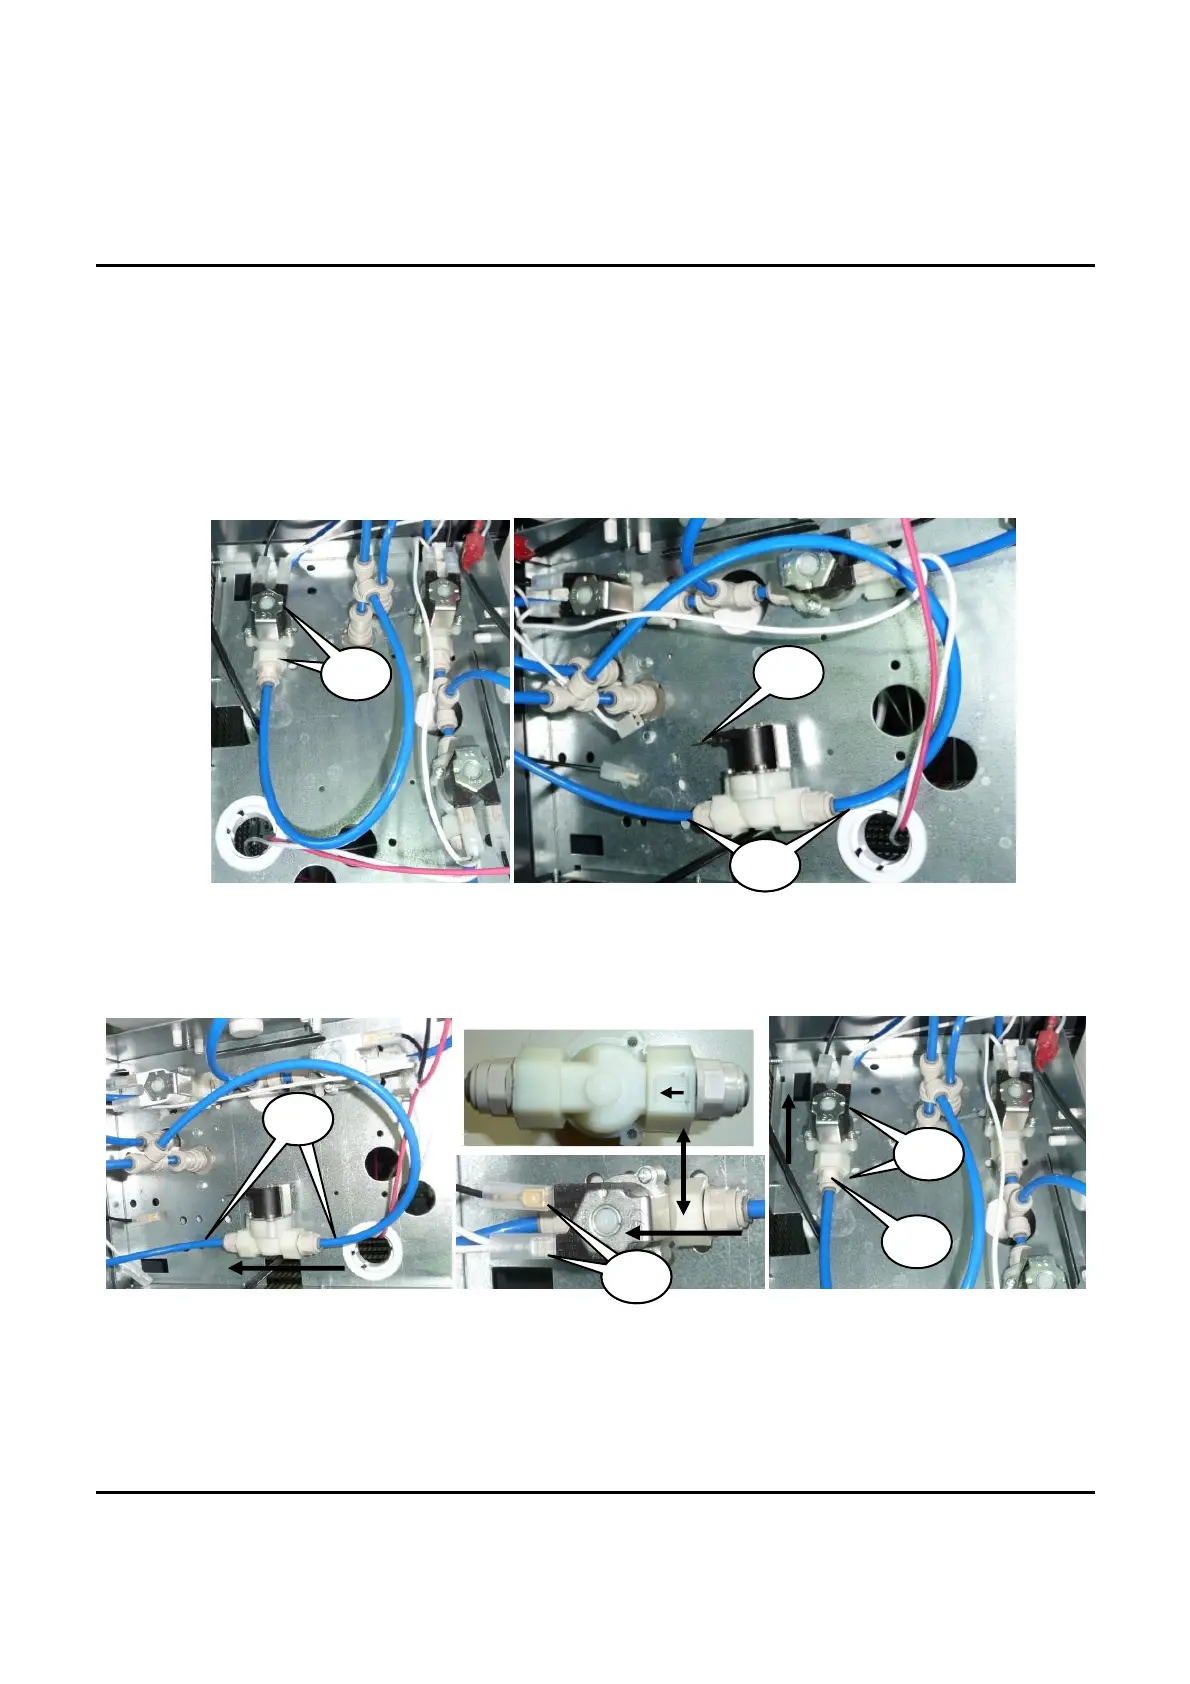
STAGE 3: REPLACE OUTLET SOLENOID
If leaks from spout are still noticeable after the expansion tank has been installed, then the outlet solenoid valve must
be exchanged.
1. Disconnect unit from water and power supply
2. Cut two tie cables that hold marked solenoid valve.
3. Disconnect two wires connected to solenoid valve.
4. Disconnect two tubes from solenoid valve.
5. Install new solenoid valve. Plug tubes as shown on photo. Servo valve has at the bottom arrow that shows water flow,
it must be directed as shown on photo.
6. Connect two wires to solenoid valve.
7. Make sure that new solenoid valve is installed as it is shown on photo – arrow shows water flow.
8. Tighten solenoid valve with two tie cables.
Assemble the unit. Plug to water and power supply. Flush some water to check if it works properly.
2 2
3
3 5
6
5 8
3 4
6
7
 Loading...