Replacing consumable items > 42
4. Put the assembly down gently on to a piece of paper to avoid damaging the green
drum surface.
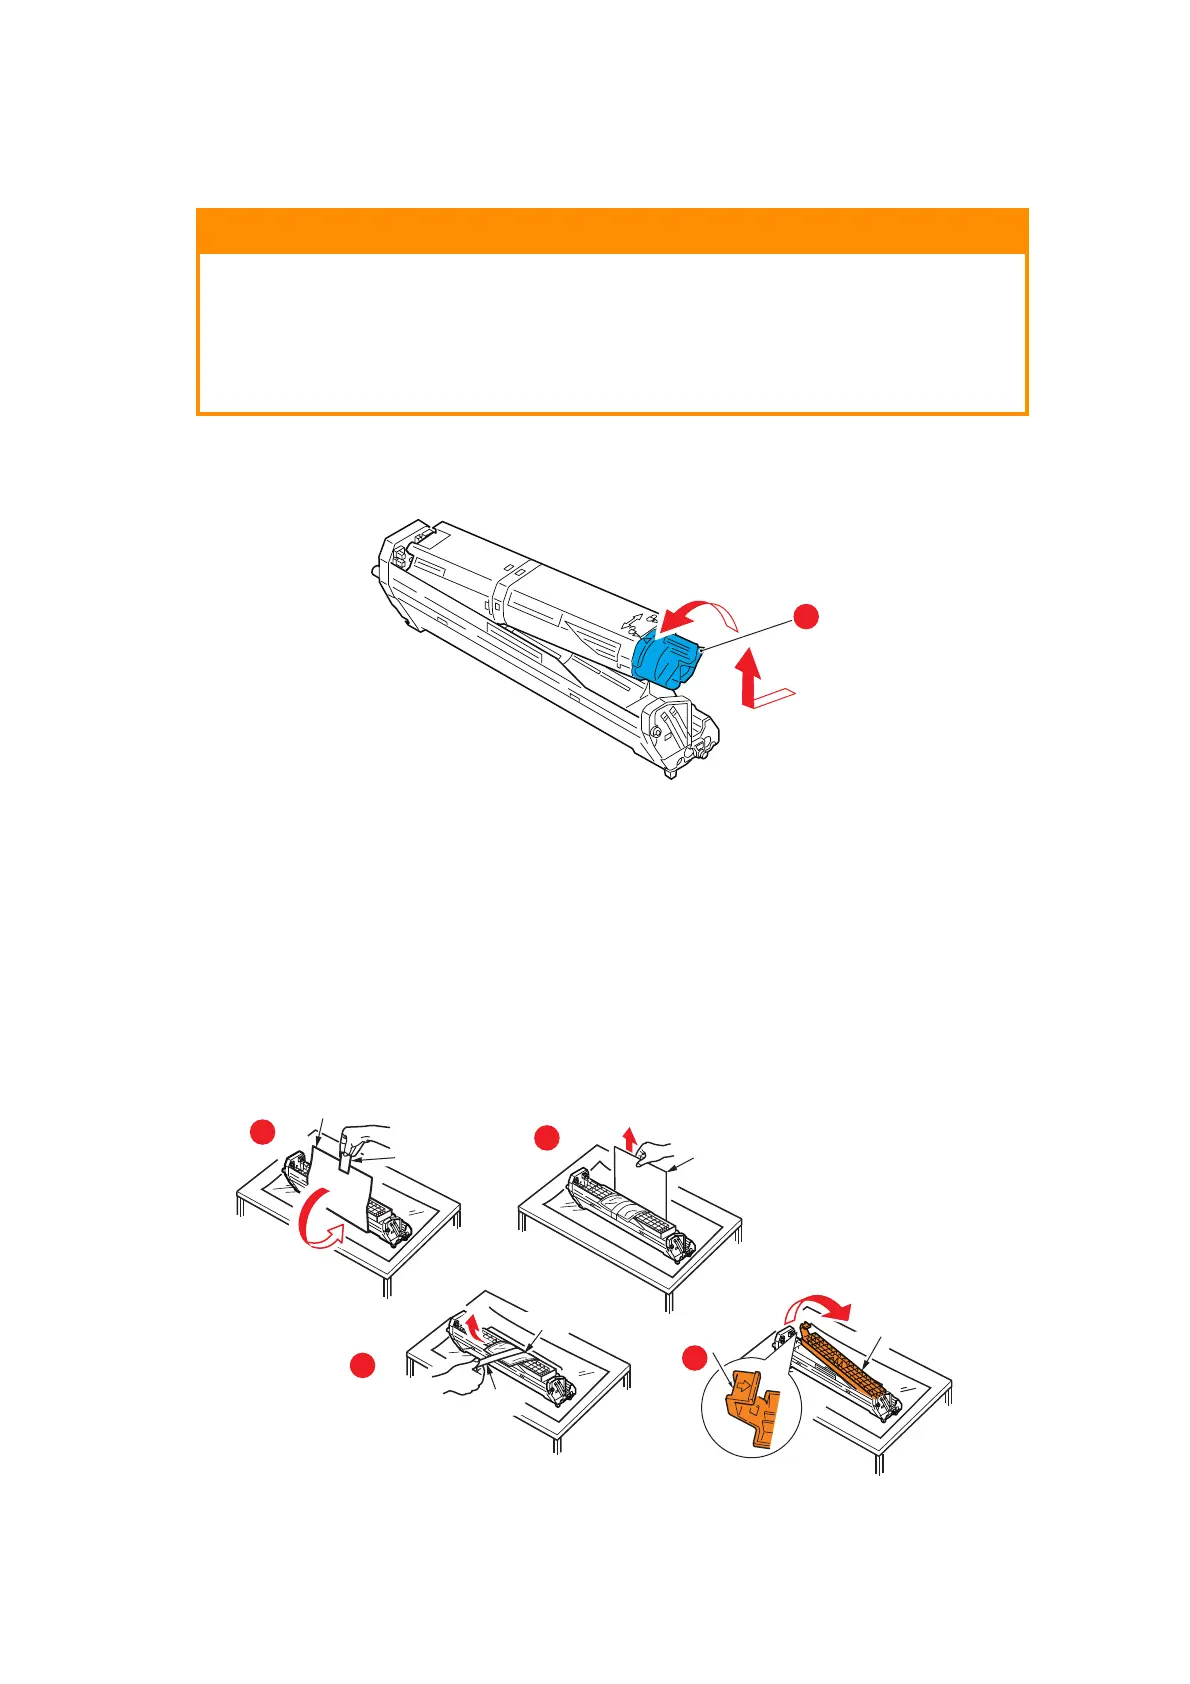
5. With the coloured toner release lever (1) to the right, pull the lever towards you.
This will release the bond between the toner cartridge and the image drum
cartridge.
Lift the right-hand end of the cartridge and then draw the cartridge to the right to
release the left-hand end as shown, and withdraw the toner cartridge out of the image
drum cartridge. Place the cartridge on a piece of paper to avoid marking your
furniture.
6. Take the new image drum cartridge out of its packaging and place it on the piece of
paper where the old cartridge was placed. Keep it the same way round as the old
unit. Pack the old cartridge inside the packaging material for disposal.
7. Remove the protective sheets from the image drum unit (a), (b) & (c). Pack the old
ID unit inside the packaging material for disposal.
Remove transit packing (d).
CAUTION!
The green image drum surface at the base of the cartridge is very
delicate and light sensitive. Do not touch it and do not expose it to
normal room light for more than 5 minutes. If the drum unit needs to
be out of the printer for longer than this, please wrap the cartridge
inside a black plastic bag to keep it away from light. Never expose the
drum to direct sunlight or very bright room lighting.
1
a
b
c
d
 Loading...