EasyManua.ls Logo

Oki C712dn-b - User Manual

Oki C712dn-b
6 pages
Print Icon
To Next Page IconTo Next Page
Loading...
Version 1.0
1
Thank you for choosing OKI.
This is C712 configuration instructions for Ballot model. These instructions explain 2 ways for
configuration. Manually and using Ballot Configuration Tool.
Before ballot configuration, please perform the following steps.
1. Install Extended 2nd Paper Tray for 19" Ballots (Order/Part Number 44274505).
2. Turn ON the device.
3. Print the Configuration pages. (Print Information -> Configuration -> Execute)
4. Check Serial Number and the current tray 2 setting from the configuration pages.
[Serial Number]
[Tray 2 Setting (Paper Size)] (Before Ballot Configuration)
Notes: Be sure to note down the serial number as it is necessary for inquiry.
If you do not have Ballot Configuration Tool you can set by using device menu, please
proceed to next page. In case you have Ballot Configuration Tool, please proceed to page 3.

Questions and Answers

  • H
    hbrewerAug 18, 2025
    What to do if Oki C712dn-b shows 'Caution, unknown Consumable detected'?
    • T
      Tonya ScottAug 18, 2025
      If the Oki Printer displays the message “Caution, unknown Consumable detected”, turn off the printer. Then, press and hold the Cancel button while turning the printer back on. After the printer starts up, release the Cancel button.
  • X
    xowensSep 4, 2025
    What to do if an error message is displayed on the Oki All in One Printer operator panel?
    • P
      Pamela JonesSep 4, 2025
      If an error message appears on the operator panel of your Oki All in One Printer, press [Details] and clear the error following the onscreen instructions.
  • J
    Jason SalinasNov 11, 2025
    How to fix paper jams in Oki C712dn-b Printer?
    • A
      Amber IbarraNov 11, 2025
      If a sheet is partially out of the Oki Printer, gently pull it out. If it doesn't come out easily, don't force it. Open the printer’s output tray fully by pressing the cover release. Check for paper on the belt unit. To remove a sheet with its leading edge at the front of the belt, lift the sheet from the belt and pull it into the internal drum cavity. For a sheet in the central belt area, separate it from the belt and withdraw it. If a sheet is entering the fuser, separate its trailing edge from the belt, push the fuser pressure release lever forward and down, and withdraw the sheet through the drum cavity. Don't pull back a sheet far into the fuser. To remove a sheet in the fuser, push the two retaining levers towards the rear to release the fuser, then withdraw the fuser unit. Replace t...
  • B
    Brenda MillerNov 23, 2025
    Why is my Oki All in One Printer unable to print?
    • A
      Alex PattersonNov 23, 2025
      Your Oki All in One Printer may be unable to print due to several reasons: * The machine might be in Sleep mode or Deep Sleep mode. Press the (POWER SAVE) button to enter standby status. * The machine might be turned off. Turn the machine on. * A LAN cable or USB cable might be unplugged. Check that the cable is properly connected to both the machine and the computer. * There might be a problem with the cable. Replace it with a new one. * The machine might be offline. Press the (PRINT) button, and then select [Online]. * An error message might be displayed on the touch panel. Check the error messages or press [?] on the touch panel. * The interface setting might be disabled. Ensure consistency between the machine's settings and the network connection environment by checking ...
  • C
    Chad MurphyDec 1, 2025
    Why Oki All in One Printer is unable to copy?
    • C
      Christina BraunDec 1, 2025
      There are several reasons why your Oki All in One Printer might be unable to copy: * The machine might not be turned on. In this case, turn the machine on. * The machine may be initializing; wait until initialization is complete. * The document might not be set properly; ensure the document is correctly set. * There might be no paper in the tray; load paper into the tray and ensure the paper cassette is installed. * The paper size might be incorrect; load the correct size paper. * The paper tray might not be selectable; on the touch panel, go to Device Settings, then Paper Setup > Select Tray > Copy, and select the paper tray with the loaded paper, choosing ON or ON(Prior). * The loaded paper might not be compatible with duplex printing; load appropriate paper and correctly ...

Overview

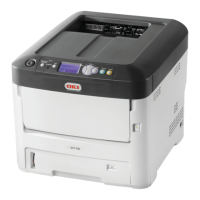
This document serves as a comprehensive setup manual for the OKI C712dn-b Ballot Printer, specifically designed for ballot printing applications. It outlines two distinct methods for configuring the printer: manual setup via the device's control panel and automated setup using the Ballot Configuration Tool. The manual emphasizes the importance of proper initial setup to ensure accurate and reliable ballot printing.

Before initiating any configuration, users are instructed to install the Extended 2nd Paper Tray, which is designed to accommodate 19-inch ballots. This accessory is crucial for the printer's intended use in ballot production. Following the physical installation, the device must be powered on. A critical preliminary step involves printing the Configuration pages. This is achieved by navigating through the printer's menu: "Print Information" followed by "Configuration" and then "Execute." These pages provide vital information about the printer's current status and settings, including the serial number and the existing configuration of Tray 2. Users are advised to note down the serial number as it may be required for inquiries or support.

For manual configuration, the process begins by accessing the "Menus" option on the device's control panel, then proceeding to "Tray Configuration" and finally "Tray 2 Config." The first step in this manual process is to change the "Paper Size" setting for Tray 2 from "Cassette Size" to "Custom." Once "Custom" is selected, the user must then define the dimensions of the custom paper size. The "Y Dimension" is to be set to "19.0 inch," and the "X Dimension" is to be set to "8.5 inch." After these dimensions are entered, the manual configuration for Tray 2 is complete. This method provides direct control over the printer's settings through its integrated interface.

Alternatively, for a more streamlined approach, the Ballot Configuration Tool can be utilized. This method requires connecting the printer to a PC via a USB cable. Users must first copy the Data Transmitter module, provided by OKI, to their desktop. The Data Transmitter Tool, identified as "DT.exe," is then launched. Upon launching, the user selects their preferred language and clicks "OK." The next step involves selecting "Open" from the file menu within the Data Transmitter Tool and then choosing the "setup.dtd" file. This file contains the predefined ballot configuration settings.

Once the "setup.dtd" file is loaded, the user must select the "C712-b Configuration" function within the tool. The tool will then search for a USB-connected printer. When the device is found, it should be selected, and the "Send" button clicked to transmit the configuration settings to the printer. A confirmation prompt will appear, and clicking "OK" will initiate the configuration process. During this period, which typically lasts about 10 seconds, users are cautioned not to touch the printer as it applies the new settings. After the configuration is successfully applied, the device will automatically restart (power off and then on) to finalize the changes. This automated reboot signifies the completion of the configuration process using the Ballot Configuration Tool.

Following either the manual or automated configuration, a crucial verification step is required. After the printer reboots and completes its initialization, its status will change to "Ready To Print." At this point, users must once again print the Configuration pages by navigating to "Print Information," "Configuration," and "Execute." The purpose of this step is to confirm that the Tray 2 settings have been correctly applied. The configuration pages should now display "Paper Size: Custom," "X Dimension: 8.5inch," and "Y Dimension: 19.0inch" for Tray 2. If these settings are not reflected, users are instructed to repeat the entire configuration procedure.

The manual emphasizes that the setup is successful only if these specific dimensions and paper type are applied to Tray 2. This meticulous verification ensures that the printer is correctly prepared for ballot printing, minimizing potential errors or misprints. The document concludes by reiterating the importance of accurate setup for optimal performance in ballot printing applications. The C712dn-b, with its specialized tray and configuration options, is designed to meet the precise requirements of ballot production, ensuring that each ballot is printed to the correct specifications. The detailed instructions aim to empower users to confidently set up and maintain their ballot printer for reliable operation.

Oki C712dn-b Specifications

General IconGeneral
Print Speed (Color)34 ppm
Print Resolution1200 x 1200 dpi
Monthly Duty Cycle100, 000 pages
Duplex PrintingYes
Operating System CompatibilityWindows, Mac OS, Linux
ConnectivityUSB 2.0, Ethernet
Paper Capacity300 sheets
Paper SizeA4, Letter, Legal

Related product manuals