EasyManua.ls Logo

Olympus Camedia C-3040Zoom - User Manual

Olympus Camedia C-3040Zoom
228 pages
Print Icon
To Next Page IconTo Next Page
Loading...
Before using your camera, read this
manual carefully to ensure correct
use.
We recommend that you take test
shots to get accustomed to your
camera before taking important
photographs.
Serial number/Numéro de série/Número de serie
Digital camera
CD-ROM
VT2208-02
INSTRUCTIONS
DIGITAL CAMERA
OLYMPUS OPTICAL CO., LTD.
San-Ei Building, 22-2, Nishi Shinjuku 1-chome, Shinjuku-ku, Tokyo, Japan.
(Customer support) Tel. 0426-42-7499 Tokyo
http://www.olympus.co.jp
OLYMPUS AMERICA INC.
Two Corporate Center Drive, Melville, NY 11747-3157, U.S.A. Tel. 631-844-5000
(Customer support) Tel. 1-888-553-4448
http://www.olympus.com
OLYMPUS OPTICAL CO. (EUROPA) GMBH.
(Premises/Goods delivery) Wendenstraße 14-18 D-20097 Hamburg, Germany. Tel. 040-237730
(Letters) Postfach 10 49 08, 20034 Hamburg, Germany.
http://www.olympus-europa.com
6.Displaying, editing and
erasing your pictures
9.Downloading Images to a
Computer
Printed in Japan
1AG6P1P0887– –A
1.Getting Started
2.
Shooting and Playback Basics
3.Focusing
4.Custom Photography
5.Using Flash
7.Print settings
8.Mode setup
10.Miscellaneous
P.27
P.51
P.75
P.87
P.125
P.139
P.159
P.171
P.195
P.207

Table of Contents

Other manuals for Olympus Camedia C-3040Zoom

Questions and Answers

  • J
    Jon AnthonyAug 19, 2025
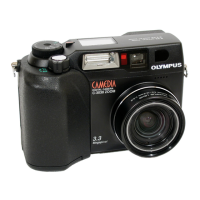
    Why doesn't my Olympus Camedia C-3040Zoom Digital Camera turn on?
    • M
      Manuel PaulAug 19, 2025
      Your Olympus Digital Camera might not be turning on for several reasons: it may be switched off, so ensure the Mode dial is set to a setting other than "OFF"; the batteries might be loaded incorrectly, so reload them correctly; cold temperatures can reduce battery performance, so warm the batteries in your pocket before loading them; the sleep mode function may have shut the camera down, so use the shutter button or the zoom lever; the camera will not operate while connected to a computer; or the lens cap was on when the camera was switched on, so remove the lens cap, then switch the camera off then on again.
  • K
    kelly42Aug 21, 2025
    What to do if my Olympus Camedia C-3040Zoom picture is out of focus?
    • M
      Megan MacdonaldAug 21, 2025
      If your Olympus Digital Camera pictures are out of focus, there might be a few reasons. You may have moved the camera when you pressed the shutter button, so hold the camera correctly and press the shutter button gently and smoothly. Ensure that your subject is in the center of the shot, or use the focus lock. The lens could be soiled, so clean the lens with a soft dry cloth. If the subject was too close, use Macro mode for subjects 7.9" to 31.5" (2.6 ft) from the camera, and for longer distances, use the normal shooting mode. If you used Self-timer mode, press the shutter button while looking through the viewfinder, not while standing in front of the camera, or use the remote control. Finally, if you used manual focus, ensure you selected the correct focal distance.
  • C
    Carrie AndersonAug 25, 2025
    How to fix Olympus Digital Camera not recording sound when shooting a movie?
    • T
      tpetersAug 25, 2025
      If your Olympus Digital Camera is not recording sound when you shoot a movie, the movie sound recording might be set to "OFF". Change the movie sound recording setting to "ON."
  • H
    huangangieAug 26, 2025
    How to fix the date recorded with my Olympus Digital Camera image data being wrong?
    • S
      sdiazAug 27, 2025
      If the date recorded with your Olympus Digital Camera image data is wrong, it's likely because the date was not set. Set the date. The clock adjustment is not factory-pre-set. Also, if the camera has been left for approximately 1 week with the batteries removed, the date setting will be canceled, so try setting the date again.
  • A
    Andrew MendozaAug 28, 2025
    Why is the monitor difficult to see on my Olympus Camedia C-3040Zoom Digital Camera?
    • E
      Elizabeth WrightAug 28, 2025
      If the monitor is difficult to see on your Olympus Digital Camera, it could be because the monitor brightness is incorrectly adjusted, so adjust the monitor brightness. Also, if you are looking at the monitor in sunlight, use your hand or another object to shade the monitor.
  • D
    David CarpenterAug 30, 2025
    Why doesn't the flash fire on my Olympus Digital Camera?
    • B
      Brent BrowningAug 30, 2025
      The flash on your Olympus Digital Camera might not be firing because the flash mode is set to "Flash Off". Change the flash mode. Also, the flash cannot be used in Sequence mode or Panorama mode. If the subject is brightly lit, set the flash mode to "Forced Flash" to force the flash to fire. If "AF" or "BKT" is selected as the drive mode, switch to a single-shot mode. If the camera is set to Panorama mode, deactivate Panorama mode. The flash also does not fire when "WHITE BOARD" or "BLACK BOARD" is selected in the FUNCTION setting.
  • C
    Cynthia RodriguezSep 1, 2025
    Why is my Olympus Camedia C-3040Zoom picture too dark?
    • K
      Kimberly PerezSep 1, 2025
      If your Olympus Digital Camera picture is too dark, it could be due to several reasons: the flash was obscured by a finger or other object, so hold the camera correctly, ensuring the flash isn't blocked; the subject is beyond the effective range of the flash, so shoot within the effective flash range or use an external flash; the flash was set to the "Flash Off" mode, so check the flash mode before taking the shot; the subject was too small and was backlit, so set the flash to "Forced Flash" mode or use Spot Metering mode; or you used Sequence mode to take the shot, as higher shutter speeds may result in darker pictures.
  • S
    Stacy PattersonSep 3, 2025
    Why is my Olympus Digital Camera picture too bright?
    • W
      William HoldenSep 3, 2025
      If your Olympus Digital Camera picture is too bright, it could be because the flash is set to the Forced Flash mode, so select a flash mode other than Forced Flash. If the subject was too bright, use exposure compensation or take the shot from a different angle. If you neared the subject by macro mode, confirm the effective flash range and shoot the picture.
  • E
    Elizabeth CochranSep 8, 2025
    Why can't I display images on the monitor of my Olympus Camedia C-3040Zoom?
    • M
      Mark GrossSep 8, 2025
      You might not be able to display images on the monitor of your Olympus Digital Camera because the camera is set to a shooting mode. Set the Mode dial to " ". If there are no pictures recorded on the card, the "NO PICTURE" message appears on the monitor. Take a picture and then display the shot. There might also be a fault in the card. Finally, the monitor is switched off while the camera is connected to a TV.
  • H
    Herbert JohnsonSep 9, 2025
    Why do the colors of pictures taken indoors with my Olympus Camedia C-3040Zoom look unnatural?
    • J
      Johnny OwensSep 10, 2025
      If the colors of pictures taken indoors with your Olympus Digital Camera look unnatural, it could be because the lighting affected the picture, so set the flash mode to Forced Flash. If there are no white areas on the subject, include something white in the field of view or adjust the white balance to suit the lighting. The white balance setting might also be incorrect, so adjust the white balance to suit the lighting.

Summary

Getting Started with Your Camera

Attaching the Strap and Lens Cap

Learn how to properly attach the camera strap and lens cap for secure handling and protection.

Loading Batteries

Step-by-step guide on how to correctly insert and load the camera's battery packs or AA batteries.

Inserting and Removing SmartMedia Cards

Instructions for safely inserting and removing SmartMedia cards, the camera's recording media.

Setting the Date and Time

Procedure to set the camera's internal clock for accurate date and time imprinting on photos.

Using the Mode Dial

Explanation of the Mode Dial settings for switching camera modes like Program, Movie, and Playback.

Navigating Camera Menus

Guide to accessing and selecting various camera settings through the menu system.

Shooting and Playback Basics

Switching the Camera On and Off

Learn the simple steps to power the camera on and off using the Mode Dial.

Shooting and Playback Checklist

Essential checks before shooting, including battery charge and card status.

Taking Still Pictures

Basic instructions on how to compose and capture still photographs with the camera.

Taking Pictures Using the Monitor

Guide on using the camera's LCD monitor to compose and capture images.

Shooting Movies

Instructions for recording movies with sound using the camera.

Displaying Pictures (Quick View)

How to quickly view recently taken pictures immediately after shooting.

Erasing Pictures (One-Frame Erase)

Procedure for deleting individual unwanted pictures from the camera.

Using the Auto-Flash

Information on how the camera automatically uses the flash in low-light or backlit conditions.

Focusing Techniques

Focusing on Difficult Subjects

Tips for achieving focus on subjects that may challenge the autofocus system.

Focusing on Off-Center Subjects

How to use focus lock to maintain focus on subjects not in the center of the frame.

Focusing Faster (Full-time AF)

Enables continuous autofocusing without pressing the shutter button halfway.

Focusing Manually

Detailed steps for manually adjusting focus for precise control.

Focusing on Close-Up Subjects (Macro Mode)

Using Macro mode for detailed shots of subjects at very close distances.

Zooming In Further (Digital Zoom Mode)

Using digital zoom to achieve higher magnification beyond the optical zoom.

Custom Photography Settings

Setting A;S;M Dial Functions

Configure the camera's Mode Dial for Aperture, Shutter Priority, or Manual modes.

Controlling Depth of Field (Aperture Priority)

Adjusting aperture settings to control background blur in Aperture Priority mode.

Capturing Movement (Shutter Priority)

Using shutter speed to freeze or blur motion in Shutter Priority mode.

Manual Aperture and Shutter Speed Control

Setting both aperture and shutter speed manually for complete exposure control.

Exposure Compensation

Adjusting exposure levels by plus or minus steps to fine-tune brightness.

Auto Bracket for Exposure

Capturing multiple images with varying brightness for optimal exposure.

Measuring Subject Brightness (Spot Metering)

Using spot metering to measure light only at the center of the subject.

Locking ISO Value

Setting the ISO sensitivity to adjust exposure in low-light conditions.

Setting Color Tone (Preset White Balance)

Selecting preset white balance options to match various light sources.

Setting Recording Quality

Choosing image quality settings (TIFF, SHQ, HQ, SQ1, SQ2) for still pictures.

Taking Sequential Shots (Sequence Mode)

Capturing a series of continuous shots by holding down the shutter button.

Using Self-Timer and Remote Control

Utilizing the self-timer or remote control for commemorative shots.

Using Special Effects (Function Mode)

Applying special effects like Black & White or Sepia to your images.

Panorama Mode

Creating panorama pictures by merging multiple overlapping shots.

Selecting Audio Record Mode

Adding voice comments up to 4 seconds long after taking a picture.

Using the Flash

Selecting the Flash Firing Pattern

Guide to choosing the best flash mode (Auto, Red-Eye, Forced, Off) for photography conditions.

Firing the Flash Automatically

How the flash fires automatically in low-light or backlit conditions.

Reducing Red-Eye Effect

Using Red-Eye Reduction mode to minimize the red-eye effect in portraits.

Using Flash for All Shots (Forced Flash)

Ensuring the flash fires with every shot for consistent lighting.

Preventing Flash Firing (Flash Off Mode)

Disabling the flash in situations where it is prohibited or unwanted.

Setting Flash Brightness (Intensity Control)

Adjusting the flash intensity to achieve better results for specific subjects.

Selecting Flash Timing (Slow Synchro)

Controlling flash timing with slow shutter speeds for scenic night shots.

Using External Flash Units

Instructions for connecting and using optional external flash units.

Displaying, Editing, and Erasing Pictures

Displaying Multiple Images (Index Playback)

Viewing multiple images on screen simultaneously for easier selection.

Enlarging Images (Close-up Playback)

Magnifying images to examine details using the zoom lever.

Preventing Unintentional Image Erasure (Image Protect)

Protecting selected images from accidental deletion.

Viewing Images on a TV

Connecting the camera to a TV to display pictures and movies.

Displaying Image Information

Viewing detailed photography information for each image.

Erasing All Images (All-Frame Erase)

Deleting all unprotected images from the memory card.

Initializing Cards (Formatting)

Formatting the memory card to prepare it for use with the camera.

Print Settings

Printing Methods Overview

Explains three ways to obtain prints: card print order, direct printer use, and PC transfer.

Printing All Images (All Print Order)

Setting instructions to print all pictures on a card using DPOF.

Printing Selected Images (Single Print Order)

Setting instructions to print specific images on a card using DPOF.

Printing Enlarged Images (Trimmed Print Order)

Enlarging and printing a specific portion of a picture.

Resetting Print Reserve

Canceling all print order settings for images stored on a card.

Mode Setup Options

Using Function Settings for Easy Operation

Customizing camera functions like monitor brightness and beep tones.

List of Mode Settings

Overview of customizable settings available in different camera modes.

Restoring Original Settings (ALL RESET)

Setting camera to revert to default values upon switching off.

Custom Settings for Startup

Ensuring preferred settings are restored when the camera is switched on.

Setting Image Clarity (Sharpness)

Adjusting the sharpness of images for prints or processing.

Setting Image Contrast

Adjusting the contrast level for light and dark tones in images.

Saving;Erasing Images After Shooting (CHECK)

Selecting whether to save or erase the picture taken before it's stored.

Adjusting Monitor Brightness

Procedure to adjust the brightness level of the camera's monitor.

Downloading Images to a Computer

Connecting Camera to Computer

Requirements for connecting the camera to a PC via USB or serial cable.

Downloading Pictures Directly from Card

Transferring images to a PC using a card adapter without connecting the camera.

Connecting via Communication Cable

Detailed steps for connecting the camera to a computer using USB or serial cables.

Downloading Images Using CAMEDIA Master

Using CAMEDIA Master software to download and manage pictures.

CAMEDIA Master Functions Overview

Overview of CAMEDIA Master's features including image viewing and processing.

Miscellaneous Camera Information

Troubleshooting Common Problems

Solutions for issues like camera not working or not taking pictures.

Camera Maintenance and Storage

Guidelines for cleaning and storing the camera properly.

Error Codes Explained

Reference for understanding and responding to camera error codes.

Camera Specifications

Technical details and features of the digital camera.

Glossary of Terms

Definitions of technical terms used in the camera manual.

Olympus Camedia C-3040Zoom Specifications

General IconGeneral
ModelC-3040 Zoom
TypeDigital Camera
BrandOlympus
Release Date2001
Optical Zoom3x
Digital Zoom2.5x
Maximum Aperturef/1.8
ISO SensitivityAuto, 100, 200, 400
LCD MonitorYes
LCD Screen Size1.8 inches
Storage MediaSmartMedia Card
File FormatsJPEG, TIFF
Flash ModesAuto, Red-Eye Reduction, Fill-in, Off
White BalanceAuto, Daylight, Overcast, Tungsten, Fluorescent
InterfaceUSB
Effective Pixels3.34 Megapixels
Sensor Resolution3.34 MP
Image Sensor1/1.8 inch CCD
LensOlympus 3x zoom lens
Aperture Rangef/1.8 - f/11
ViewfinderOptical
Exposure ModesProgram, Aperture Priority, Shutter Priority, Manual
Power Source4 x AA batteries

Related product manuals