Do you have a question about the Olympus CAMEDIA C-1400L and is the answer not in the manual?
Olympus disclaims all warranties and liability for the use of its materials or software.
Unauthorized use of copyrighted material may violate copyright laws.
Steps to take if the camera appears not to function correctly.
Instructions on avoiding disassembly and seeking professional repair.
Guidance on avoiding dusty places and handling moisture or foreign objects.
Advice on avoiding camera damage from excessive heat exposure.
Instructions on how to clean the camera safely and effectively.
Specific warnings and advice for flash photography, especially at close range.
Guidelines for safely handling the camera to prevent damage or injury.
Recommendations for optimal storage conditions to prevent camera damage.
Advice on suitable environments and avoiding hazardous conditions.
Guidelines for using supplied or recommended accessories safely.
Safety instructions for connecting, disconnecting, and handling the AC adaptor.
Steps to confirm camera function before important shoots or after long periods of non-use.
Essential safety rules for handling batteries to prevent damage or fire.
Procedures to follow if battery liquid comes into contact with eyes, skin, or the camera.
Guidelines for safe battery storage, disposal, and preventing accidental access by children.
List of parts included with the camera such as strap, lens cap, and cables.
List of optional accessories available for purchase, like memory cards and printers.
Details on CCD resolution, memory card compatibility, and lens specifications.
Notes indicating essential items for proper camera use and potential product differences.
Instructions for powering on the LCD monitor and initial display.
Methods for displaying, slideshow, index, and single-frame erase of pictures.
Overview of the camera's main menu for adjusting settings.
How to adjust resolution (SHQ/HQ/SQ), exposure compensation (AE+/-), and date settings.
Procedures for erasing all data, formatting cards, and adjusting LCD brightness.
Steps to connect the camera to a compatible printer.
Explanation of various print options like single, index, multi, mirror, and random prints.
Minimum PC hardware and software specifications for image transfer.
Steps for installing utility software and connecting the camera to a PC.
Diagram of system connections and common troubleshooting topics.
Common questions and answers regarding camera operation and features.
Guidance for diagnosing and resolving common operational problems.
Information on LCD monitor performance and backlight behavior.
Technical details and features of the camera model.
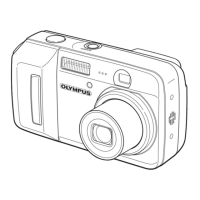
Diagram and labels identifying all external buttons, levers, and connectors on the camera.
Explanation of symbols and lamps shown in the camera's viewfinder.
Meaning of icons and indicators on the camera's control panel.
Overview of information displayed on the LCD screen, including date and frame number.
Step-by-step instructions for correctly attaching the camera strap.
Instructions for using the lens cap holder for convenience and security.
Step-by-step guide for inserting AA batteries correctly, including polarity.
Information on battery types, mixing batteries, and ensuring power is off before loading.
Instructions for opening the compartment and inserting the lithium battery.
Importance of the lithium battery for the internal calendar system.
How to connect the optional AC adaptor to power the camera.
Important safety warnings and usage tips for the AC adaptor.
Steps for inserting the SmartMedia card and turning on the camera.
Warnings about opening compartment, ejecting card, or removing power during operation.
Note on the camera performing a card check after powering on.
Explanation of battery level indicators and their meanings.
Notes on power shut-off and how battery life varies with usage.
Explanation of power saving modes and automatic shut-off.
Reminders for setting the date and keeping spare batteries handy.
How the number of storable pictures is displayed on the control panel.
Notes on errors when count is zero and how resolution affects picture count.
Table showing the minimum number of pictures storable based on resolution and card size.
Note that remaining picture count may vary with each shot or deletion.
Table identifying error codes displayed on the control panel and LCD monitor.
Warnings about card write-protection, card errors, and unformatted cards.
Illustrations and instructions for holding the camera correctly to prevent shaking.
Reminder to keep fingers and strap away from the lens and flash.
How to use the half-press to lock focus and exposure, indicated by the green lamp.
How to fully press the shutter to take the picture and view it on the LCD.
Tips for gentle shutter pressing and avoiding blurry pictures.
Steps for composing the shot, using dioptre adjustment, and locking focus.
Procedure for fully pressing the shutter, observing indicators, and preparing for the next shot.
Warning against opening card compartment or removing power during operation.
Procedure for turning off the camera using the power button.
Notes on data retention, LCD monitor usage, and picture recording status.
Steps to lock focus on a subject and recompose the frame for shooting.
Note indicating that the green lamp lights when focus is locked.
How to select pre-adjusted focal lengths (2.5m or 40cm) for quick shooting.
Steps for engaging Quick Focus and shooting, including flash working range.
Situations where autofocus may not work correctly or lock onto the wrong subject.
Guidance for autofocusing on subjects with low contrast, bright light, dark scenes, or multiple subjects.
How to press the spot metering button and position the subject for measurement.
Steps to lock focus and exposure using spot metering, and recomposing the shot.
Note that spot metering mode is cancelled after the picture is taken.
How to press the selftimer button and observe the indicator.
Sequence of events after pressing shutter, including focus lock and shutter release.
Tips for using a tripod, cancelling selftimer, and preventing light entry into viewfinder.
How to use the zoom lever to switch between telephoto (T) and wide-angle (W) shooting.
How to use macro mode for small subjects and understanding the macro indicator.
Information on minimum focusing distance and using Quick Focus within macro mode.
How to set up the flash and indications for when it is charged.
Table showing effective flash range for wide-angle and telephoto at different camera models.
Descriptions of Auto-Flash, Red-Eye Reducing, and Fill-In Flash modes.
Notes on how selected flash modes are displayed and how Fill-In Flash resets.
Explanation of when auto-flash fires automatically in low light and backlight.
Guidance on positioning subjects within the autofocus mark for backlit shots.
Explanation of pre-flashes to contract pupils and reduce red-eye phenomenon.
Factors affecting red-eye reduction effectiveness, such as distance and subject response.
How to use fill-in flash regardless of lighting conditions for subject illumination.
Advice on using fill-in flash within its working range and in bright light.
How to ensure the flash does not fire, even in low light or for fireworks.
When to use Off mode and the recommendation for using a tripod due to slow shutter speed.
Instructions for powering on the LCD monitor and initial display.
Details on what is displayed, error messages, and date settings.
Warning against touching or pressing the LCD monitor surface.
Note on the power saving function and how to turn the monitor back on.
How to display a picture and navigate between previous and next pictures.
Reminders to wait for full display and notes on viewing similar consecutive pictures.
How to start and stop the automatic picture slideshow.
Note that slide-show is also available in Index-Display mode.
How to select index display showing up to nine frames simultaneously.
Using +/- buttons to select preceding/succeeding frame groups and specific frames.
How to exit index display mode and return to single frame view.
Note that Direct-Print, Slide-Show, and One-Frame erase are possible in this mode.
How to select a picture in index-play mode for deletion.
Steps to press erase and OK buttons to delete the selected picture.
Warnings about not interrupting the erase process or pressing erase during image loading.
Notes on write-protection, protected images, and erasing time variability.
How to turn on power, press the menu button, and navigate menu pages.
Steps to select items, change values with +/- buttons, and confirm with OK.
Notes on returning to menu, cancelling mode, and menu timeout.
Information on whether adjustments persist after power off or battery replacement.
How to select resolution quality (SHQ, HQ, SQ) from the menu.
Steps to confirm selection and view resolution's effect on remaining picture count.
Notes on how resolution affects storable picture count and potential zero count.
How to access and select exposure compensation levels (+/- steps) from the menu.
Guidance on adjusting for light or dark subjects and confirming the setting.
Note on how exposure compensation settings are retained after power off.
How to select 'ERASE ALL' from the menu and start the erasing process.
Notes on restrictions during erasing and the 'ERASED' message.
Warnings about interrupting erase, write-protection, and protected images.
Note that erasing time depends on the amount of data on the SmartMedia.
How to select 'FORMAT CARD' and start the formatting process.
Warnings about data erasure, write-protection, and recommended formatting method.
How to select 'DATE' from the menu and navigate settings.
Steps to set year, month, day, hour, minute, format, time, and print settings.
Notes on valid dates, PC adjustment, and display/print behavior of date/time.
How to select 'BRIGHTNESS' from the menu in Play mode.
Steps to adjust brightness using +/- buttons and confirm with OK.
Steps to connect the camera to the P-300E printer via parallel cable.
Notes on printer button validity, LCD display during printing, and print mode cancellation.
How to press the Print button and navigate the print menu.
Steps to select print types (Single, Index, Multi, Mirror, All, Select) and confirm.
How to stop printing immediately by pressing the power button.
Explanation of error messages like 'PRINTER OFFLINE' or 'PRINTER ERROR'.
How to select and print a single picture from the card.
How to print all pictures in small frames (index print) on a sheet.
How to print multiple images (16 frames/sheet) or sticker prints.
How to print a mirror image of a picture, and notes on date printing.
How to print all pictures stored on the card.
Steps to select individual pictures for printing, including double/triple print options.
How to print the pictures previously selected in SELECT IMAGE mode.
Minimum specifications for CPU, OS, disk space, RAM, connectors, and monitor.
Minimum specifications for Macintosh CPU, OS, disk space, RAM, connectors, and monitor.
Using PCMCIA card adaptor for direct data transfer from SmartMedia.
Introduction to the utility software's capabilities for image management.
How to download and view image data and thumbnails from the camera.
Supported file formats and basic image editing functions like rotation and color change.
Details on printing options available through the software.
How to connect the camera to PC serial ports using the provided cable.
Using the Macintosh conversion connector to link camera to Mac computers.
Notes on feature differences between OS and battery saving with AC adaptor.
Steps to connect the camera to the PC serial port and activate software.
Diagram illustrating connections between camera, PC, printer, and modem.
Information on direct printing capability with an optional printer.
Answers to common questions about battery life and date/time settings.
Instructions on proper camera storage and protection from environmental factors.
Explanation of the red-eye effect and how the reducing mode helps.
Information on compatibility and attachment of filters and hoods for specific models.
Solutions for issues like camera not powering on or batteries not functioning.
Troubleshooting steps for situations where no picture is taken or saved.
Causes and solutions for images being out of focus.
Troubleshooting steps for pictures that are too dark or too bright.
Solutions for unnatural colors and obscured edges in images.
Troubleshooting steps when the flash fails to fire.
Solutions for when photos cannot be displayed on the LCD monitor.
Troubleshooting steps for difficulties in reading the LCD monitor display.
Common error messages during data transfer and their initial causes.
Step-by-step solutions for cable, power, battery, port, speed, and software installation problems.
Procedure to reset the camera when no operations are possible.
Information on limited lifespan of display lamps and contacting service for issues.
How cold affects backlight and how to mitigate it.
Explanation of pixel behavior, brightness variations, and normal operating characteristics.
Product type, recording system, memory, erase functions, and image pickup elements.
Details on recording image resolution, auto white balance, and lens specifications.
Details on aperture, metering, exposure control, working ranges, and focus.
Information on shutter speed, sensitivity, viewfinder, LCD monitor, and pixel count.
Features indicated on screen and the flash charging time.
Effective flash ranges and available flash modes (Auto, Red-Eye, Fill-In).
Information on control panel indicators and autofocus system details.
Details on selftimer, external connectors, and date/time recording.
Information on the automatic calendar system's operational range.
Information on power sources for the calendar system and camera operation.
Recommended temperature and humidity ranges for operation and storage.
List of direct print functions available with the exclusive printer.
Physical dimensions and weight of the camera.
| Brand | Olympus |
|---|---|
| Model | CAMEDIA C-1400L |
| Category | Digital Camera |
| Language | English |