QuickStart Guide
PREPARING THE CAMERA FOR USE
Before you begin using your Olympus Digital camera…
a. Loading the battery
Note: The batteries and xD-Picture card
compartments are accessed by opening the
respective compartment covers.
• Close the lens barrier.
• Slide the battery compartment cover to the direction of the
arrow, and lift open the cover as shown in the illustration.
• Insert the batteries into the compartment.
• Close the battery compartment cover so that it pushes the
battery in and slide the cover while pressing the mark.
Note: If the battery compartment cover is hard to
close, do not force it. Press on the cover firmly
to close the cover, and then slide it into position.
• To remove the batteries, make sure that the monitor and the
lamps at the side of the viewfinder are off.
b. Inserting the xD-Picture Card
The xD-Picture Card is where the camera stores your pictures
and is available in a variety of memory capacities. The pictures
you take with the camera remain on the xD-Picture Card even
when the camera is turned off and/or the batteries are removed.
• Open the card cover.
• Face the card the correct way and insert it into the card slot.
• Insert the xD-Picture Card into the spring-loaded card slot as
shown in the illustration. Push the card fully into the slot. The card
will lock into place when fully inserted.
• To remove, push the card all the way in to unlock it, then let it return
slowly.
• Close the card cover securely.
Confirm you have installed the battery and xD-Picture Card
properly by pressing . The “NO PICTURE” message should be displayed in the monitor. Turn
the camera off by pressing again.
c. Attaching the strap (OPTIONAL)
Attach the strap as illustrated to make the camera easier to
handle.
LensMonitor
Contact area
TURNING ON THE CAMERA
All you need to do is slide the lens barrier open or closed to turn the camera ON or OFF.
a. Turning the camera ON (SHOOTING MODE)
• Slide the lens barrier open fully until it clicks. The lens extends and the subject is displayed on the monitor.
• To turn the camera off, slide the lens barrier until you feel the first click. Wait until the lens is fully retracted, then
close the lens barrier all the way.
To maximize battery life, the built-in power-saver operates, and the camera enters sleep mode after approximately three (3)
minutes of non-use.
b. Setting the Date and Time (OPTIONAL)
Set the date and time before using the camera for the first time. This affects the way image file names are
created, and will conveniently include this information with each picture.
• With the front lens barrier closed, press once. The monitor will turn on with “NO PICTURE” displayed in the
monitor. The date and time can also be set when the camera is in the shooting mode.
• Press to display the top menu.
• Press to select MODE MENU.
• Press to select SETUP, and then press .
• Press to select , and then press .
• Use to select the date format.
• Adjust the date and time in the appropriate fields by using to select the field, and to set the proper value.
Repeat this step until all date/time fields have been set.
Note: Time is entered using the 24-hour format.
• Press twice to set the date and time and exit the menu.
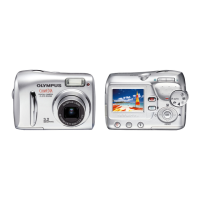
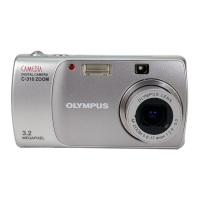
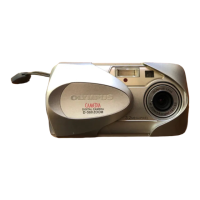
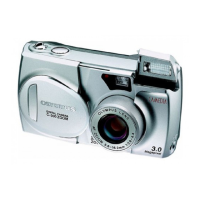
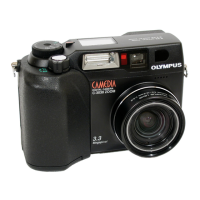
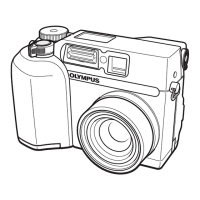
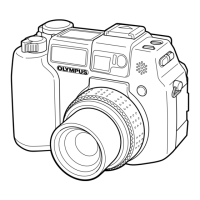
c. Camera Diagram and Controls
Now take a moment to familiarize yourself with the key areas of camera controls by reviewing the illustrations.
Power on
Power off
TIP
A/V OUT (MONO) jack
Self-timer control lamp
Flash
DC-IN jack
DC-IN jack
cover
Lens barrier
Lens
USB connector
Card cover
Strap eyelet
Battery compartment
cover
Connector cover
Microphone
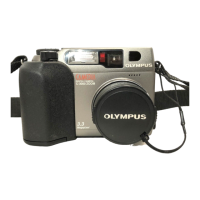
UNPACKING THE BOX CONTENTS
Gather your Digital camera and the parts as shown in the illustration. You’ll need these to complete the steps for the camera
set-up procedures that follow. The items, such as batteries, supplied with the camera may differ depending on the area you
purchase the product.
START HERE
It is strongly recommended that you follow these step-by-step
numbered instructions to set up and quickly begin using your
new Digital camera.
OLYMPUS AMERICA INC.
Two Corporate Center Drive, Melville,
NY 11747-3157, U.S.A.
http://www.olympusamerica.com/support
For more detailed instructions on advanced features, please refer to
the printed Basic Manual included in your package, or the Reference
Manual on the CD-ROM.
Camera Settings in Shooting Mode as shown in Monitor
Camera Settings in Playback Mode as shown in Monitor
Note: Depending on the camera settings, not all indicators will be displayed.
Tripod socket
Viewfinder
Green lamp
Orange lamp
Playback button
(QUICK VIEW )
Monitor
OK/Menu button
Shutter button Zoom lever
Arrow pad ( )
Macro button
Self-timer button
Flash mode buttonShooting mode button
Battery check
Green lamp
Flash stand-by
Flash mode
Macro mode
Memory gauge
Shooting mode
Exposure compensation
Self-timer
White balance
Metering
Record mode
Number of storable
still pictures
AF target mark
Sequential shooting
Resolution
Sound record
Battery check
Print reservation
Number of prints
Protect
Record mode
Resolution
Exposure compensation
White balance
Date and time
File number
(still picture)
Sound record
Olympus Europa GmbH
Wendenstrasse 14-18,
20097 Hamburg, Germany
http://www.olympus-europa.com
The following items are also included in the Digital camera package: Basic Manual, AV cable, warranty card, registration card (not provided
in some areas), and safety precautions booklet.
Digital camera Strap AA (R6) alkaline batteries (2) CAMEDIA Master
CD-ROM
USB cable (gray color) xD-Picture Card
http://www.olympus.com/
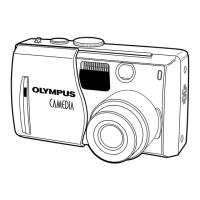
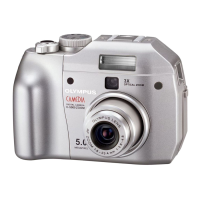
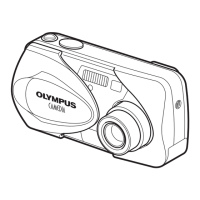
D-575ZOOM / C-360ZOOM / X-350
1AG6P1P1978-- VT747201
Printed in Japan
qsge_pquick.fm 1 ページ 2003年12月15日 月曜日 午前10時37分