EasyManua.ls Logo

Olympus DIEGO ELITE User Manual

Olympus DIEGO ELITE
3 pages
To Next Page IconTo Next Page
Page #1 background imageLoading...
Page #1 background image
SETUP AND OPERATION
QUICK-REFERENCE GUIDE
Setup: Ensure the console and the optional suction module
are properly assembled onto an IV pole before use.
NEW DIEGO ELITE SYSTEM. WITH A TWO-YEAR MANUFACTURER’S WARRANTY.
1
Power ON: When using
the Olympus suction
module (EGMDSM220V)
the suction is activated
using the console touch
screen.
2
Turn the
console ON
Turn
suction ON
Setup with suction module
Setup without suction module
1.8 m 1.3 m
Attach tube set: When using
the declog tube set, be sure to
preassemble the pressure bulb
and tubing prior to starting the
procedure. Slide either tube set onto
the back of the handpiece. Listen for
the “click.” Attach the blue suction
connection to the suction canister.
3
Two tube-set choices
Declog
Standard
Two surgeon-inspired ergonomics Multidebrider handpieces
Both Multidebrider handpieces meet the CSF requirements. They are compatible with automatic washer/disinfector machines as
described in the instructions for use (IFU) as well as with autoclave sterilization (see IFU).
Connect accessories: Connect the handpiece. Connect
the grounding pad (if using a monopolar blade). Connect the
foot switch (red dot to red dot).
5
Connect
the grounding
pad (if using a
monopolar blade)
Connect foot pedal (red dot
to red dot)
Connect
the hand-
piece
Attach a blade or burr: Press
the two release buttons on
the sides of the handpiece to
secure it in place. The type
of blade or burr chosen will
determine the default factory
settings shown on screen.
Press (+) or (–) to adjust.
4
Release buttons
on either side
6
Attach tubing to the suction source.

Other manuals for Olympus DIEGO ELITE

Question and Answer IconNeed help?

Do you have a question about the Olympus DIEGO ELITE and is the answer not in the manual?

Olympus DIEGO ELITE Specifications

General IconGeneral
BrandOlympus
ModelDIEGO ELITE
CategoryMedical Equipment
LanguageEnglish

Summary

Setup and Operation Instructions

Step 1: Setup

Ensure console and suction module are assembled onto an IV pole before use.

Step 2: Power On

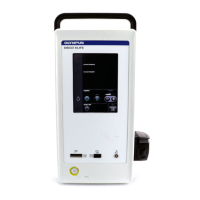
Activate suction using the console touch screen when using the Olympus suction module.

Step 3: Attach Tube Set

Preassemble pressure bulb and tubing, slide onto handpiece, and attach blue suction connection.

Step 4: Attach Blade or Burr

Press release buttons on sides of handpiece to secure blade/burr; adjust factory settings as needed.

Step 5: Connect Accessories

Connect handpiece, grounding pad (if applicable), and foot switch.

Step 6: Attach Tubing

Attach tubing to the suction source.

Step 7: Attach Irrigation

Center irrigation tubing sleeve, ensure length for IV bag, thread through keeper, hang fluid, spike bag, and prime.

Step 8: Ensure Communication

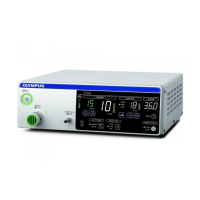
Connect communication cable, power cords to units and wall outlets.

Step 9: Activation

Foot pedal activates handpiece for cutting and drilling.

Step 10: 'Ready' Indicator

Confirms setup is complete, with visual indicators for cutting and RF active states.

Step 11: Clogging

Address tubing clogging with specific procedures for declog tube sets or standard stylets.

Step 12: Image Guidance Systems

Using IGS requires attaching a universal adapter to the declog tube set boss attachment point.

Step 13: End of Procedure

Turn off unit, disconnect accessories, remove blade and tubing, then clean/disinfect/sterilize handpiece per IFU.

System Chart

Related product manuals